
Tags
decomposed granite, decomposed granite path, installing a level path, landscaping, path, Ravenscourt Landscaping & Design LLC, skid tamper, steel edging
Looking for an inexpensive flat path? Decomposed Granite (DG) is a great, low-maintenance, and inexpensive material to use for paths. The easiest method of installation is simply layering DG where you want it and begin using the space. The problem with this method is your path may sink, shift, or quickly dissipate.

Our client had plenty of green space, but found the use of it awkward. This bed bisected their usable space and walking through the lawn left their shoes sodden. We first mark the space with spray paint. This notes the edge for us as well as allows the client to understand exactly what parameters we imagine. When stripping/removing great amounts of sod I highly recommend using a sod stripper. It will save your back and make sod-removal a much easier chore than removal by hand/shovel.

Set the machine to cut as shallowly as possible to remove the sod and roots but not churn up/disturb the soil beneath.
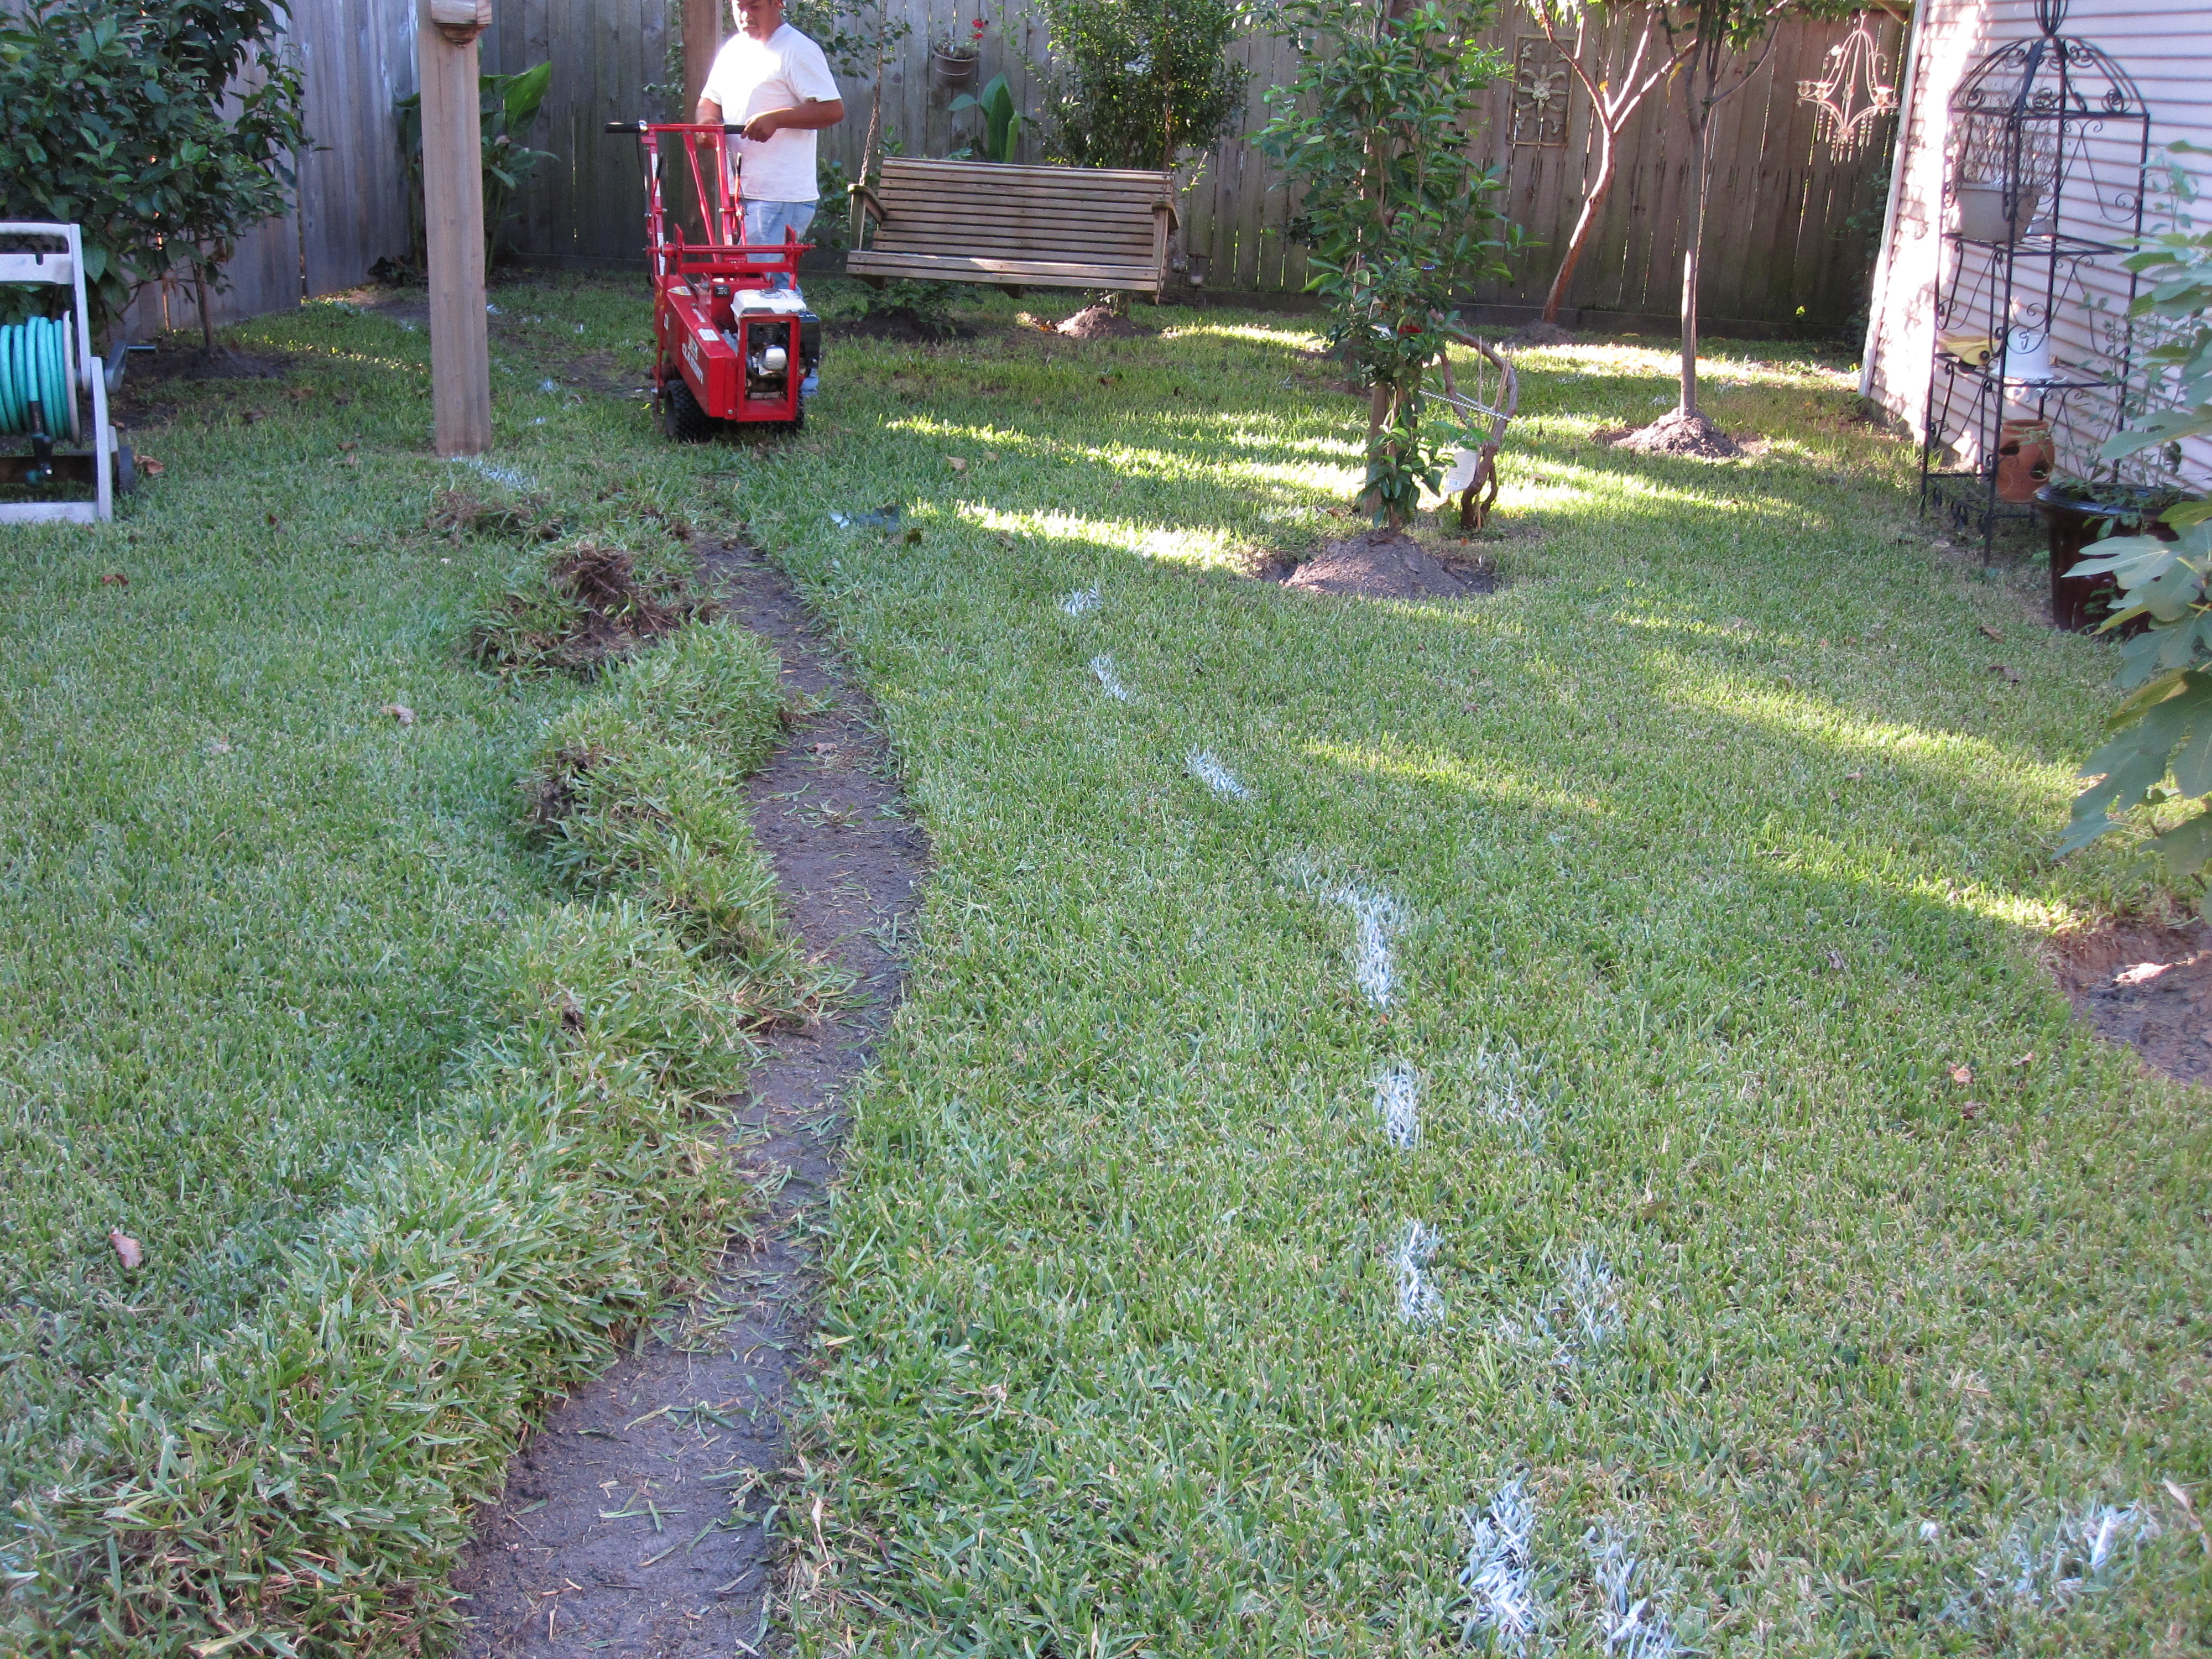
Once all of the sod is stripped, and hence the edges defined, excavate the area to allow the base layer to be installed. Sometimes you can use the excavated soil on the same site to fill in low spots on the property or it can be raked into the neighboring lawn.

We often use crushed concrete as our base layers. It is an inexpensive material that transports and installs easily, and can be compacted very well.
Install your base material in thin layers, making sure to wet each layer before you compact it.

After the base layer is prepared, we begin installing our edging. While not strictly necessary it helps keep the area low-maintenance. Hitting the DG with a line trimmer (‘weed eater’) can produce flying bits that can find and shatter nearby windows. Also, edging keeps the perimeter neat and in place for years to come.
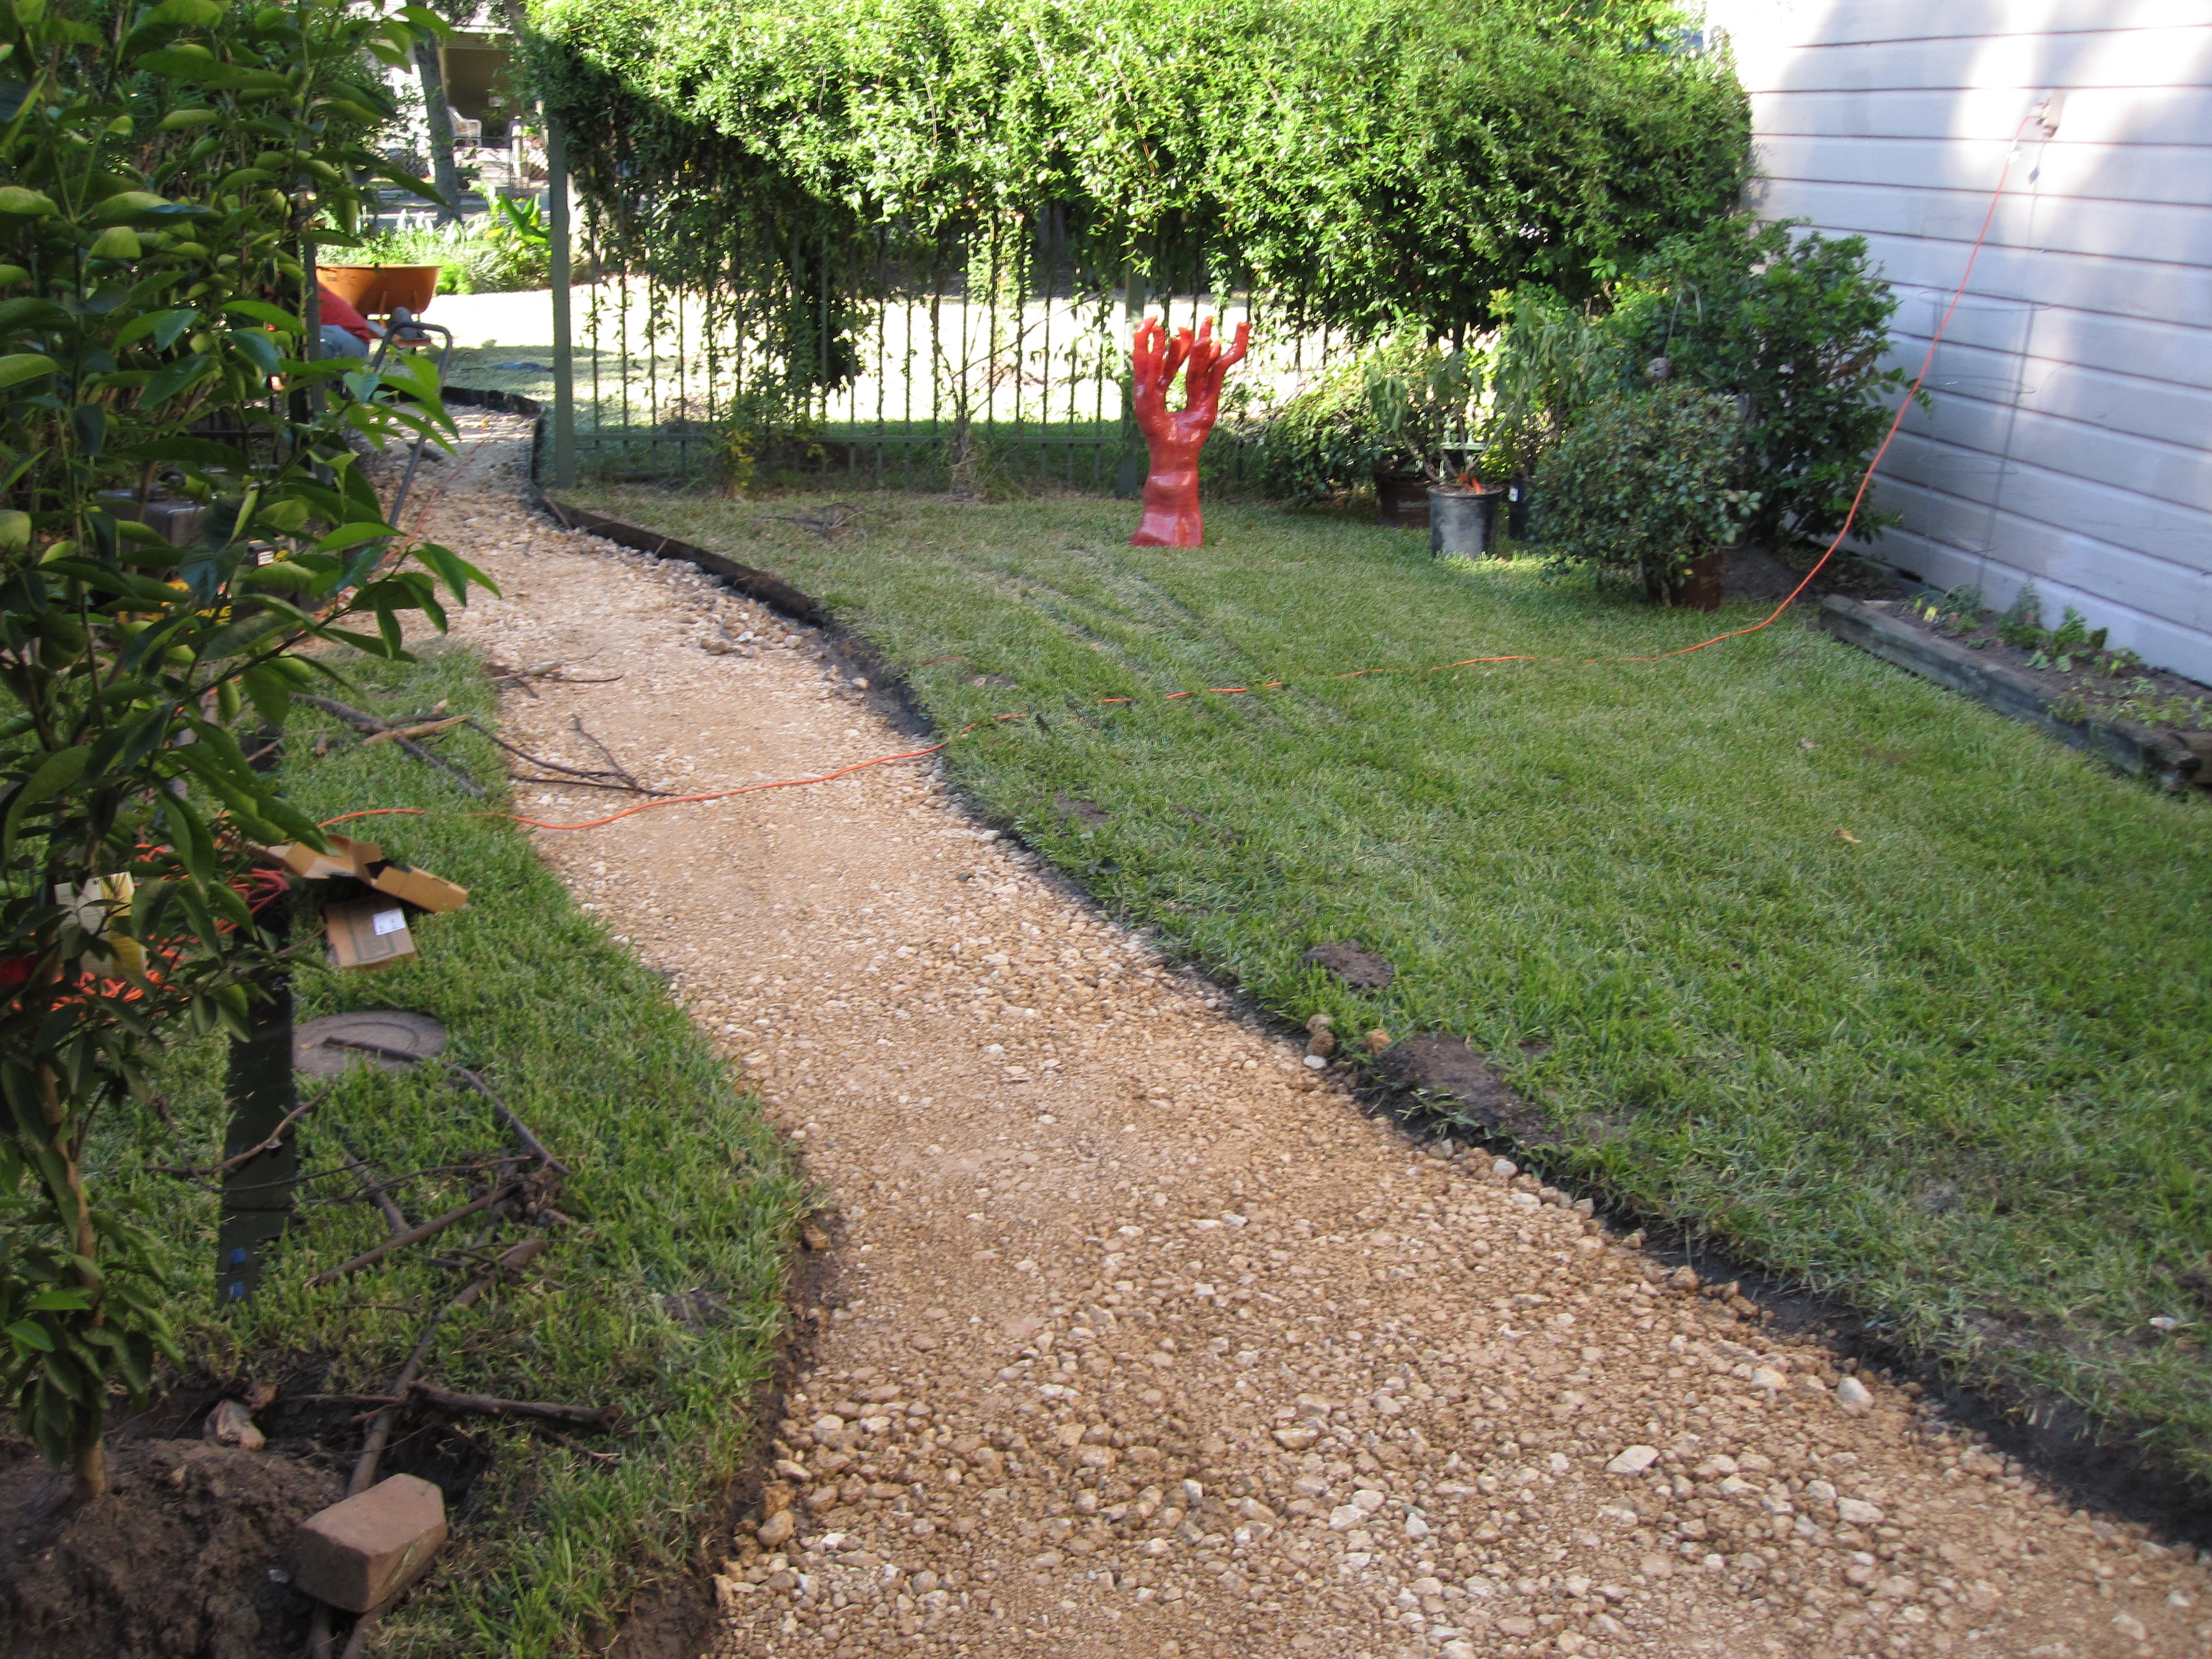
Above you see the DG installed but uncompacted; functional but a bit too rough for this project.
Below you notice how smooth the path becomes once compacted. Wetting down each layer as you go helps you get greater compaction.
Remember to install your material in thin layers and to compact the dampened materials well to create a uniform and long-lasting path.

Be sure to select a compactor that is narrow enough to fit in your project. A wider machine will cover more area faster, but becomes burdensome when you try to turn it around. You may create small divots when you pivot the compactor; these are expected and do not undermine the finished product. With practice you can learn to turn the machine without causing much disturbance.

By shortening the bed beside the driveway we created a usable, and easily accessible, path.


Once we finished the client wanted a slightly roughed look. We ran a leaf rake over the top to loosen up the top layer

There is little maintenance needed for a well-installed DG path. Weeds do not find the material very hospitable, and refreshing the path is as simple as adding additional layers of material and compacting them down.

Thanks for the informative post! The path looks great and I’m sure your client will enjoy it for years to come.
LikeLike
Thank you Peter : )
LikeLike
A well designed and made path. I do find that the disadvantage of decomposed granite is tracking when wet. We have moved to using the larger grade. Not so friendly to weeds and too big to stick to your shoes. Of course it has its disadvantages too if made too deep.
LikeLike
Thank you Jenny! We do warn people about the tracking especially if they have wood floors. We also do gravel paths with all different kinds of gravel. They are good at 3 to four inches to help keep the weeds from rooting in but they will get weeds. For that we recommend pulling or a vinegar solution on a sunny day.
LikeLike
I always liked your blog and the great ideas here, but somehow I lost it. I am so glad to find it again.
LikeLiked by 1 person
I don’t post as much as I should. Especially since our newest granddaughter was born and I hang out with her once a week while her parents work.
LikeLiked by 1 person
You should see my collection–grandbabies that is. We have 19 grands now and two great grandchildren with one more on the way. I won’t bore you with all this talk.
LikeLiked by 1 person
Newcomer here. Looking to do that as a dog run so I appreciate your blog here. Looks great. Would you recommend a weed blocker somewhere in the install? Then again digging 6″ pretty much gets the roots out I’d imagine.
Thanks.
LikeLiked by 1 person
Hello Brandon, welcome. We do not use weed blocker. Most weed seed comes on the wind or from birds. The week blocker doesn’t really help. The real issue we have with it is it deteriorates and shreds over time. Weeds don’t really like growing in DG. Best thing to do when you get them is pull by hand. If you must spray use a vinegar solution not a chemical spray that might harm your dogs. DG is also easy to refresh. You just add a layer and compact it.
LikeLike
Great post. Do you have any recommendations on best surfaces for a driveway, about about 150 yards, it leads to a parking area covered in hampton crush.
LikeLike
I suggest you hire a local designer that knows your area, weather and material sources. It is best to plan and work with an experienced. person.
LikeLike