
Tags
brick ties, constructing, fire brick, fire ring, hardscape, Ravenscourt Landscaping & Design LLC, stone facade
We like to make sure our clients get out and enjoy their garden spaces. We can add little patios out in the garden, pergolas with fans, water features to drown out all the a/c units in the hot months or something very interactive like a fire-pit or fire-ring. In our last installation we added a fire-pit on the edge of a water permeable flagstone patio.

In setting up a fire pit a few items need to be determined first. Placement: Sometimes it is best to use a mobile pit until you are sure of placement; once the blocks are set they are not easily shifted. Size: The pit in this project is six feet from outer edge to outer edge and about eighteen inches high (which is a comfortable seating high). The pit needs to be big enough for whatever purpose you intend. Materials: we finished the outside with natural chopped stone and used the same flagstone for the coping that we used for the patio. Be sure to select materials that will safely achieve your goal.
Once you are sure of size and placement ready the ground by stripping out the surrounding vegetation and leveling the soil. The first tier of blocks are installed on a bed of mortar. We prefer mortar over concrete as it is easier to level the blocks in. We space the blocks using a string tied to a stake in the center of the area. Each corner of the block will be equidistant from the center.

The first tier is installed. Each block is settled into the mortar and we make sure the entire structure is level.
During construction we found that the third tier (seen below) made the fire pit too high for the clients and subsequently removed this level. Make sure to check the level of each block as it is installed. Additionally, you want to check the overall level across the structure. Most blocks are close enough to square to make leveling an easy task.
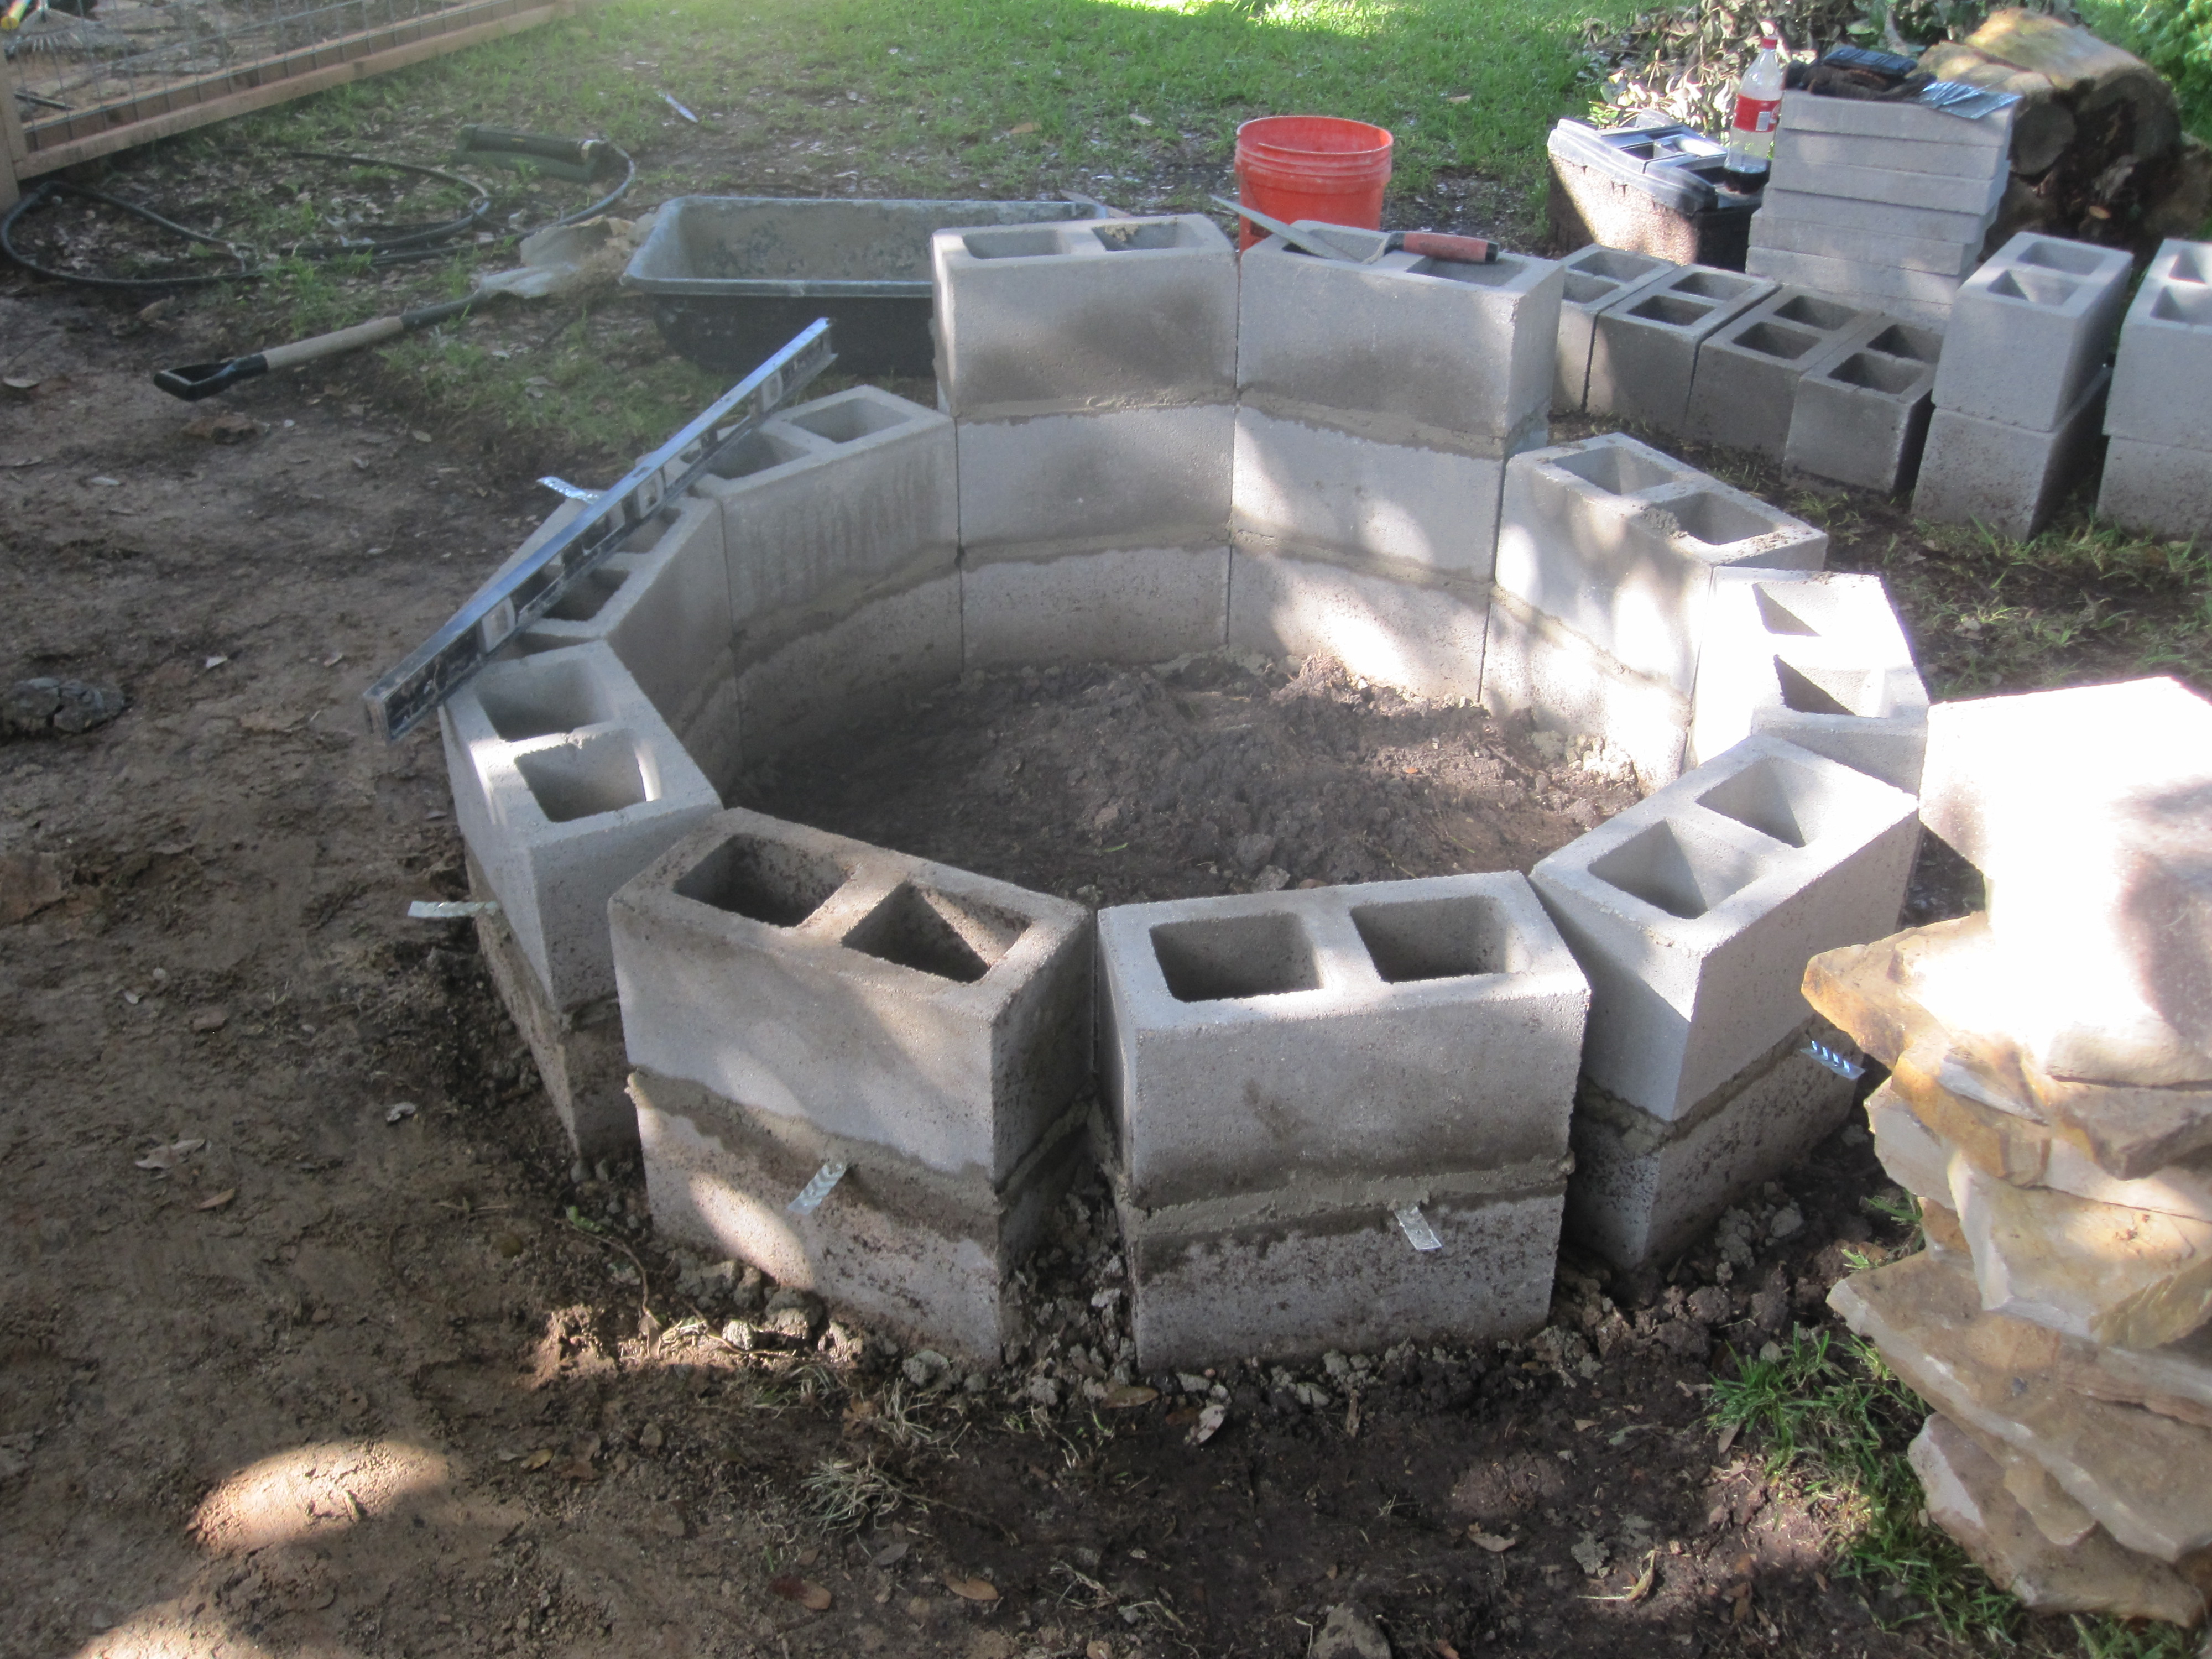
We use brick-ties between the levels to aid us in tying the facade material into the structure.
The brick ties need to come out far enough to allow our chopped stone to overlap them.

Brick ties
Once the cinder blocks are installed (and allowed to cure for at least 24-hours) we begin our chopped stone facade. Because we are using a straight product in a curve we chose shorter pieces of stone. This creates a more even curve.
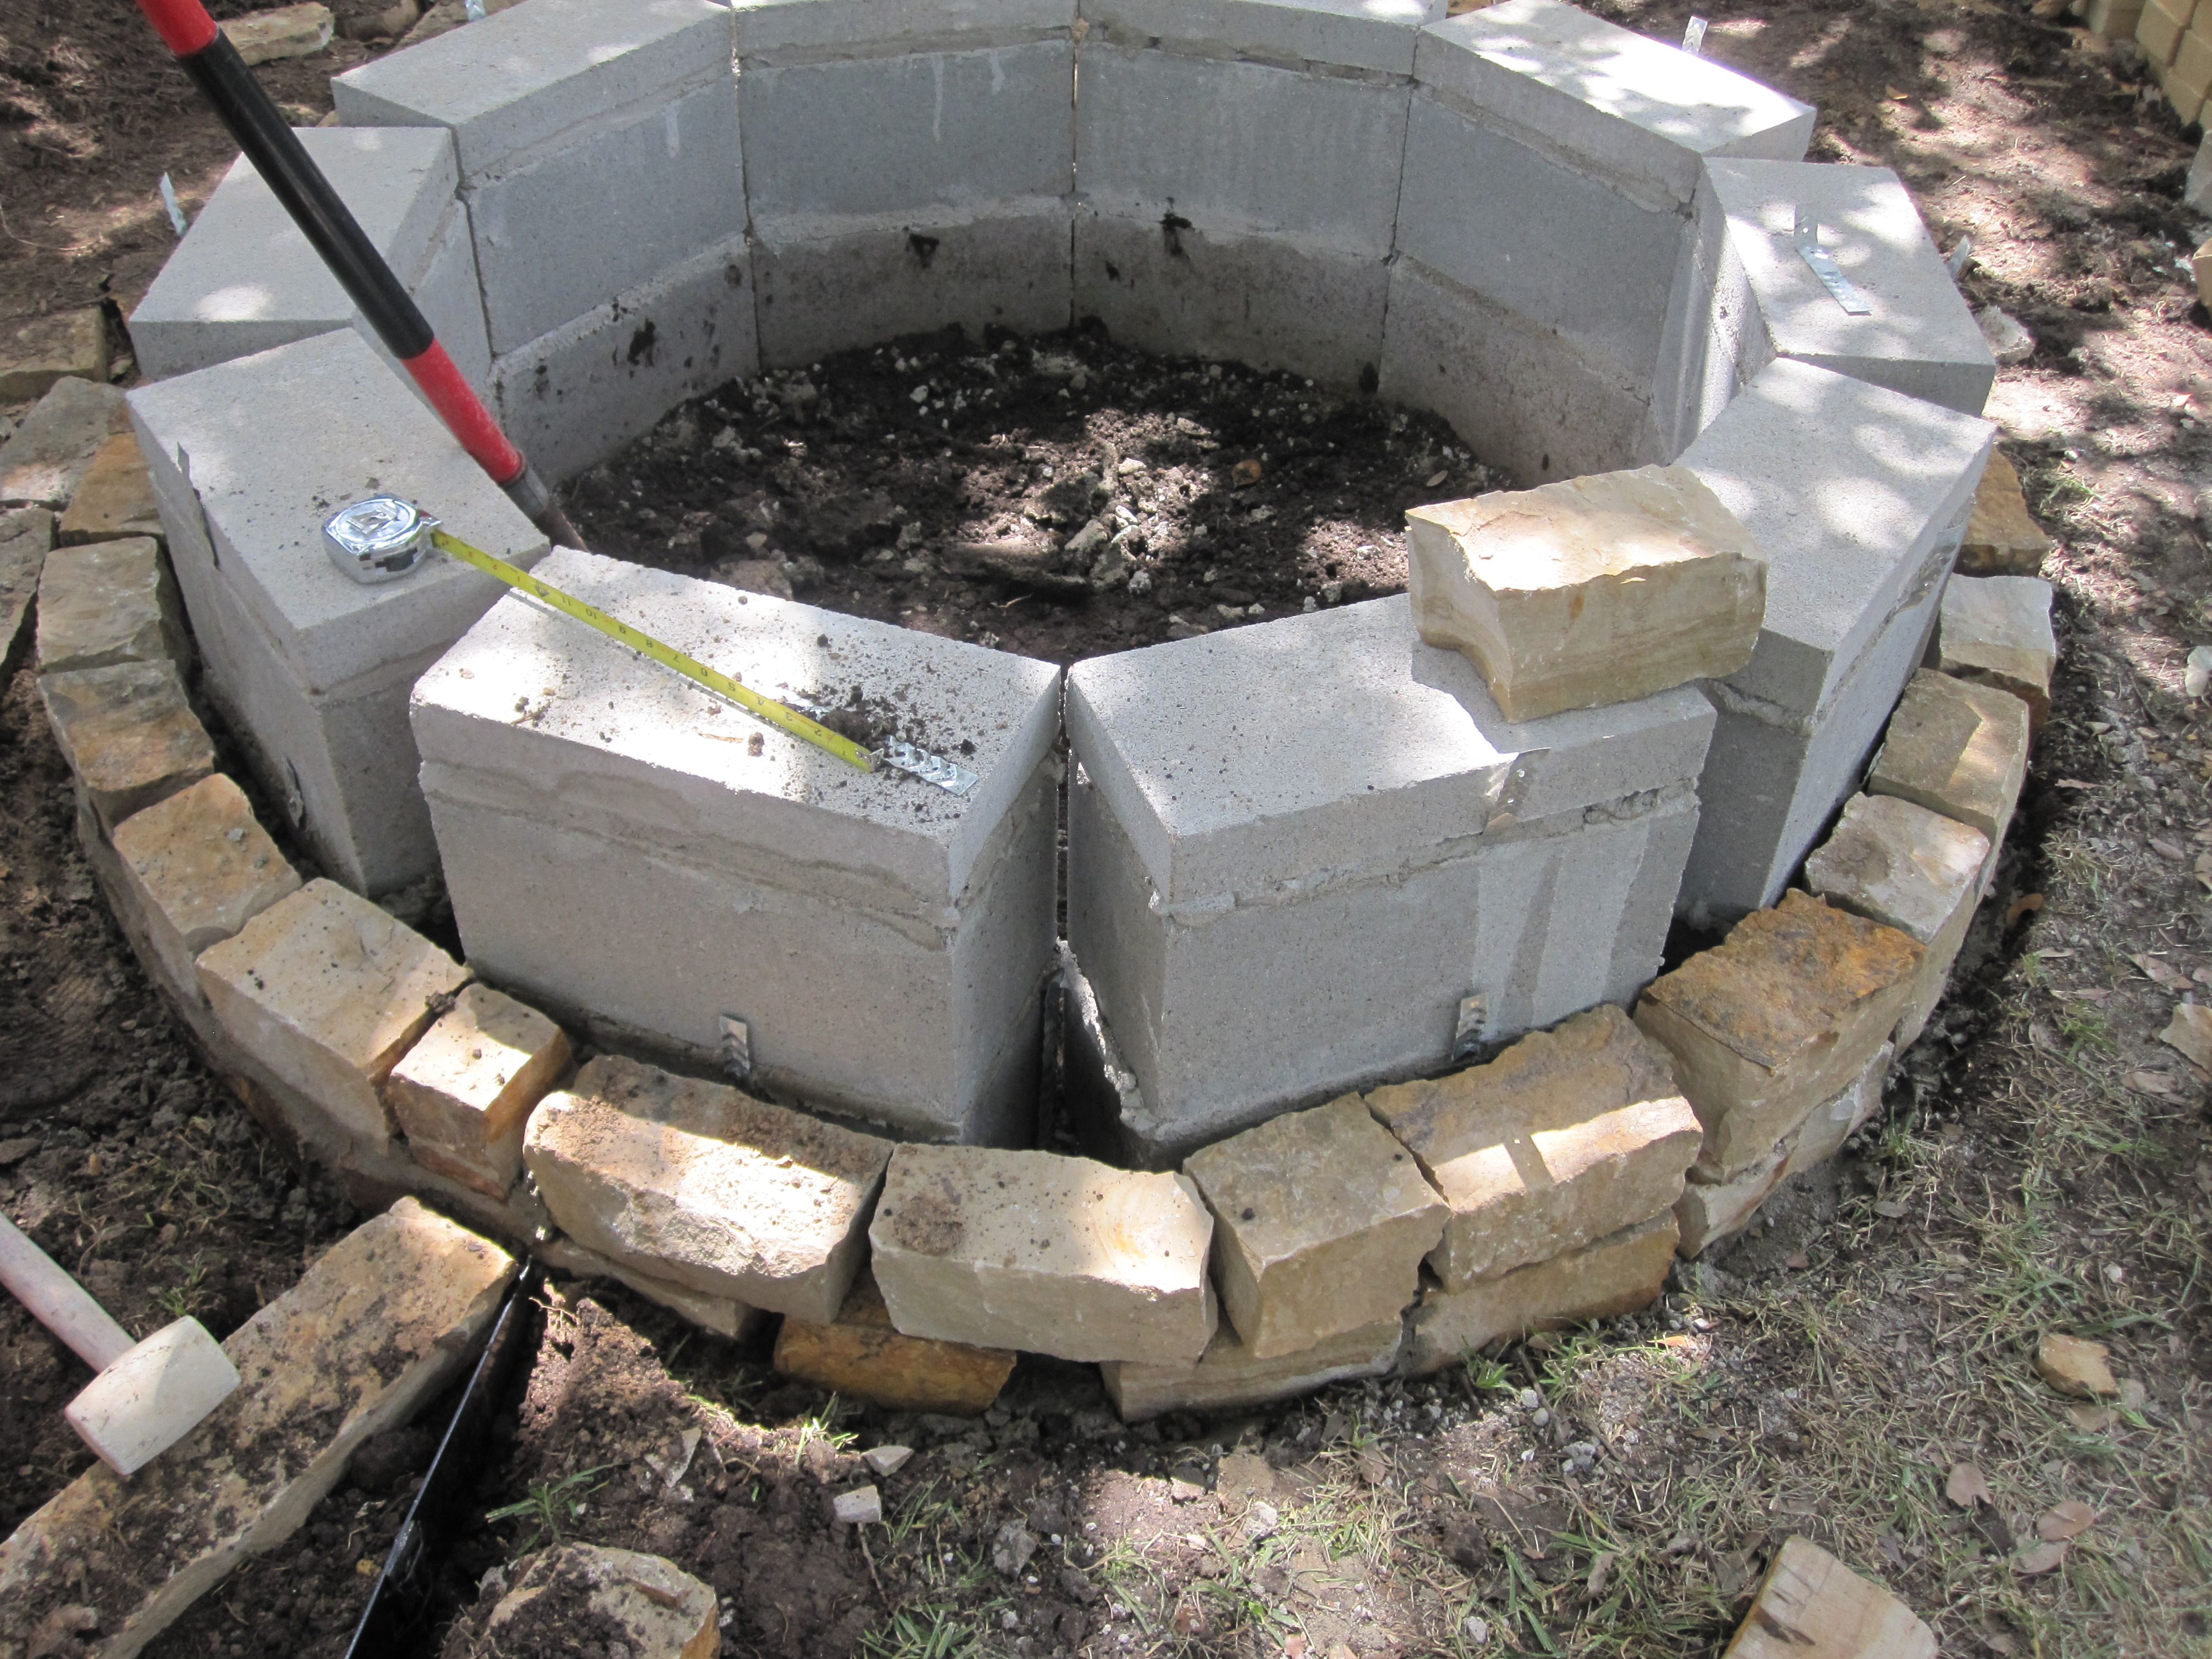
We use the cap stone on top of the cinder blocks to close off the holes (in which we have re-bar) and give us a surface to mount our coping to.
Fire needs three things to function. Fuel, Oxygen and Heat. The client will provide the wood and the spark, we just need to make sure that they have the oxygen. At the bottom of our rings we leave gaps for the air to flow in to feed the fire.
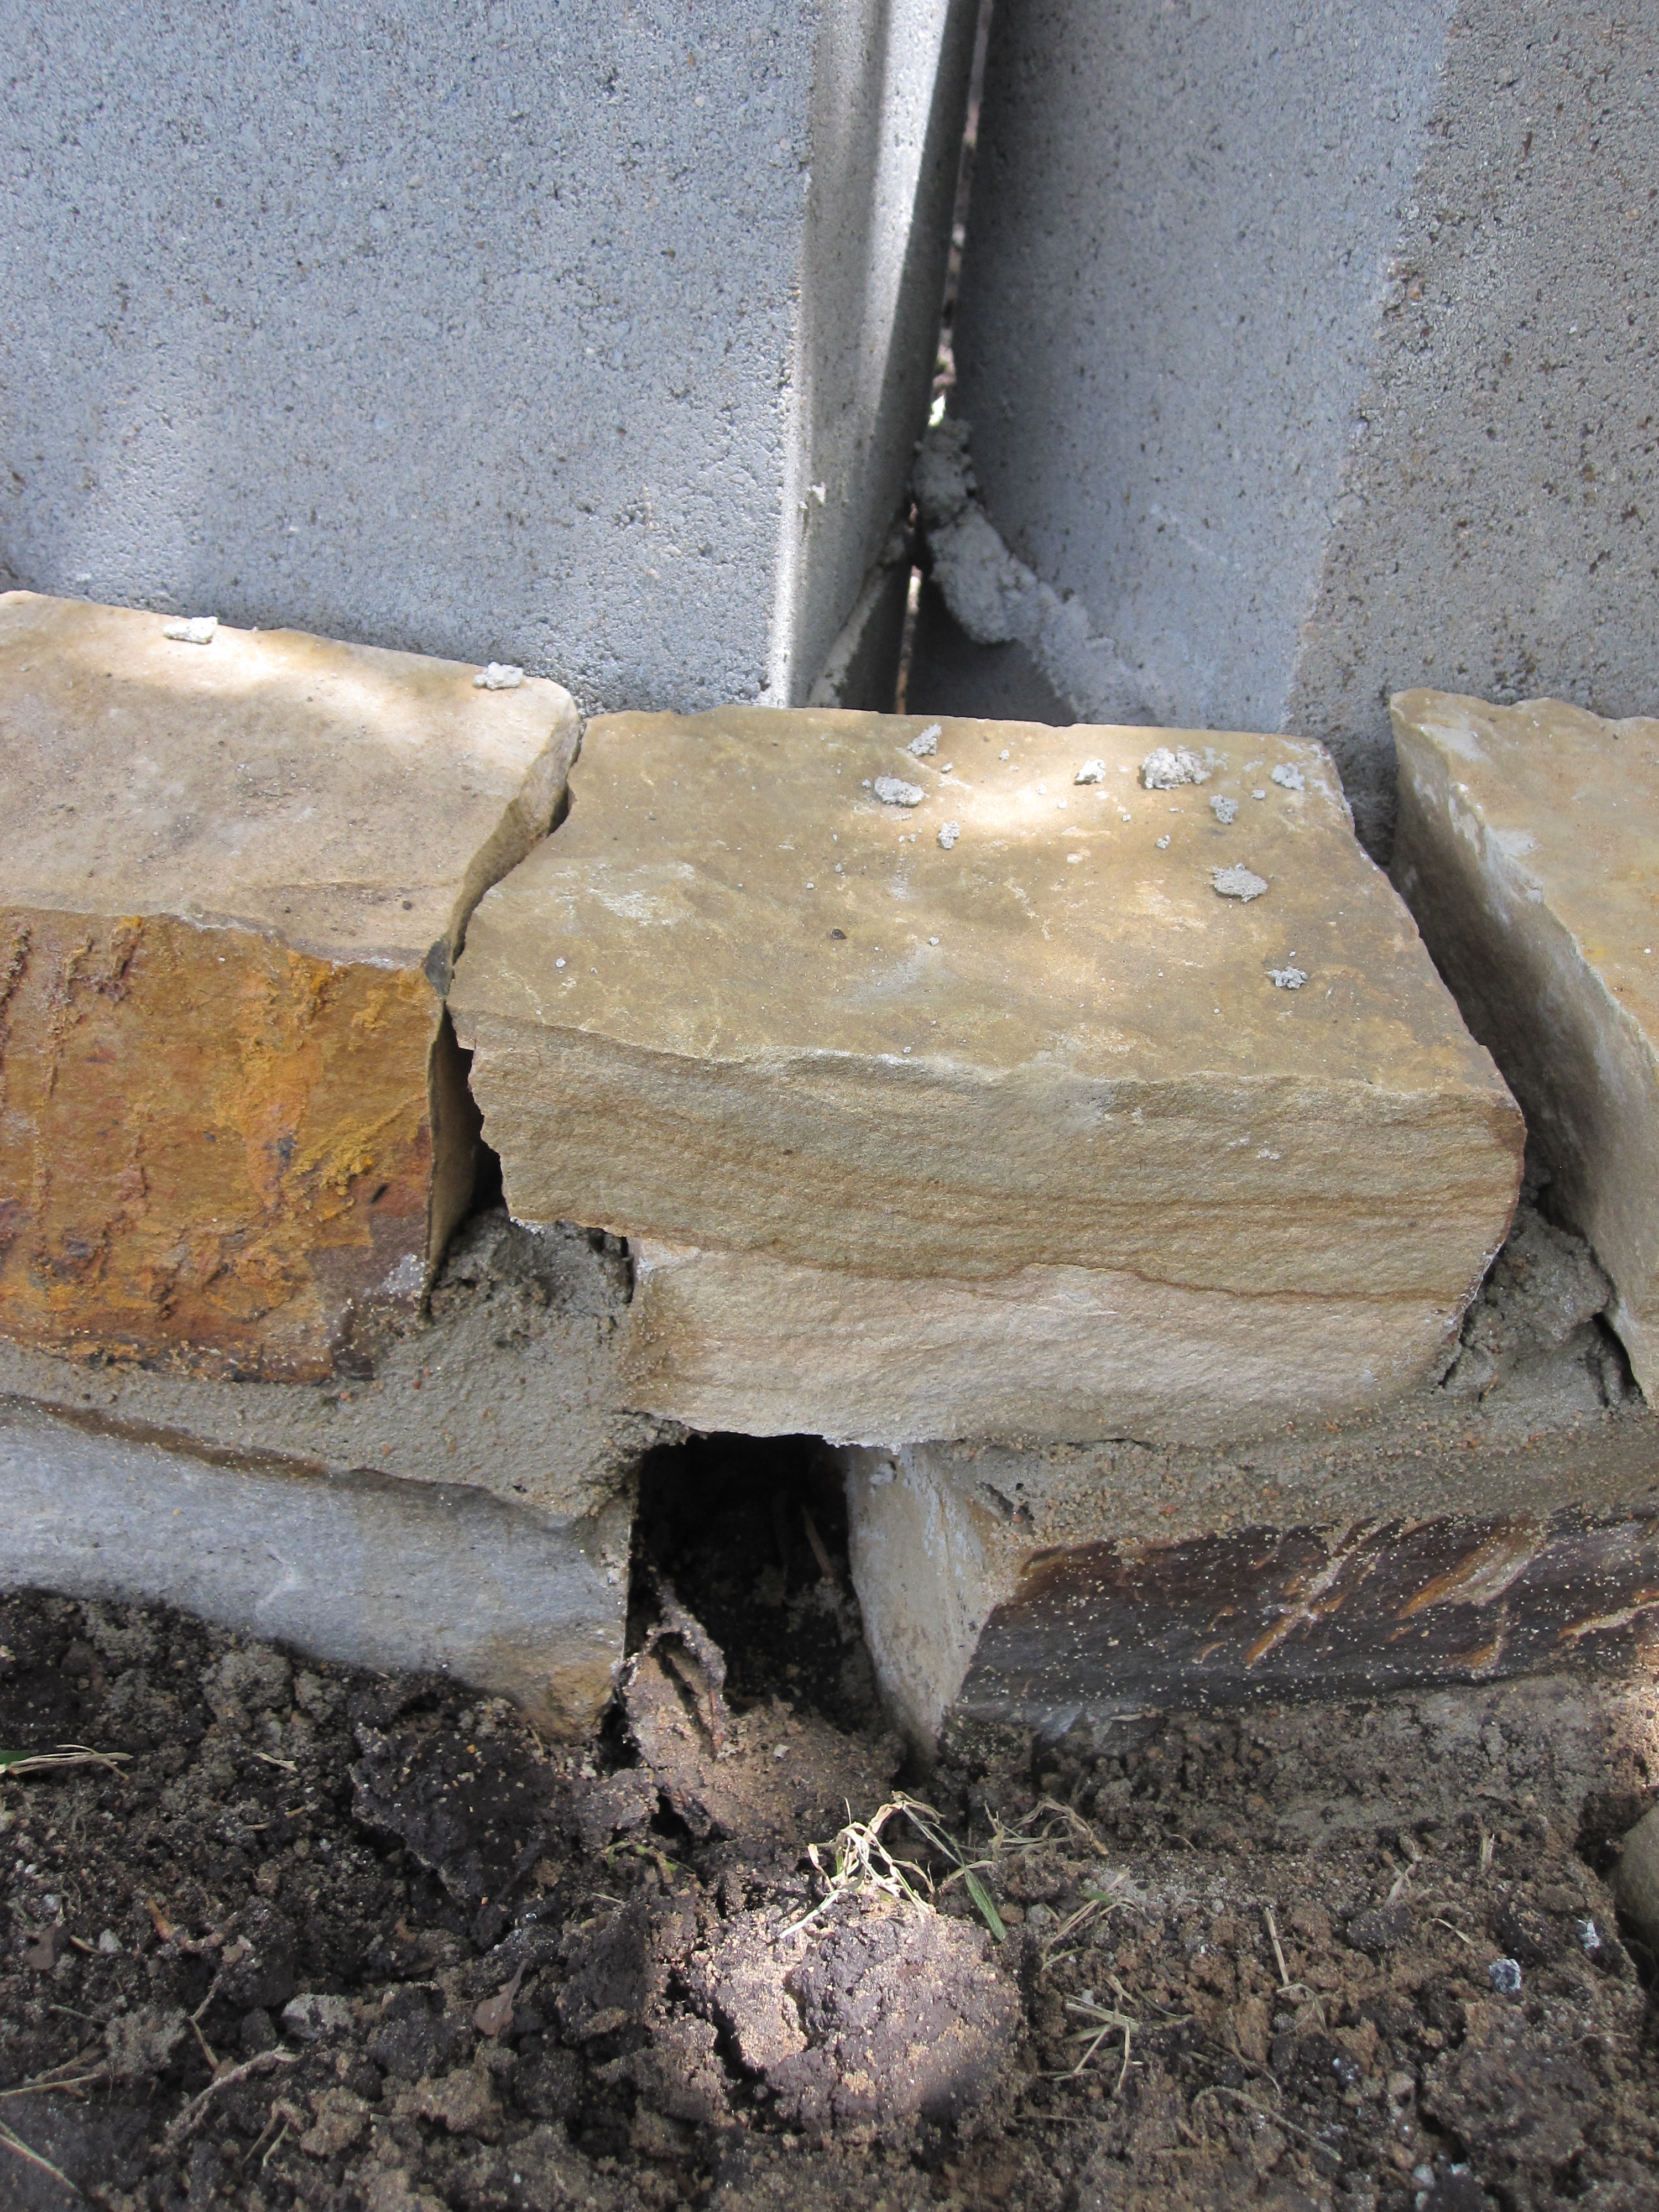
This lower gap is used to let air in and any rainwater out
We only set two tiers of stone per day to allow the mortar to cure. Working too quickly would risk undermining the masonry. Note that this uppermost level finishes flush with the cap blocks.

Now to straighten out the brick ties and mortar the last tier.
It is important to note that cinder blocks may not hold up to direct flame very well. This is why we line our fire rings with fire bricks. They are specialty bricks often used in chimneys and work quite well for this project. We notch two on the bottom tier that correspond with our air gaps. Note that these bricks ought to be installed with specially designed mortar (fire clay) that will allow the bricks to function as intended.

We have also begun laying out the coping stones for fit.
We prefer to let a little of the coping flagstone to overlap the outer edge as well as the inner edge of the ring. The outer detail provides a nice finish. The inside overlap covers the tops of the fire bricks.

The chopped stone appears chalky because we have yet to acid-wash the facade
The fire pit, when completed, is about six feet across. The eighteen inch coping brings the proportions into a pleasing scale. Acid-washing the flagstone has allowed the natural colors to shine through.

And here is the pit, acid-washed, and surrounded by lawn and flagstone patio

We are looking forward to hearing about the family’s first fire!
-This post was contributed by Shawn Michael
If you need more information please comment and I will get back to you!

You make it look so easy! I have a feeling if I tried this, it wouldn’t turn out quite so beautiful. Thanks for the great how-to, maybe one of these days.
LikeLike
It just might take a little longer because you haven’t done it before but it is pretty straight forward! Love to see a picture : )
LikeLike
Gorgeous! I always wanted one of these in my former garden, and made due with a chimenera. Your design is so well thought out!
LikeLike
We actually have a little pottery fire vessel ourselves, no room for a fire ring. What i love is that this family has teenage sons that love camping and can will enjoy their back garden around the fire!
LikeLike
A wonderful spot for a family with teenagers to gather and spend time together. 😉
LikeLike