
Tags
cedar pergola, ceramic fountains, cinder block raised bed, Creeping Jenny, Possumhaw Holly, Ravenscourt Landscaping & Design LLC
We actually finished this project in July. It was pretty stifling in this tiny space, a box of a yard, with no airflow and no shade after mid-day. That is the down side of working outdoors year round. We will start with the before shots.  Not bad but a bit tired and overgrown. The couple had just remodeled the back family area of the house and wanted to be able to flow out into their courtyard space. This is a townhome and this is the only private outdoor area. It faces south and they really needed more shade. I had hoped to keep the Mimosa tree in the far corner but they felt it was too leggy and were tired of it. We suggested adding a small tree in its place. One of my favorites small trees is Possumhaw holly, Ilex decidua. We used a 30 gallon Paco’s Red Possumahaw holly. Another issue was that over the years different owners had built up the level of the soil in the space. Below you can see what good intentions did. The raised level also pushed water into the house and warped the floors.
 Here is the view out to the side alley. We needed to bring the soil level down about five inches.
It gets worse before it gets better. Whoever installed the flagstone patio loved concrete. In some places the concrete was up to eight inches thick. Even after we took out all of the flagstone, and most of the concrete, you can see how high the soil was
Lots of removal of debris and soil. We made three trips to the dump. For those of you keeping track at home, that is nine cubic yards of material. Better yet, over seventy wheel-barrows-full. Because the loads were so heavy (with the concrete) we had to take smaller volumes each trip. Even in this photo, with the soil smoothed, there was more soil to be removed so that we would be sure to keep below the seal of the doors.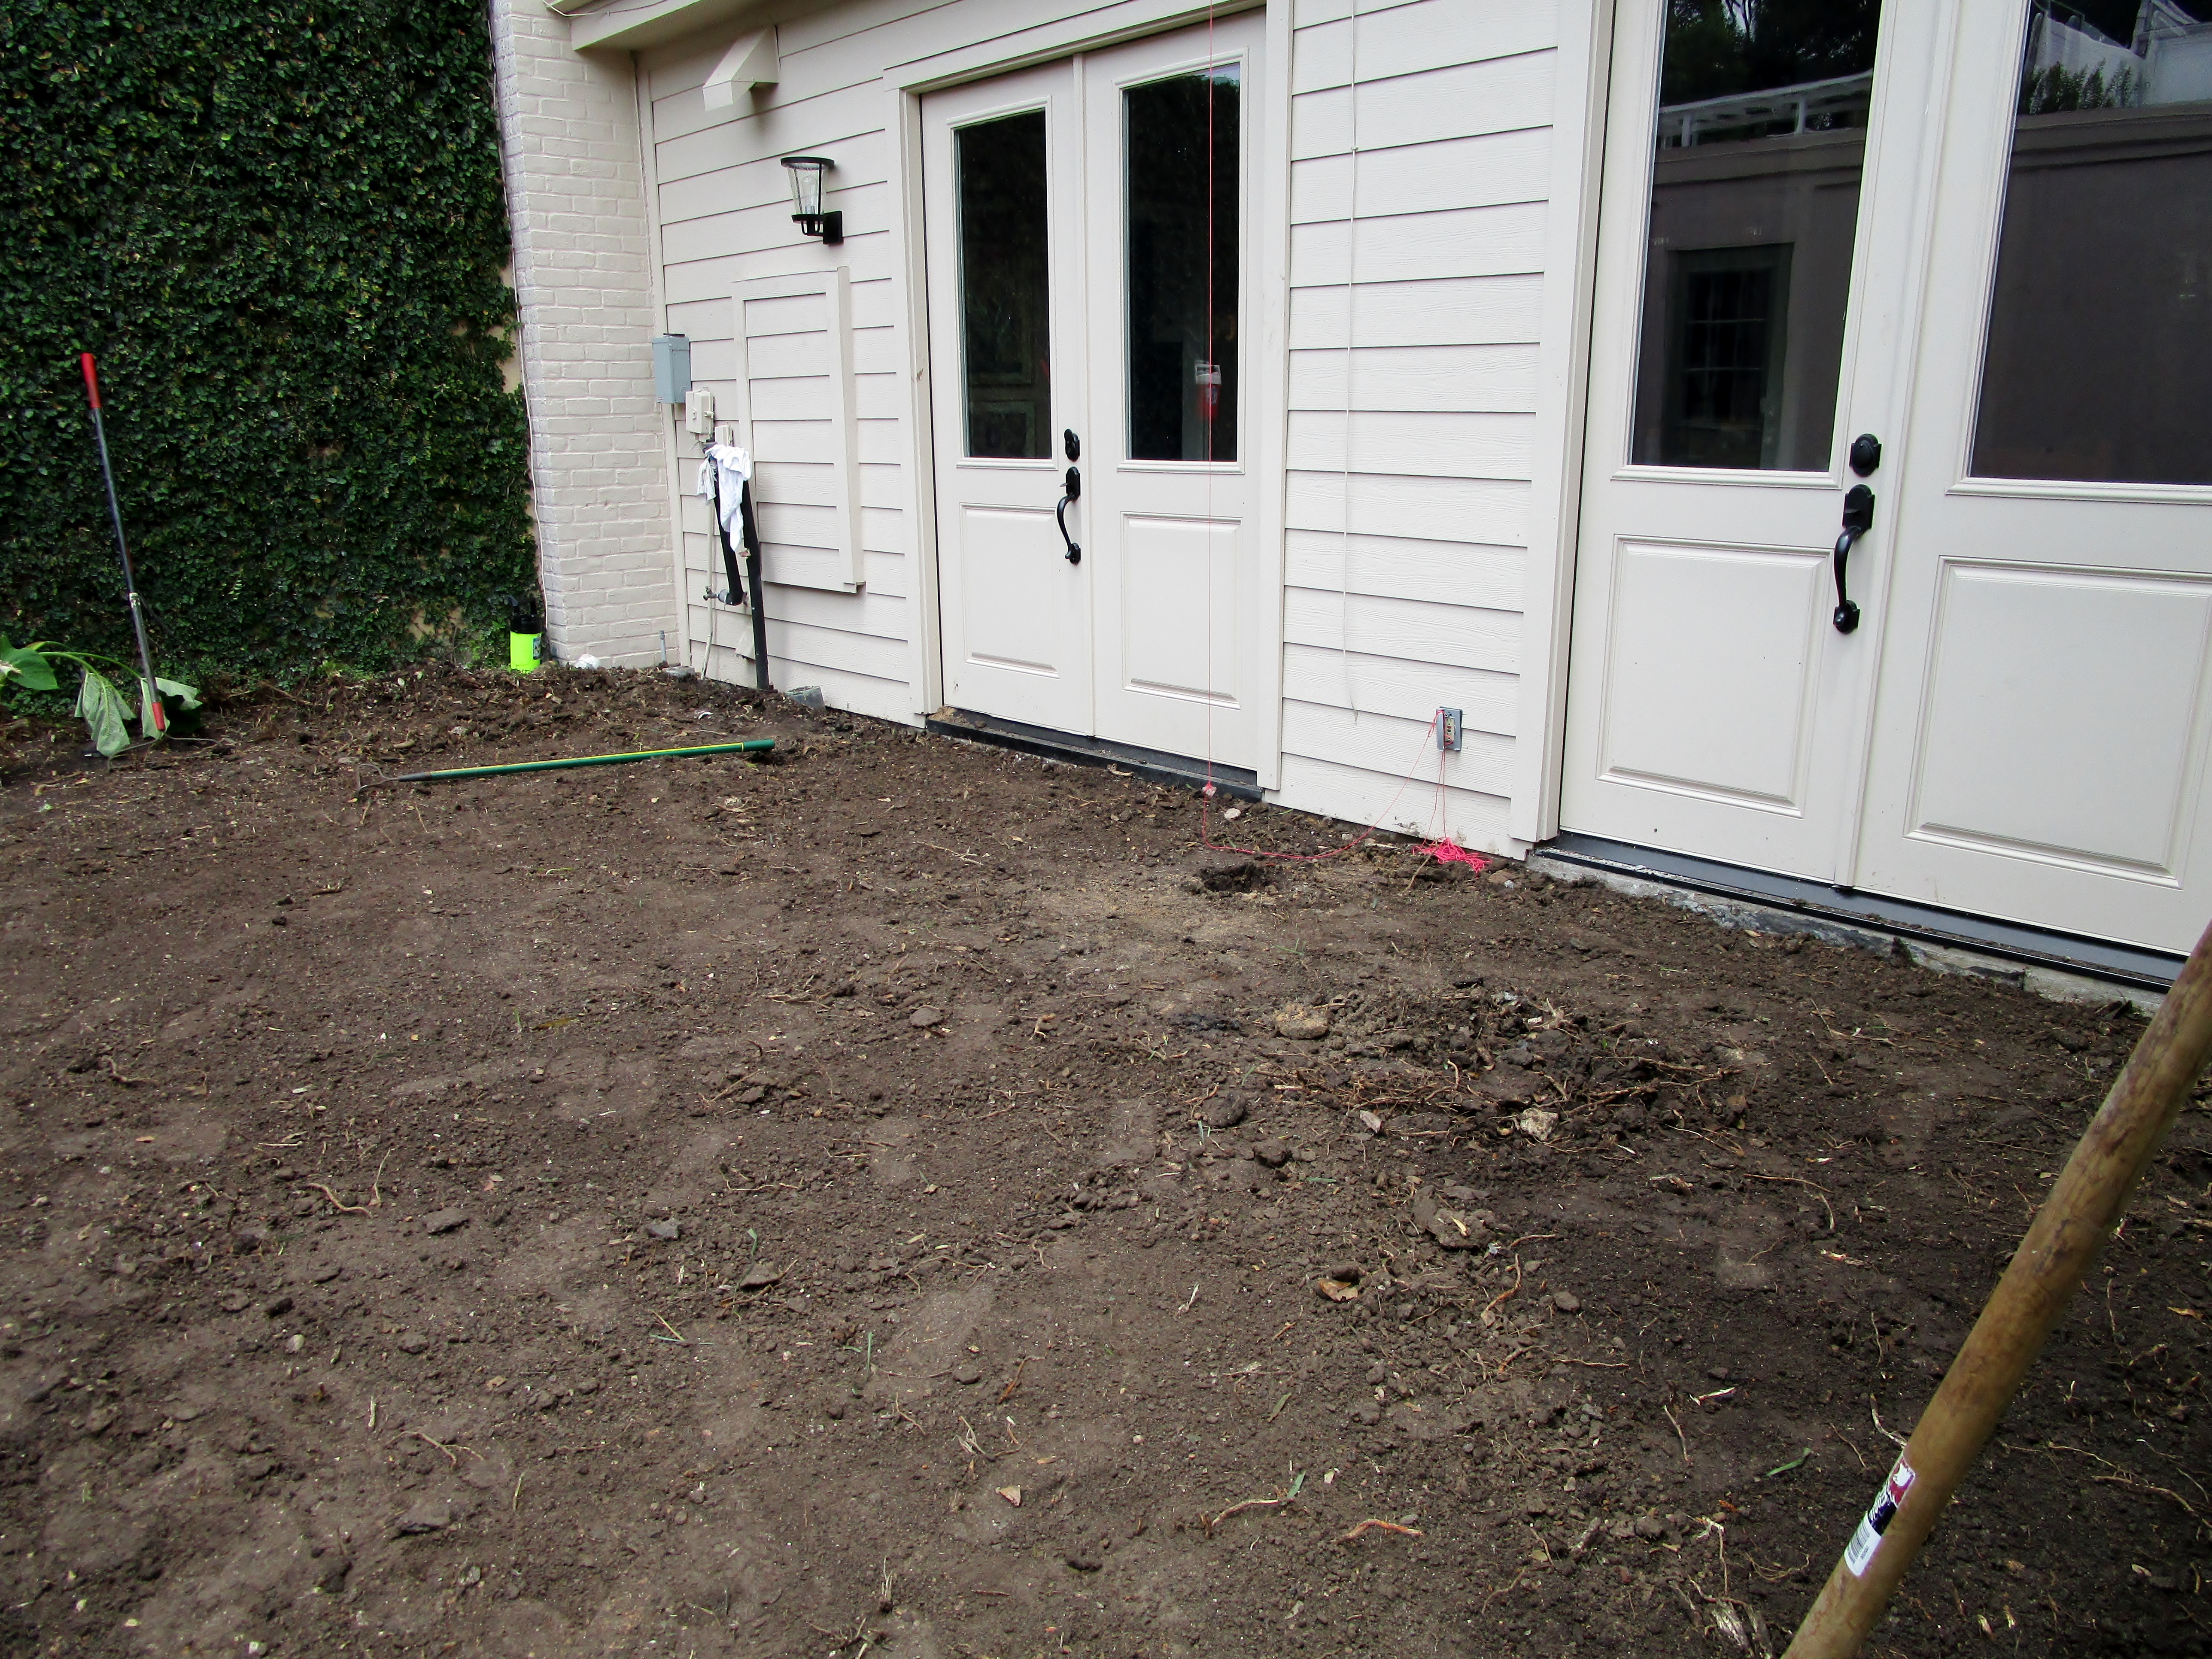
Finally a clean slate!
Once we had the site cleared, and accessible to work in, we began setting our posts. Note the black at the bottom of the posts. We use roofing mastic (“tar”) to seal the wood away from the moisture in the ground. The one down-side of using cedar is that it does not tolerate ground contact well. Our work-around is to seal off the ground contact! We also prefer to mix our concrete in the holes as opposed to having it pre-mixed and shoveling in the slurry. Dry concrete is much easier to clean off of the wood than wet. A little water, a slight wiping, and its done. Slinging wet concrete around, especially in tight places, can make a mess. We had already taken the strings off of this set of posts as you can see it laying on the ground. While my eyes are well trained at picking out details/errors I do not rely on it for installations. Strings are a great way to lay out a project. The clients wanted more privacy from the house next door along with shade to keep the back of their home cooler. There are two sets of doors leading to the courtyard so we had to use a middle post to traverse the long space and work around the doors. Here we have the tie-beams installed (bolted through the posts) and the joists going up. Because the beams were so close to the house (and at the height of the roof) we did not have enough room to install lag screw. Drilling through the post, for long bolts, is a little tense for me as we only have one chance to do it right.
 Once the supporting pieces are all in place we make sure all of our hangers are screwed in. If you have read one of our construction posts before you know I am a big fan of joist hangers and hurricane ties. Earlier this year one of our pergolas was hit by a falling tree, only lost two structural boards, and kept the tree from hitting the roof of the house. I no longer concern myself that I may be over-engineering our over-head structures. On the top layer we used 2×2 and spaced them 2″ apart. When there is regular spacing it can be helpful to use a jig. In this case we used two pieces of the same 2×2 material to keep the spacing even. While we have not installed blocking for outdoor (overhead) fans to this pergola, if the client decides they want them we will build out the support for them.
You can see how the bolts are just next to the gutters. The client asked to have the pergola as close to the house as possible while still allowing for maintenance. I could have gotten, maybe, a quarter of an inch closer.
You can see how well it blocks the light………and in the corner you can see the newly planted Possumhaw holly. They have nice dense green foliage spring through fall but in the late fall they drop their leaves and are covered in red berries. It is quite a striking site. We picked this one for its height and the plan is to trim/train it into a tree form. A normal height is between 15 to 20 feet. And being deciduous means in the winter, when the warmth of the sun is more welcome, it will not block the light.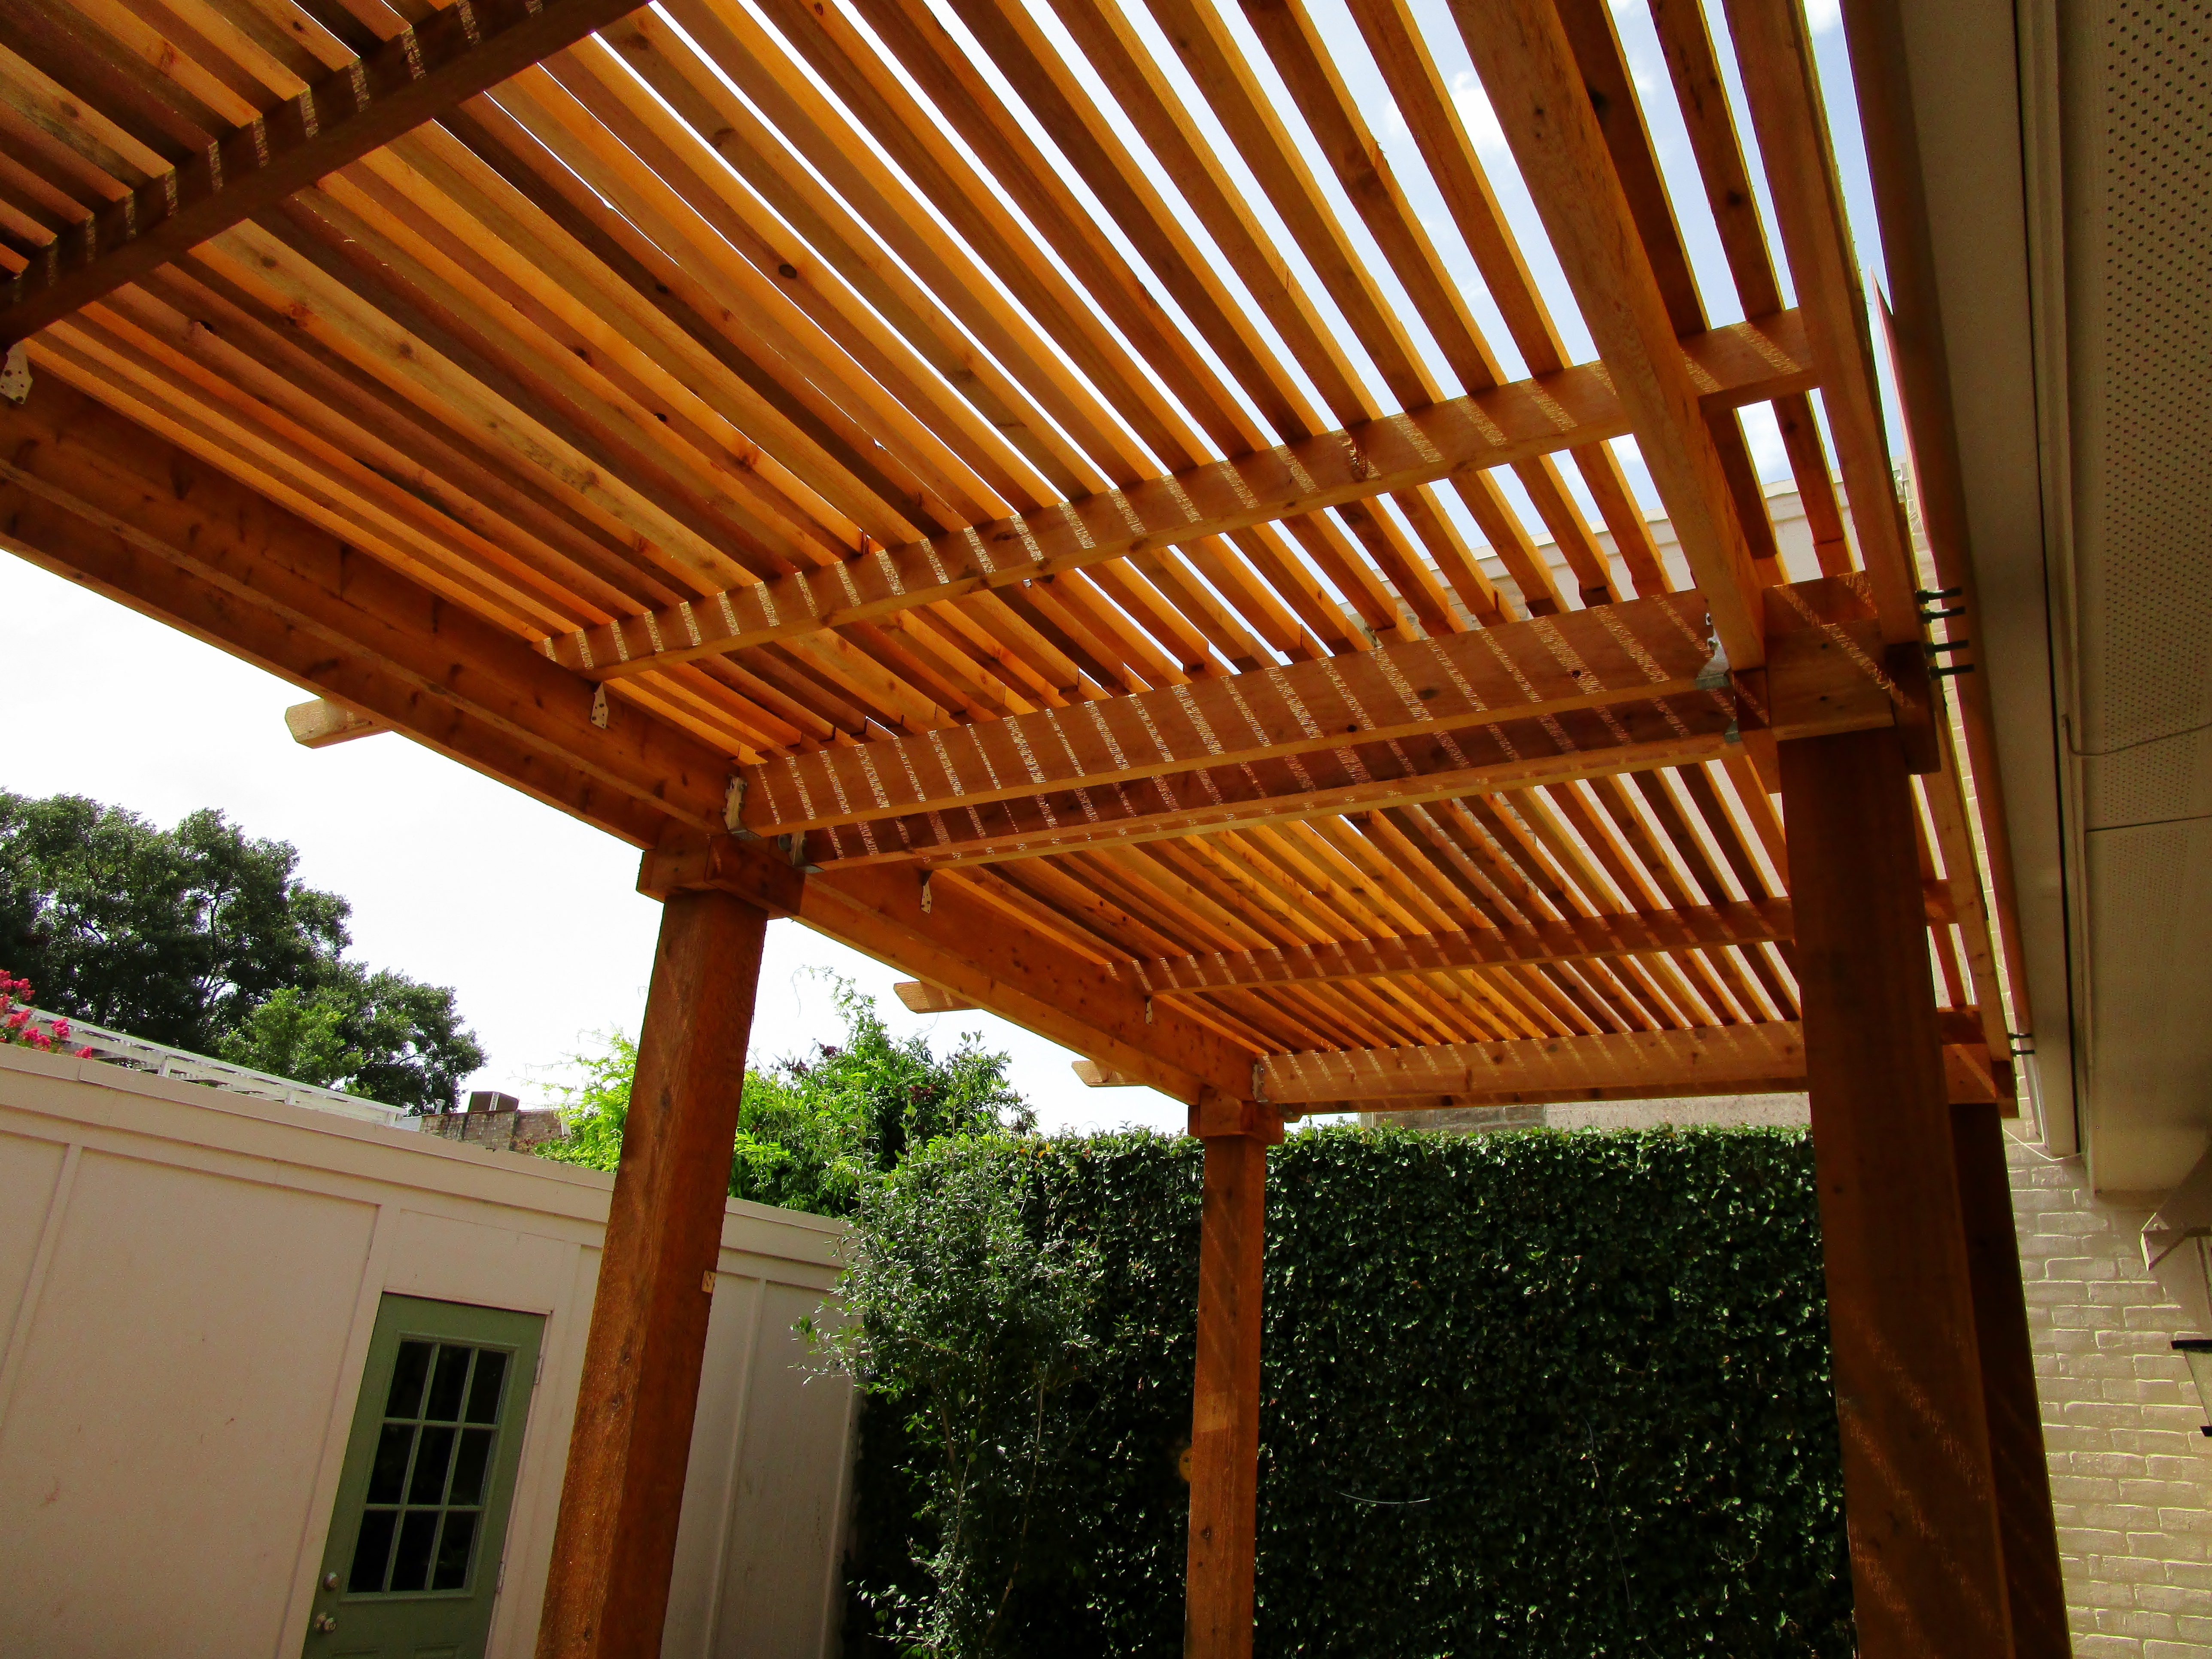 In the original questionnaire that the clients filled out they asked about growing herbs and vegetables. They also wanted something interesting on this blank wall.
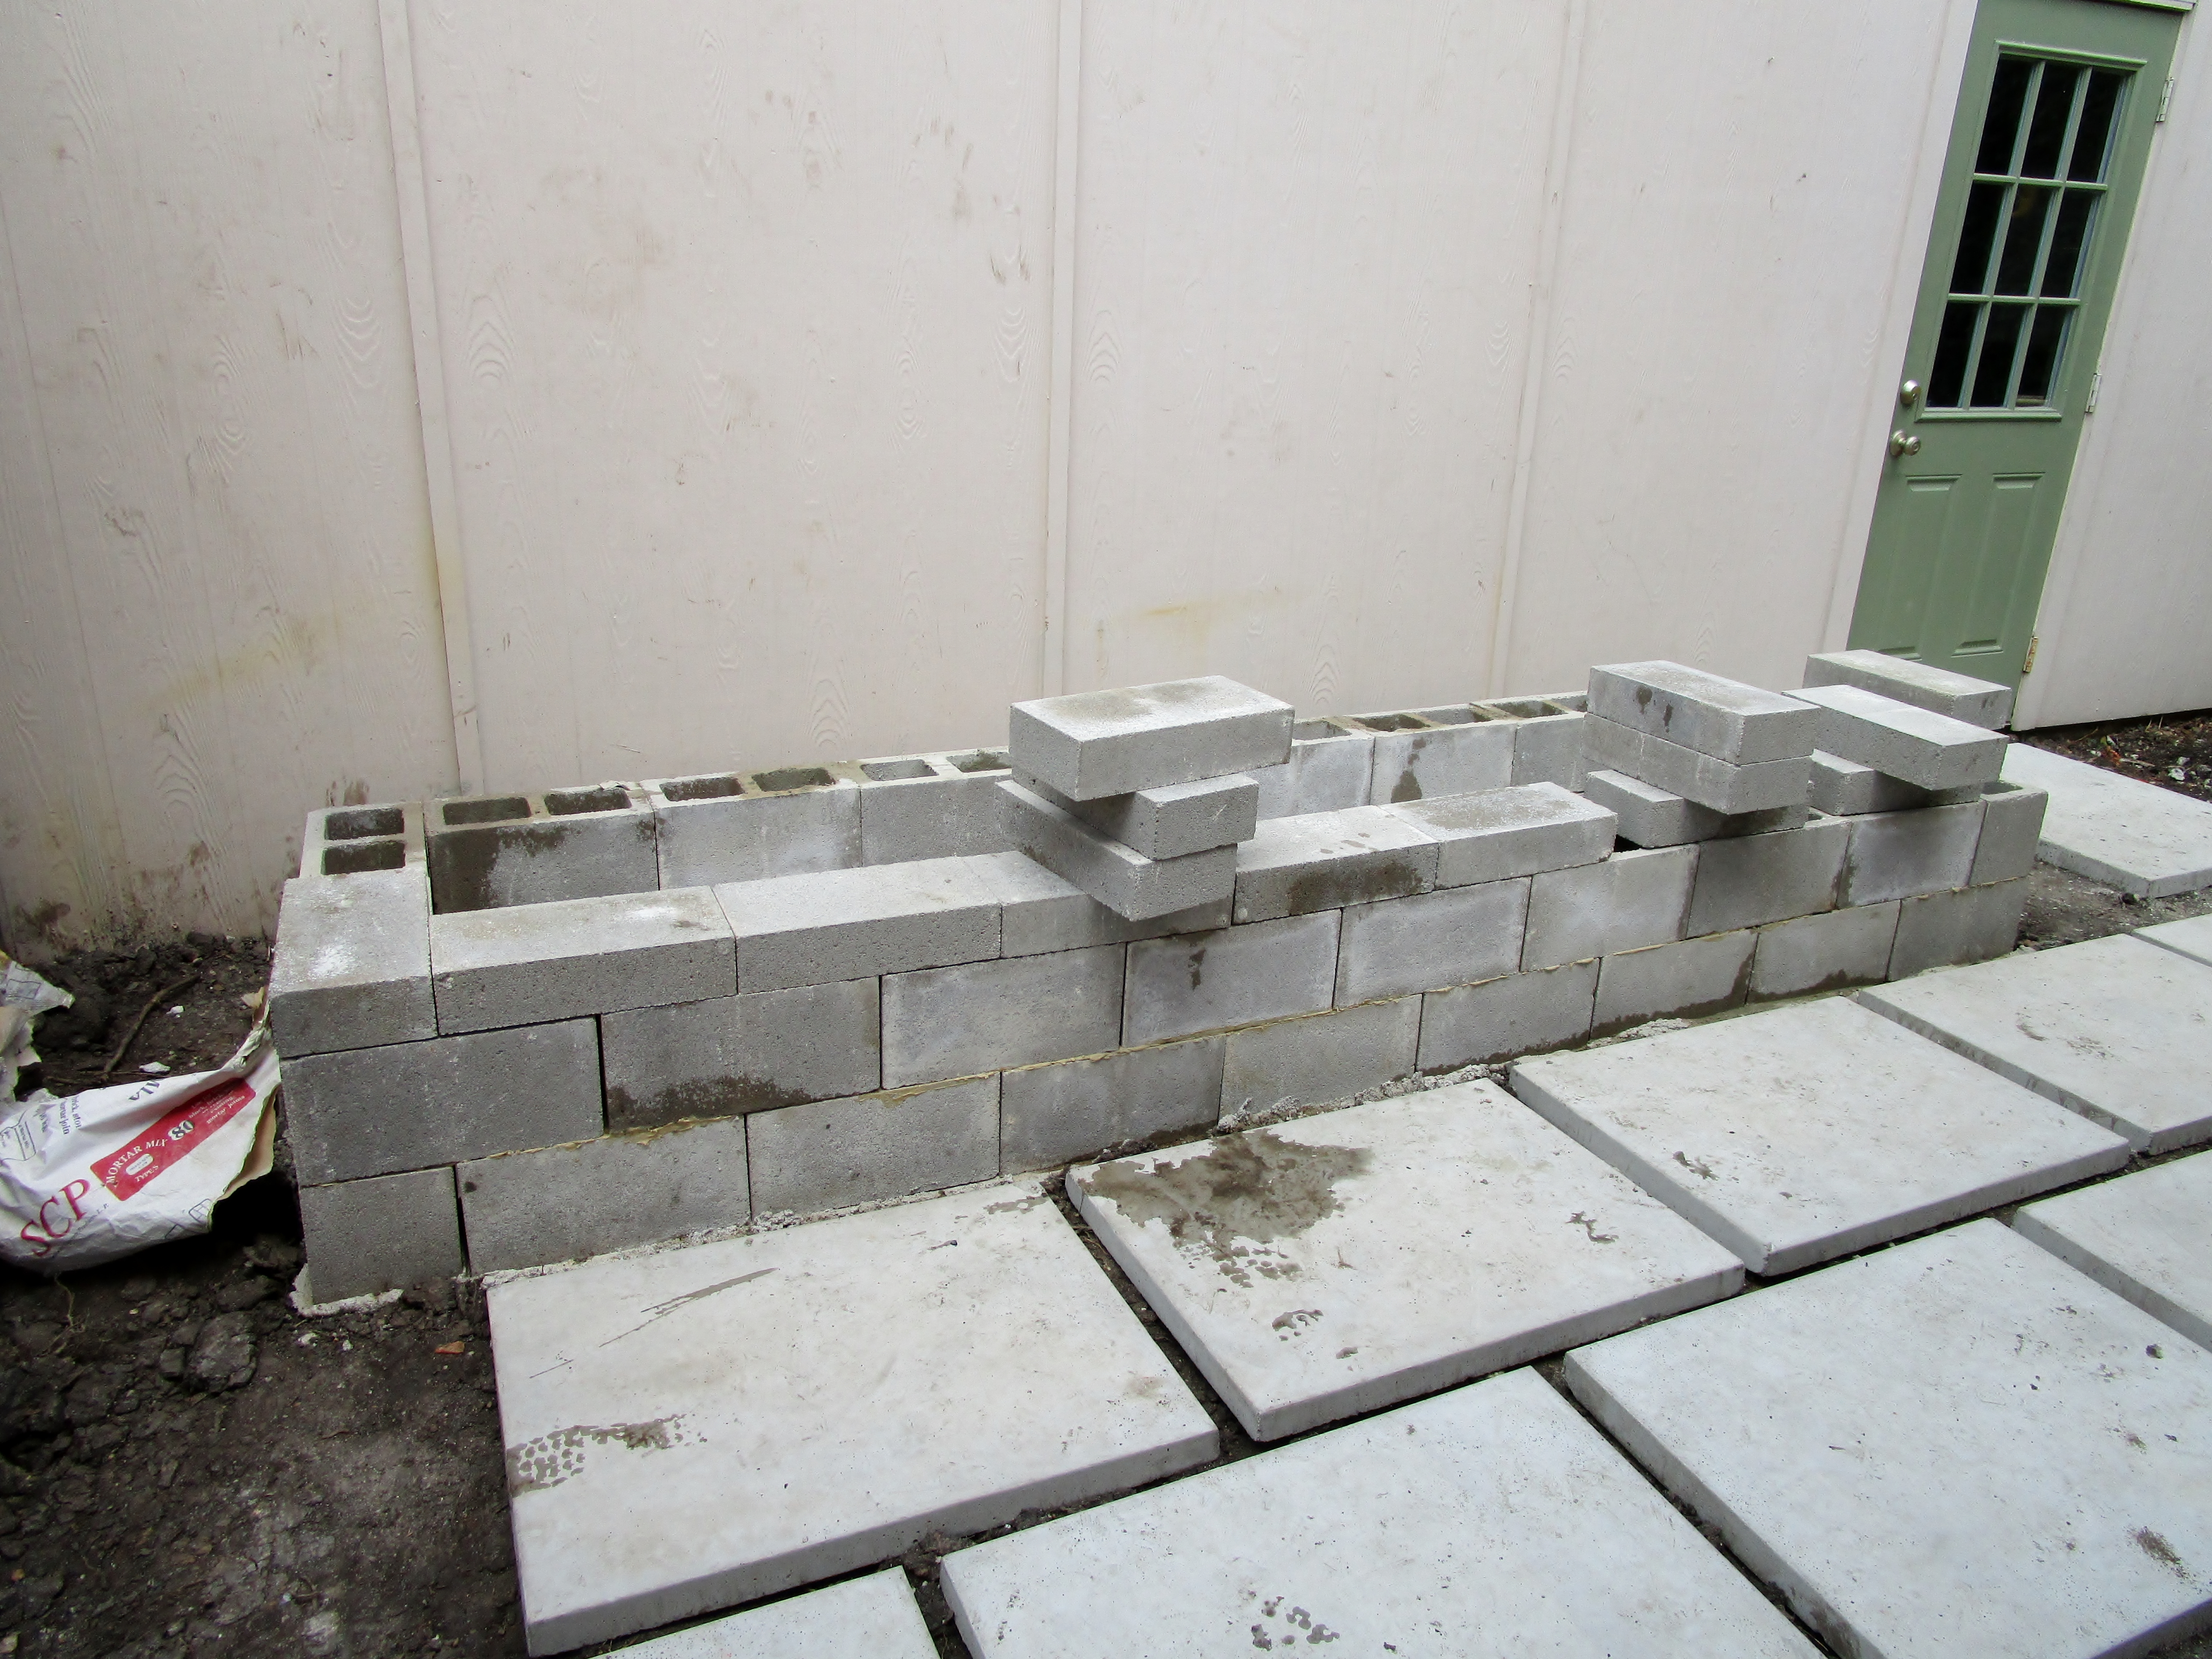 We presented two ideas: one with tall plants, the other leaving it empty so they can plant a kitchen garden. This is just after the skim coating was applied.
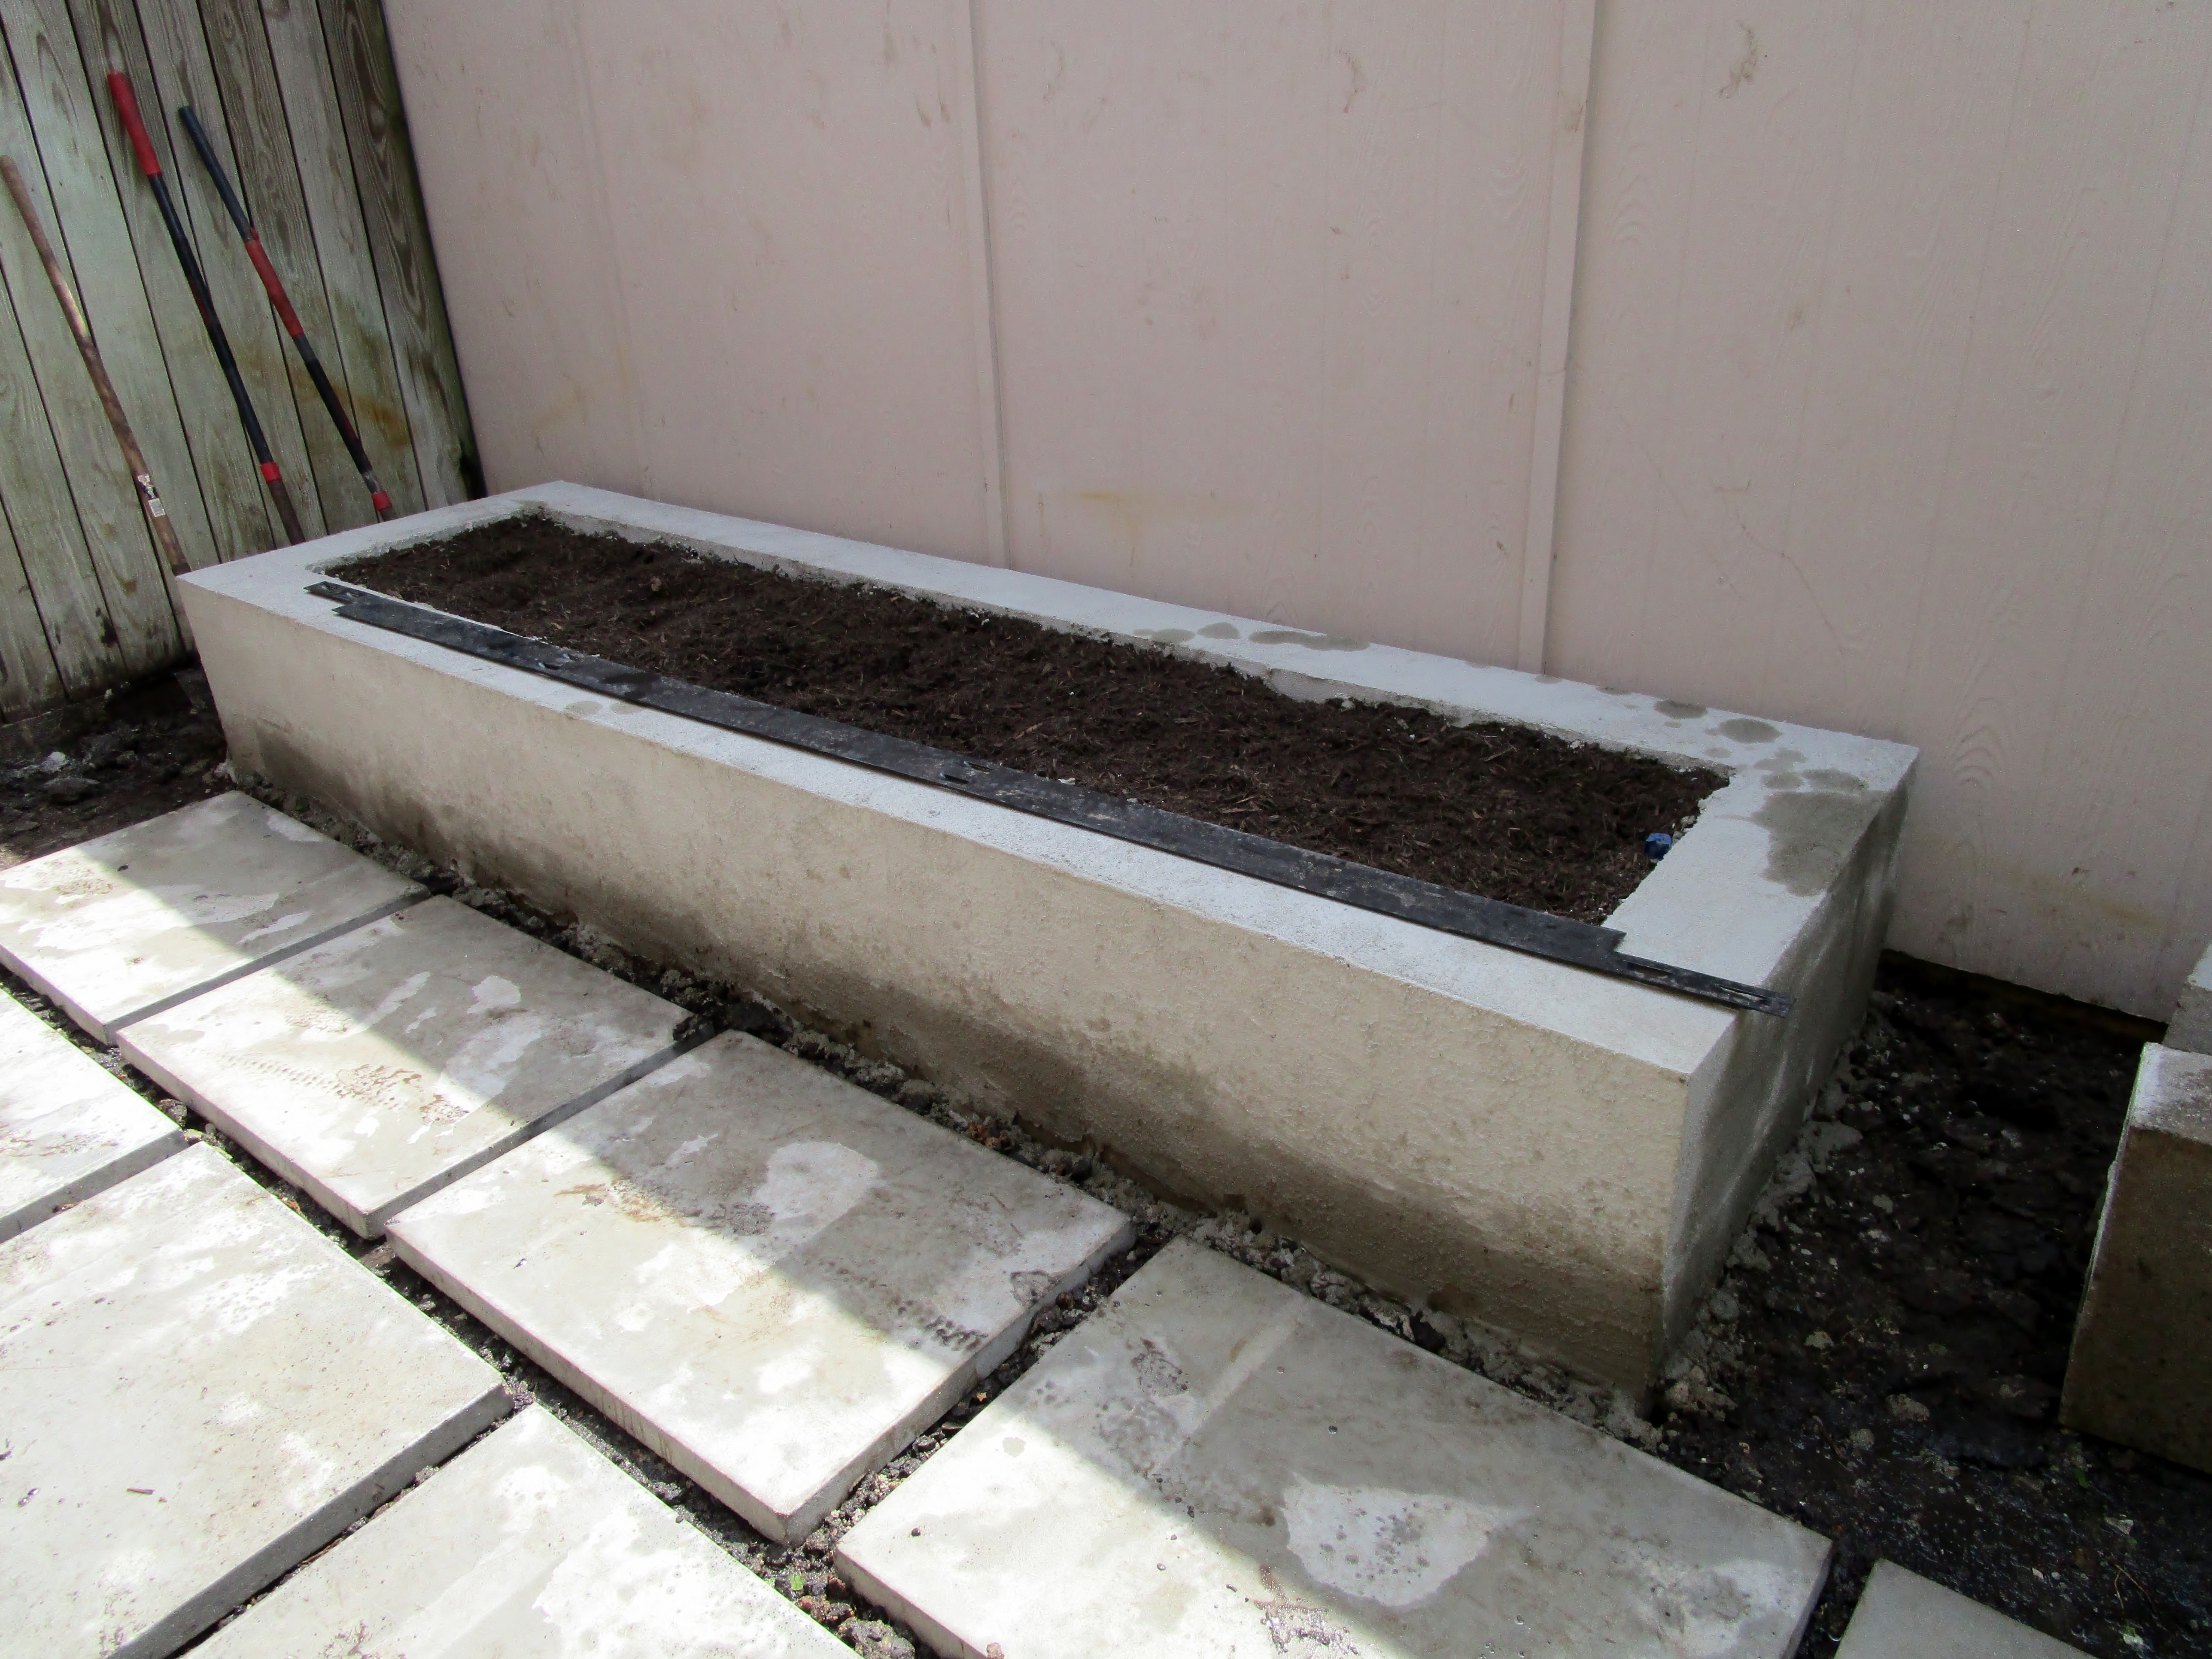 Here is a good shot showing how we fit the pergola around the doors.
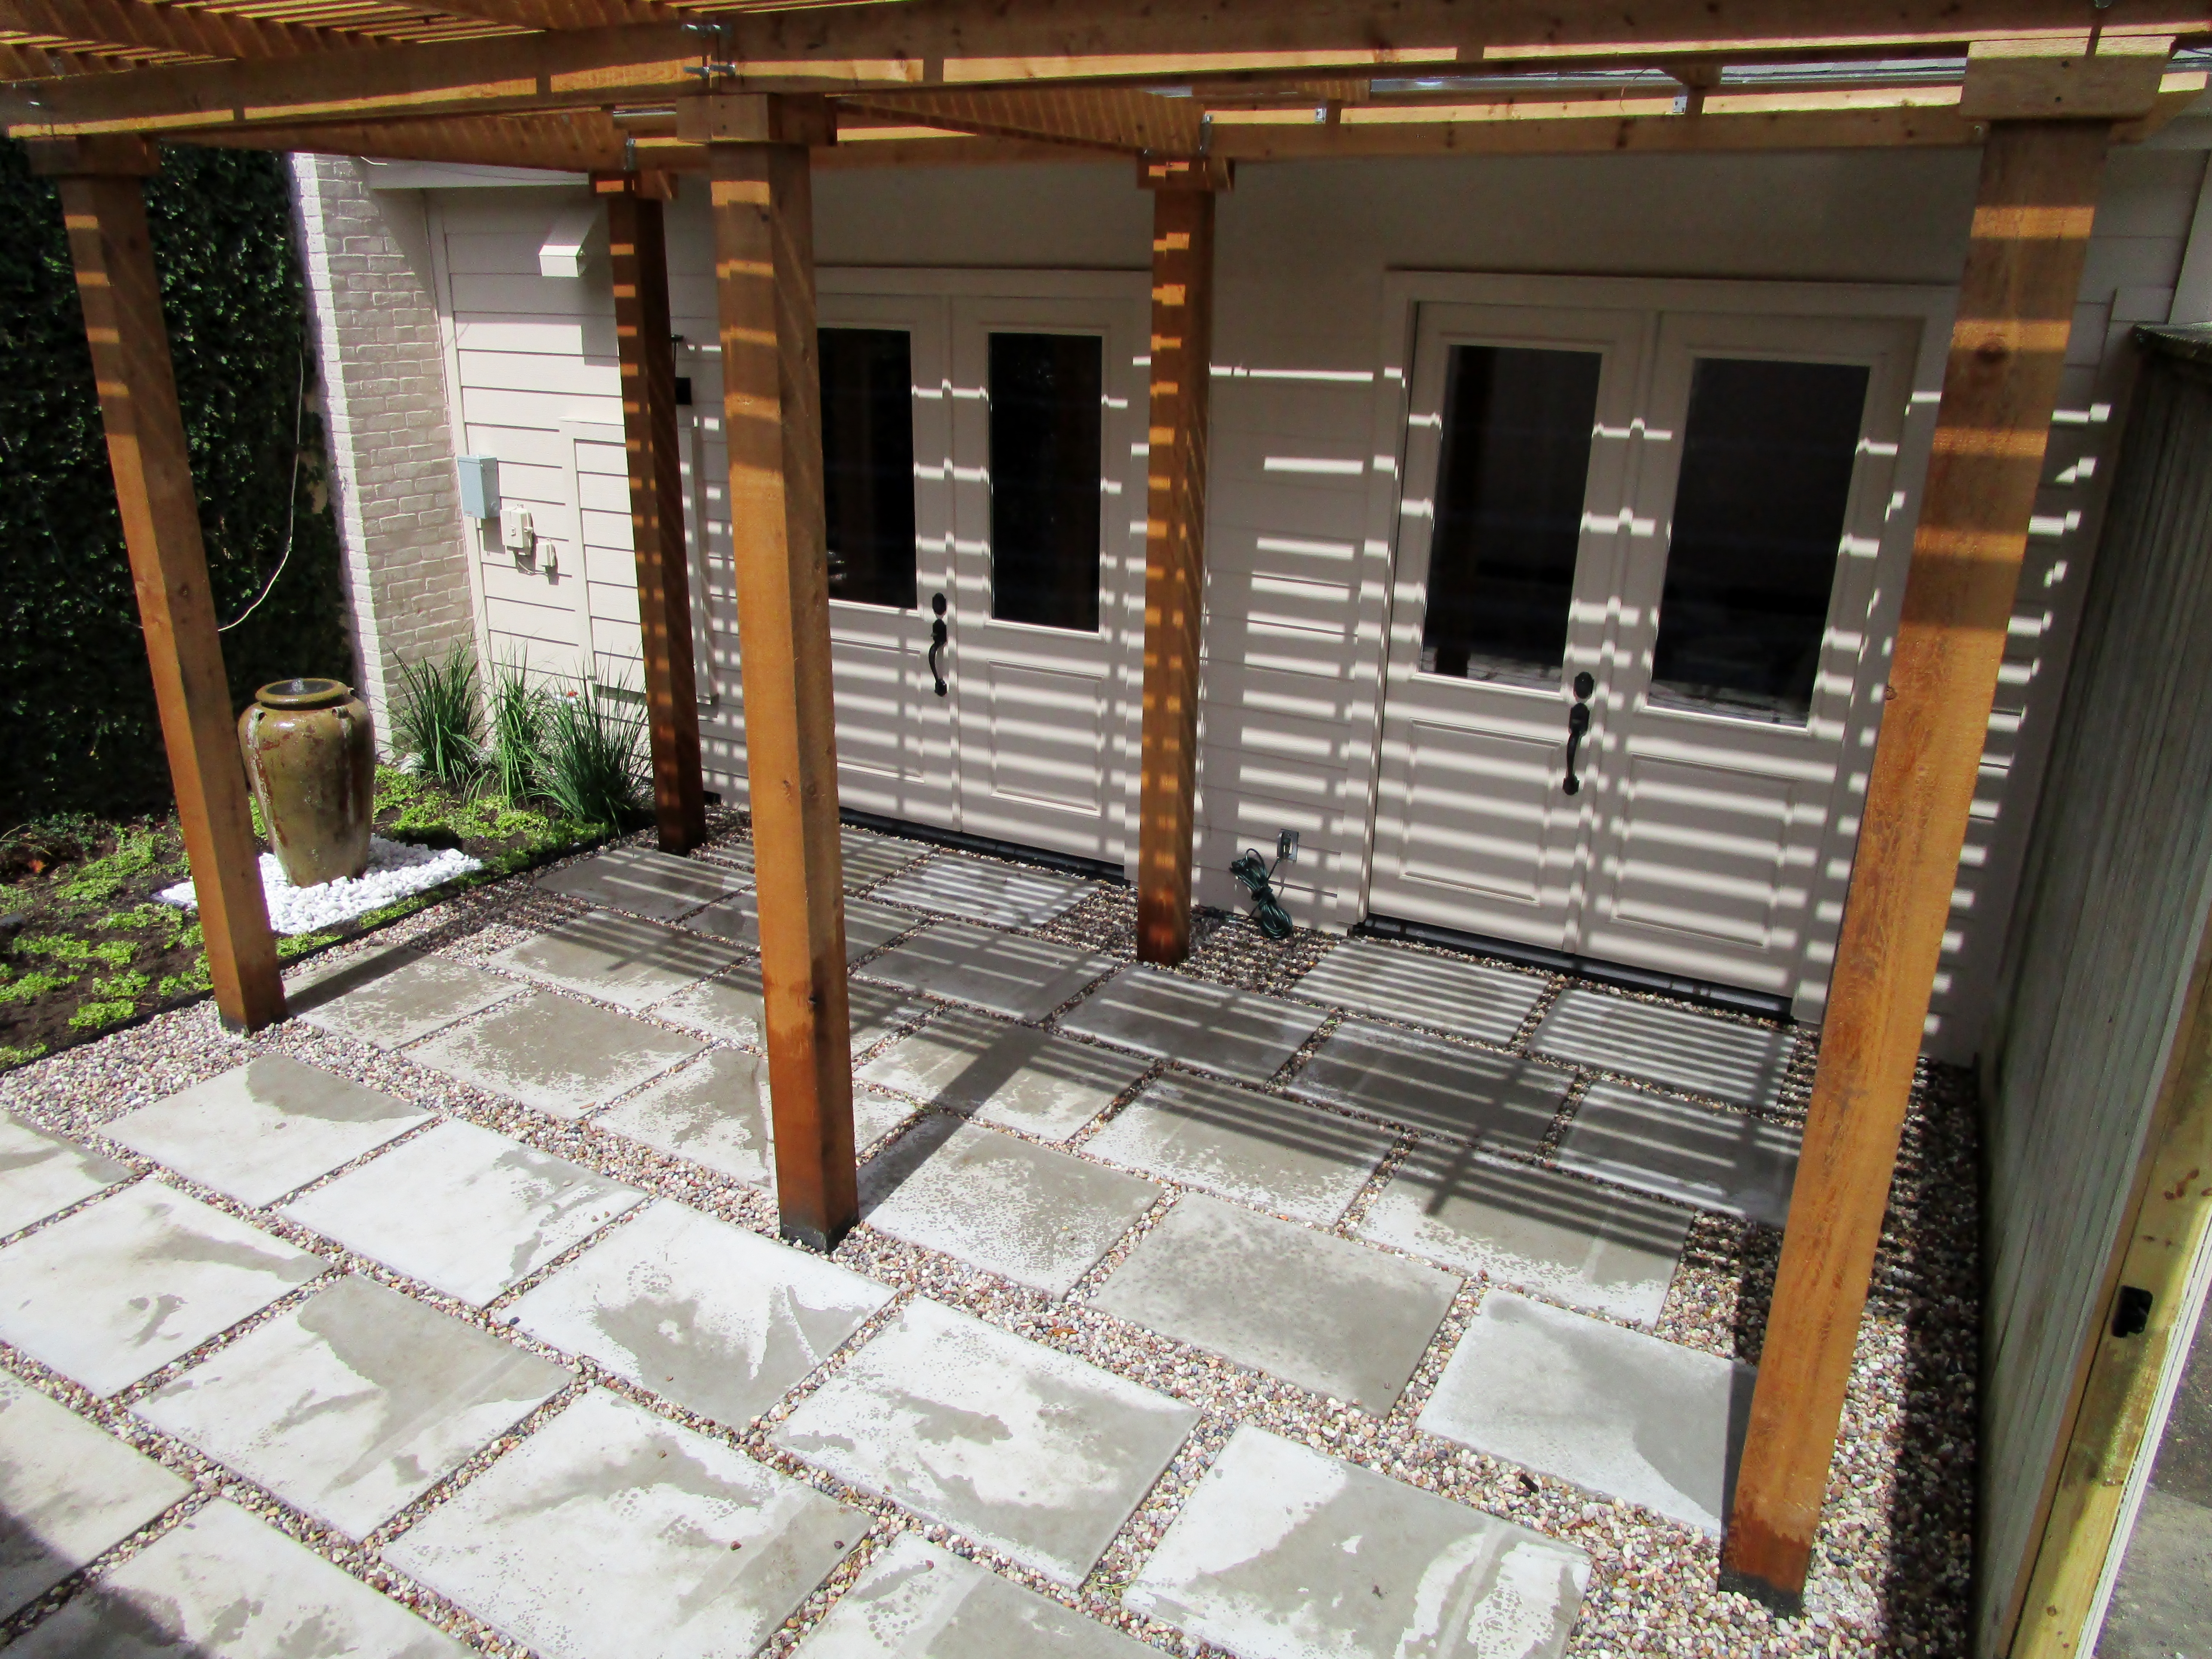 The fig ivy covered wall stayed and makes a nice cool back drop for the fountain and ground cover. A water feature can function as focal point, bring relaxing sounds and birds to your garden and be an art piece. This one is doing all that and still is simple and fits the scale of the area. Around the fountain we planted Creeping Jenny, Lysimachia nummularia. It has a nice lime green color that contrast well with the ivy and will fill in as a solid carpet and even flow over the gravel to soften the edge if allowed. It only gets about four inches high and spreads about 18 inches wide. Likes part shade and needs regular water. It does survive our winters even though it looks quite delicate.
  And….Ready to use. A great start with a nice outdoor table and some rockers.
  Another view from the top of the raised bed. Well, building this in summer was a challenge and it is nice to know with Autumn here that this is going to get a lot more use.
  Happy Gardening!

Yet another lovely project. I really like this look. It feels inviting. Pretty nice to have a mature vine already filling that wall. But ugh … what a nightmare it must have been to remove all that concrete from such a small area.
LikeLiked by 1 person
Thank you Debra, it fit the bill and the owners are please! I did feel bad for the crew!
LikeLike
Beautiful. You really tamed that area, it looks so fresh and new now!
LikeLiked by 1 person
Thanks bittster..it was nice to start with a blank slate!
LikeLike
Wow, fantastic job on the pergola. I’ve fantasized about doing having a garden design/build business, but your posts are a good reminder of just how much you need to know.
LikeLiked by 1 person
It is great to have your own business and especially do the design and the install but yes there is a bit to know. One of the reasons we do these project posts is hoping they might help DIY or other landscapers learn about the processes.
LikeLiked by 1 person
Wow, it looks great! I really like the flagstone combined with the gravel. And of course the tall urn with the fountain. Your clients are lucky they hired you!!
LikeLiked by 1 person