
Tags
cedar A/C surround, cedar and welded wire fence, cedar pergola, cement pads, cinder block raised bed, outdoor room, patio, privacy screen, rainbow gravel, raised bed
Happy New Year readers! I have not been very regular here and I have so much to share with you. I hope to carve out more time in 2016 for blogging. We got a review today that made my heart swell. It was from the owner of this project. So I just had to share : ) 
Towering town houses were under construction as we did our installation in this little yard.
We will start with the after picture, then continue at the beginning and work our way through. The before is pretty much a blank slate. The key in a small area is to maximize the use of the space without having the feeling you crammed too much in. This small backyard space was never really used except for two wooden raised beds. The homeowner wanted a space to enjoy being outside and still grow herbs and vegetables. She also wanted to have more privacy. When we started the design process there was nothing behind her but they were breaking ground on more townhomes. We came up with a plan that could be done in phases and would give her everything she was looking for. She liked the plan so much she had us do the whole thing at once. We planted a row of crape myrtles at the back that will give a nice privacy screen. They are bare for only a few months and add fun summer shade and color. In addition we built a pergola that obscures the view, gives shade and creates an outdoor room. We replaced the worn wooden beds with cinder block beds. Along the east side north of the A/C screen we planted a bushy Meyer lemon and a Key lime tree. We used welded wire on the side fences to grow Star Jasmin, creating green walls.
This is the before. Pretty much a blank slate.

Each bed is connected to the irrigation system and tubing will be added once the soil is in.
We started by clearing the grass and then building the raised veggie beds.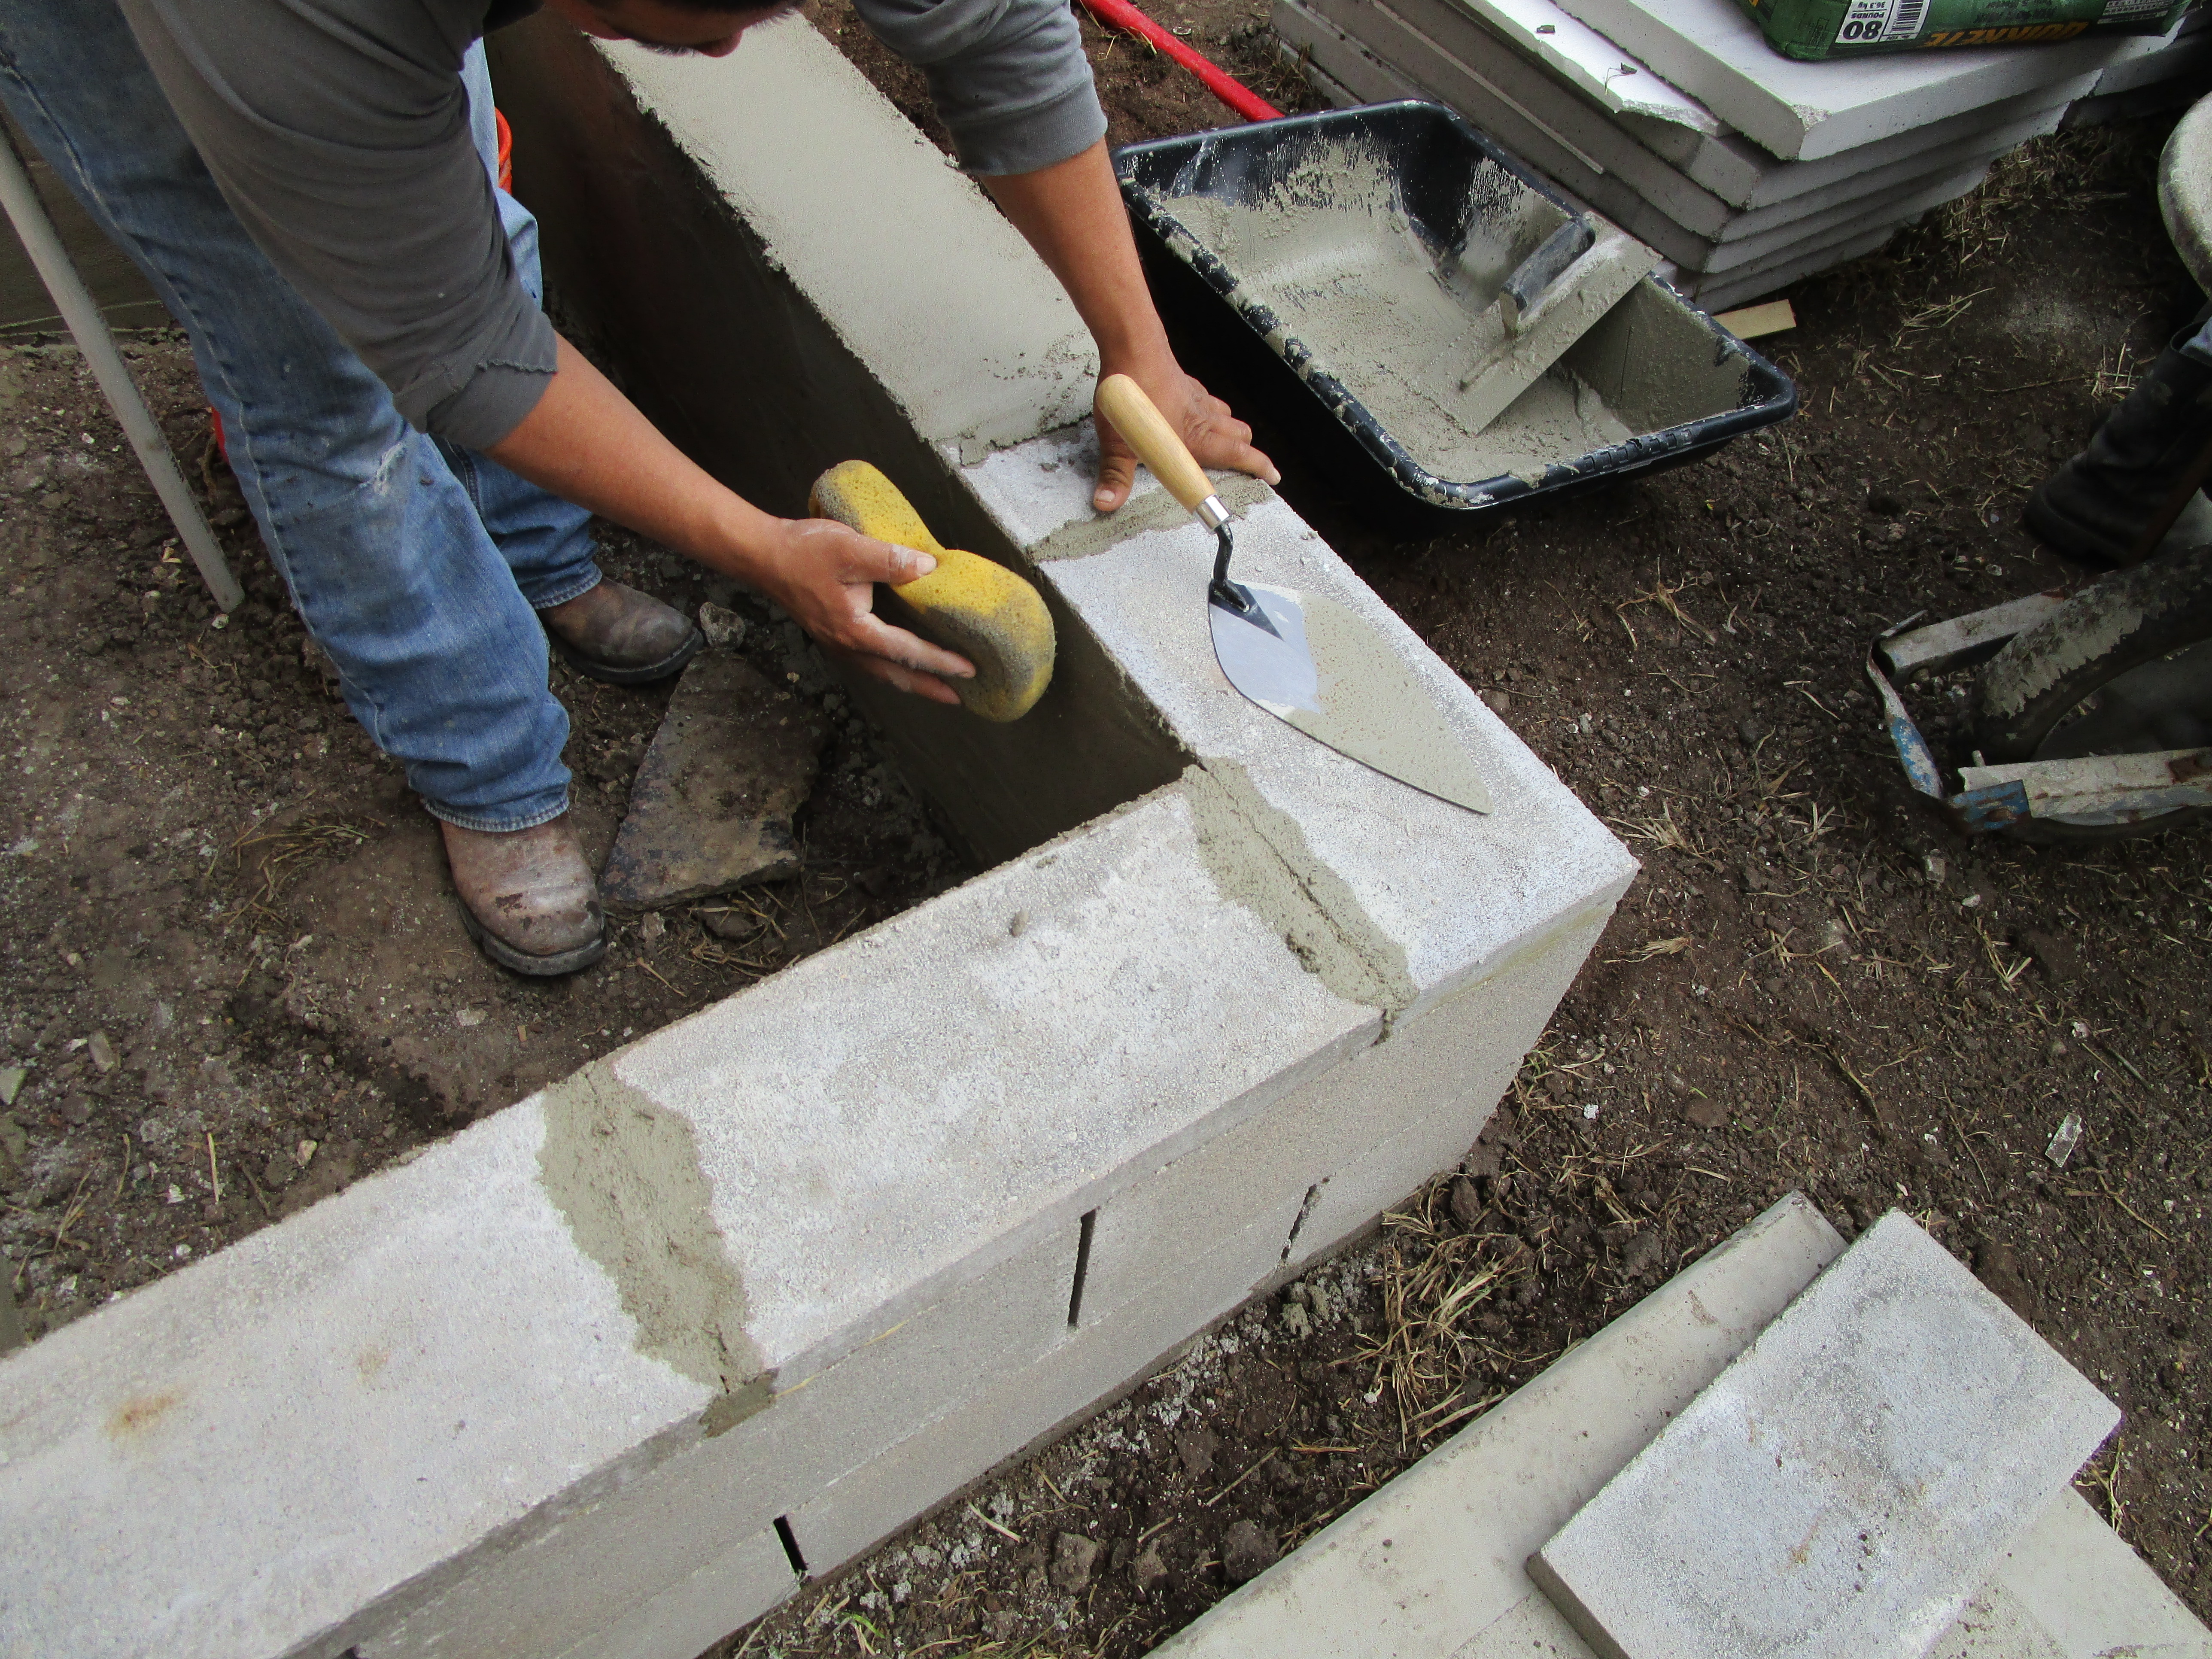 The beds are skim coated cinder blocks which we reinforce at key points using rebar. The mixture, a slurry of runny mortar, makes a nice clean finish. The bed is fitted with irrigation using the same drip tubing we utilize with ground-level beds.

Custom made reinforced cement pad that we will use to create a water permeable patio.

Here you can see how the top 2×2 boards really do obscure the view of the towering house behind.
We didn’t know what the building would look like when we did the design. You can see there are a lot of windows looking down into this back garden. I am glad we went for the maximum shelter. The 4 Biloxi Crape myrtles trees will add even more privacy as they grow in.
This neighborhood used to be tiny little bungalows. But as they began to decline people came in with multi-story townhomes. The center of Houston is being filled in with these multi family dwellings. More and more it reminds me of London. We even have ring roads.
The cement pads are carefully measured, spaced and placed.
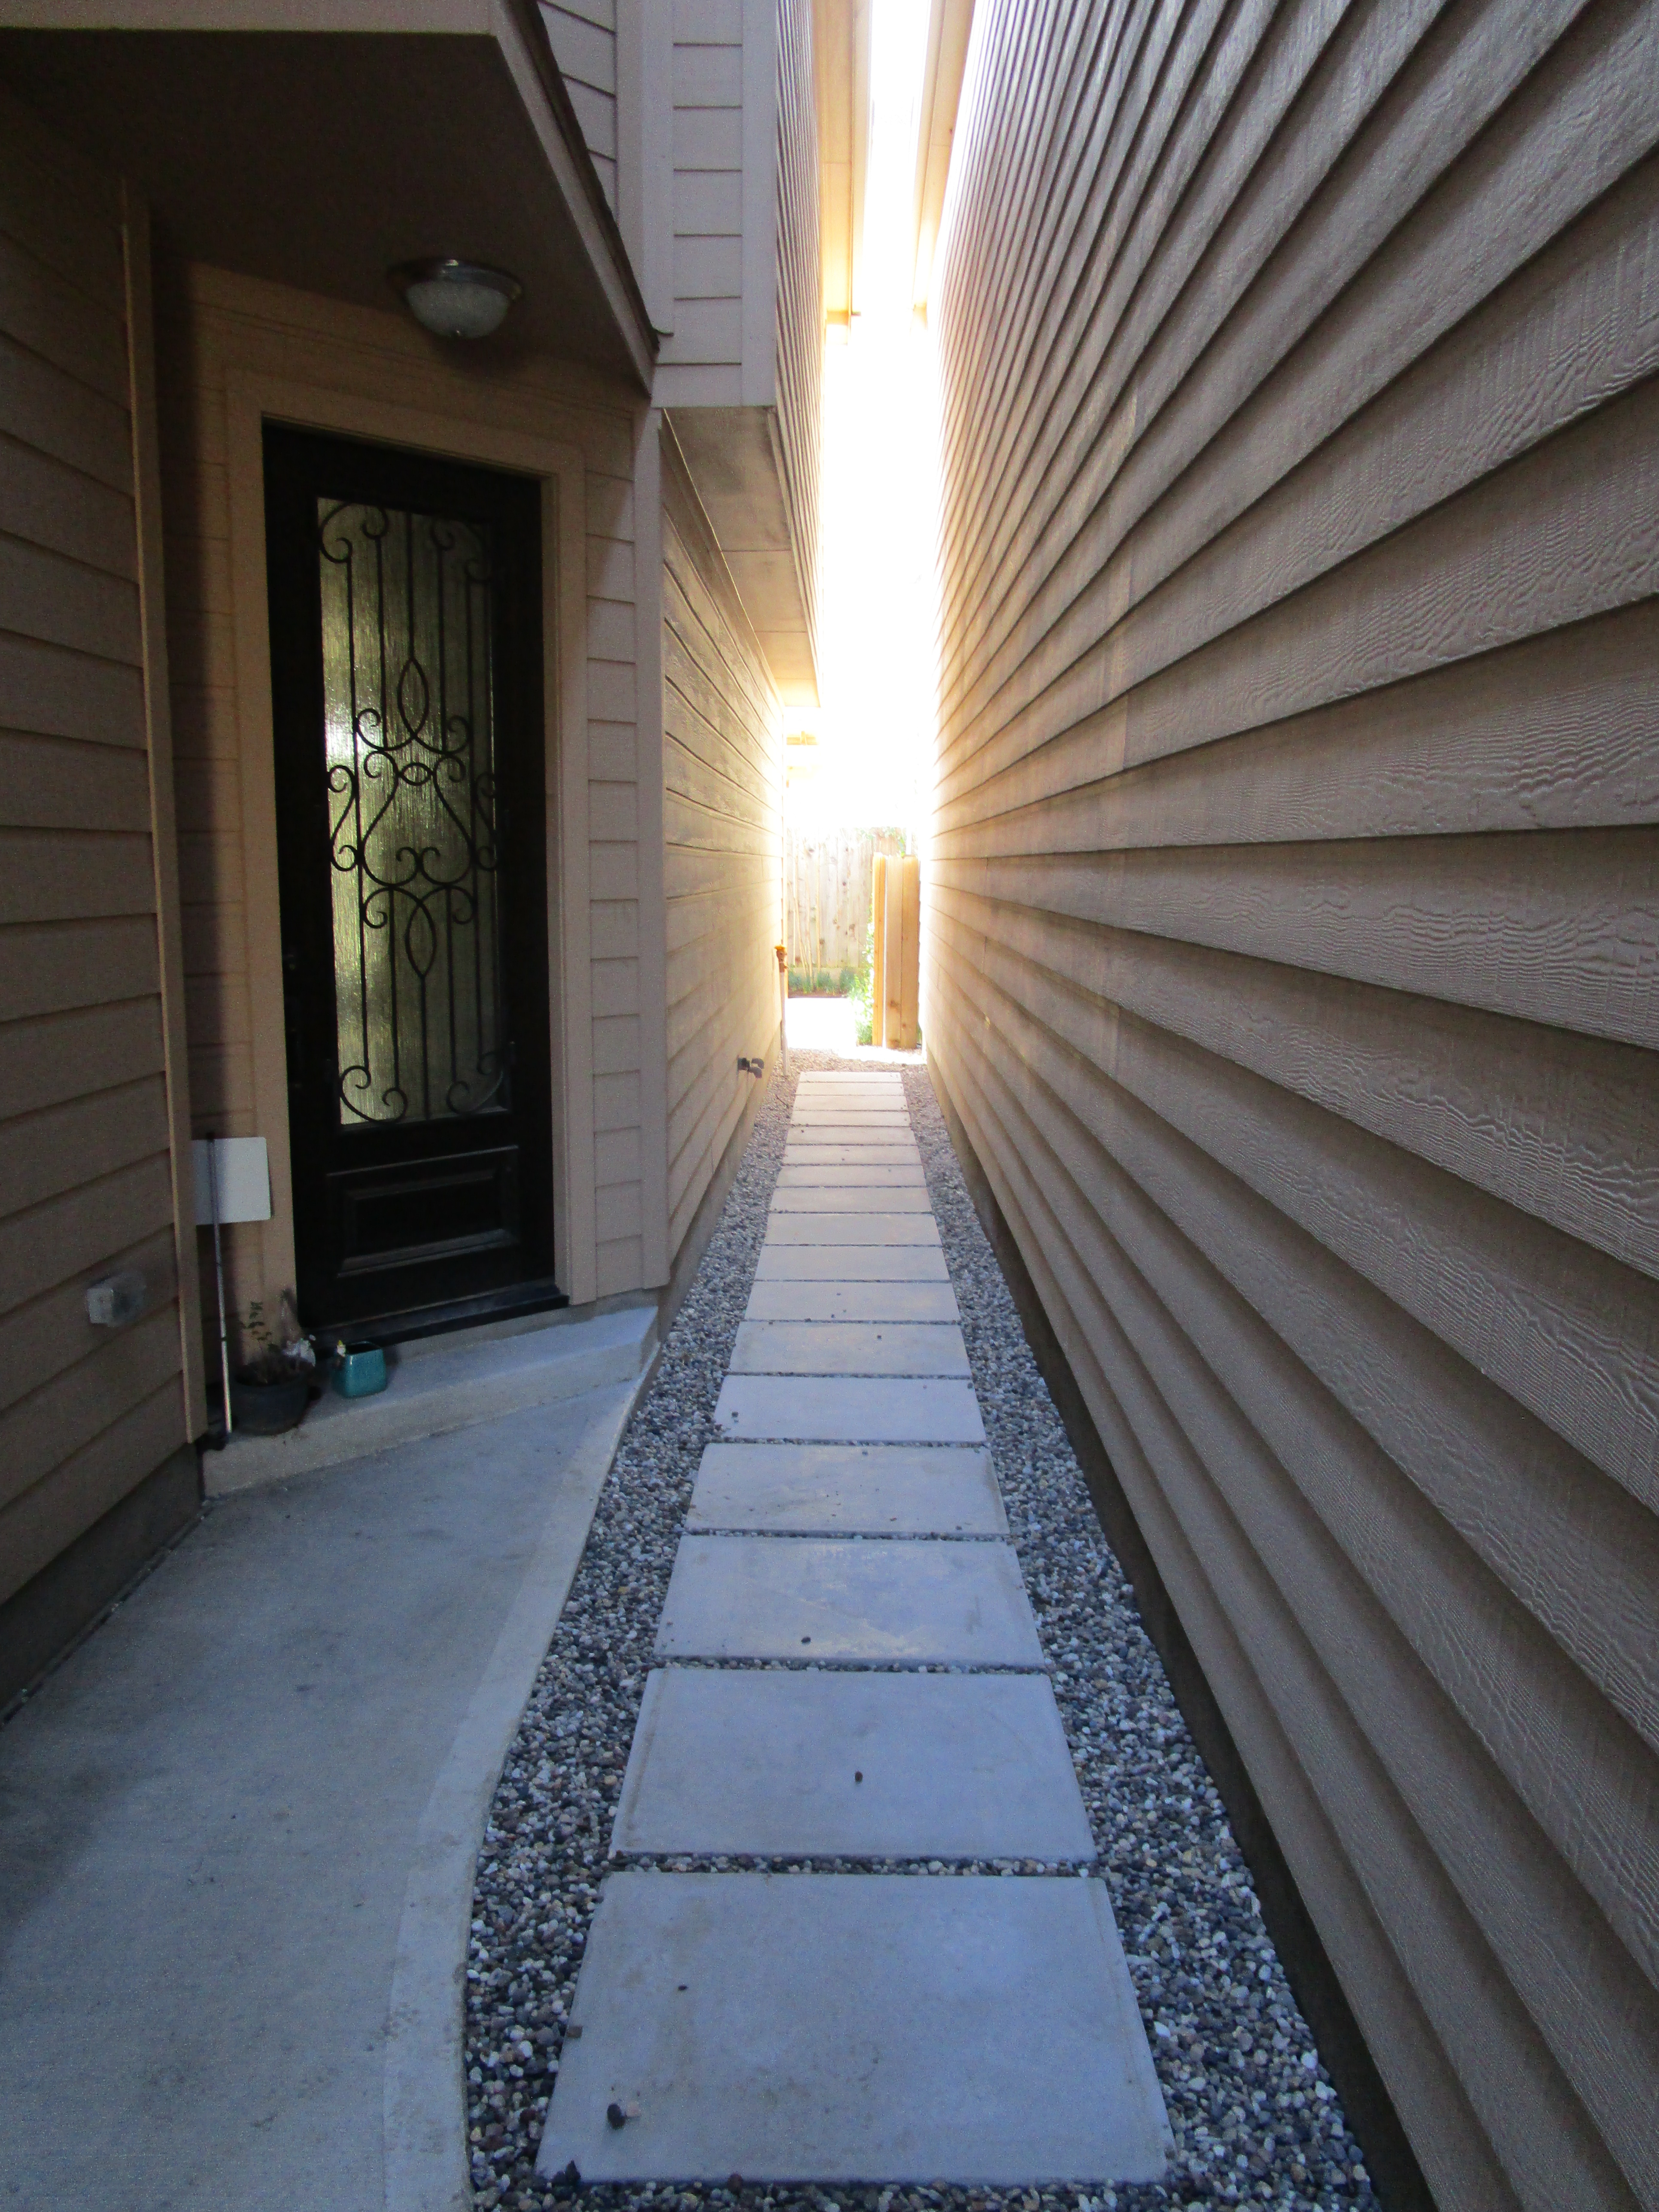
We also created a path to connect with the front door using the same cement pads.
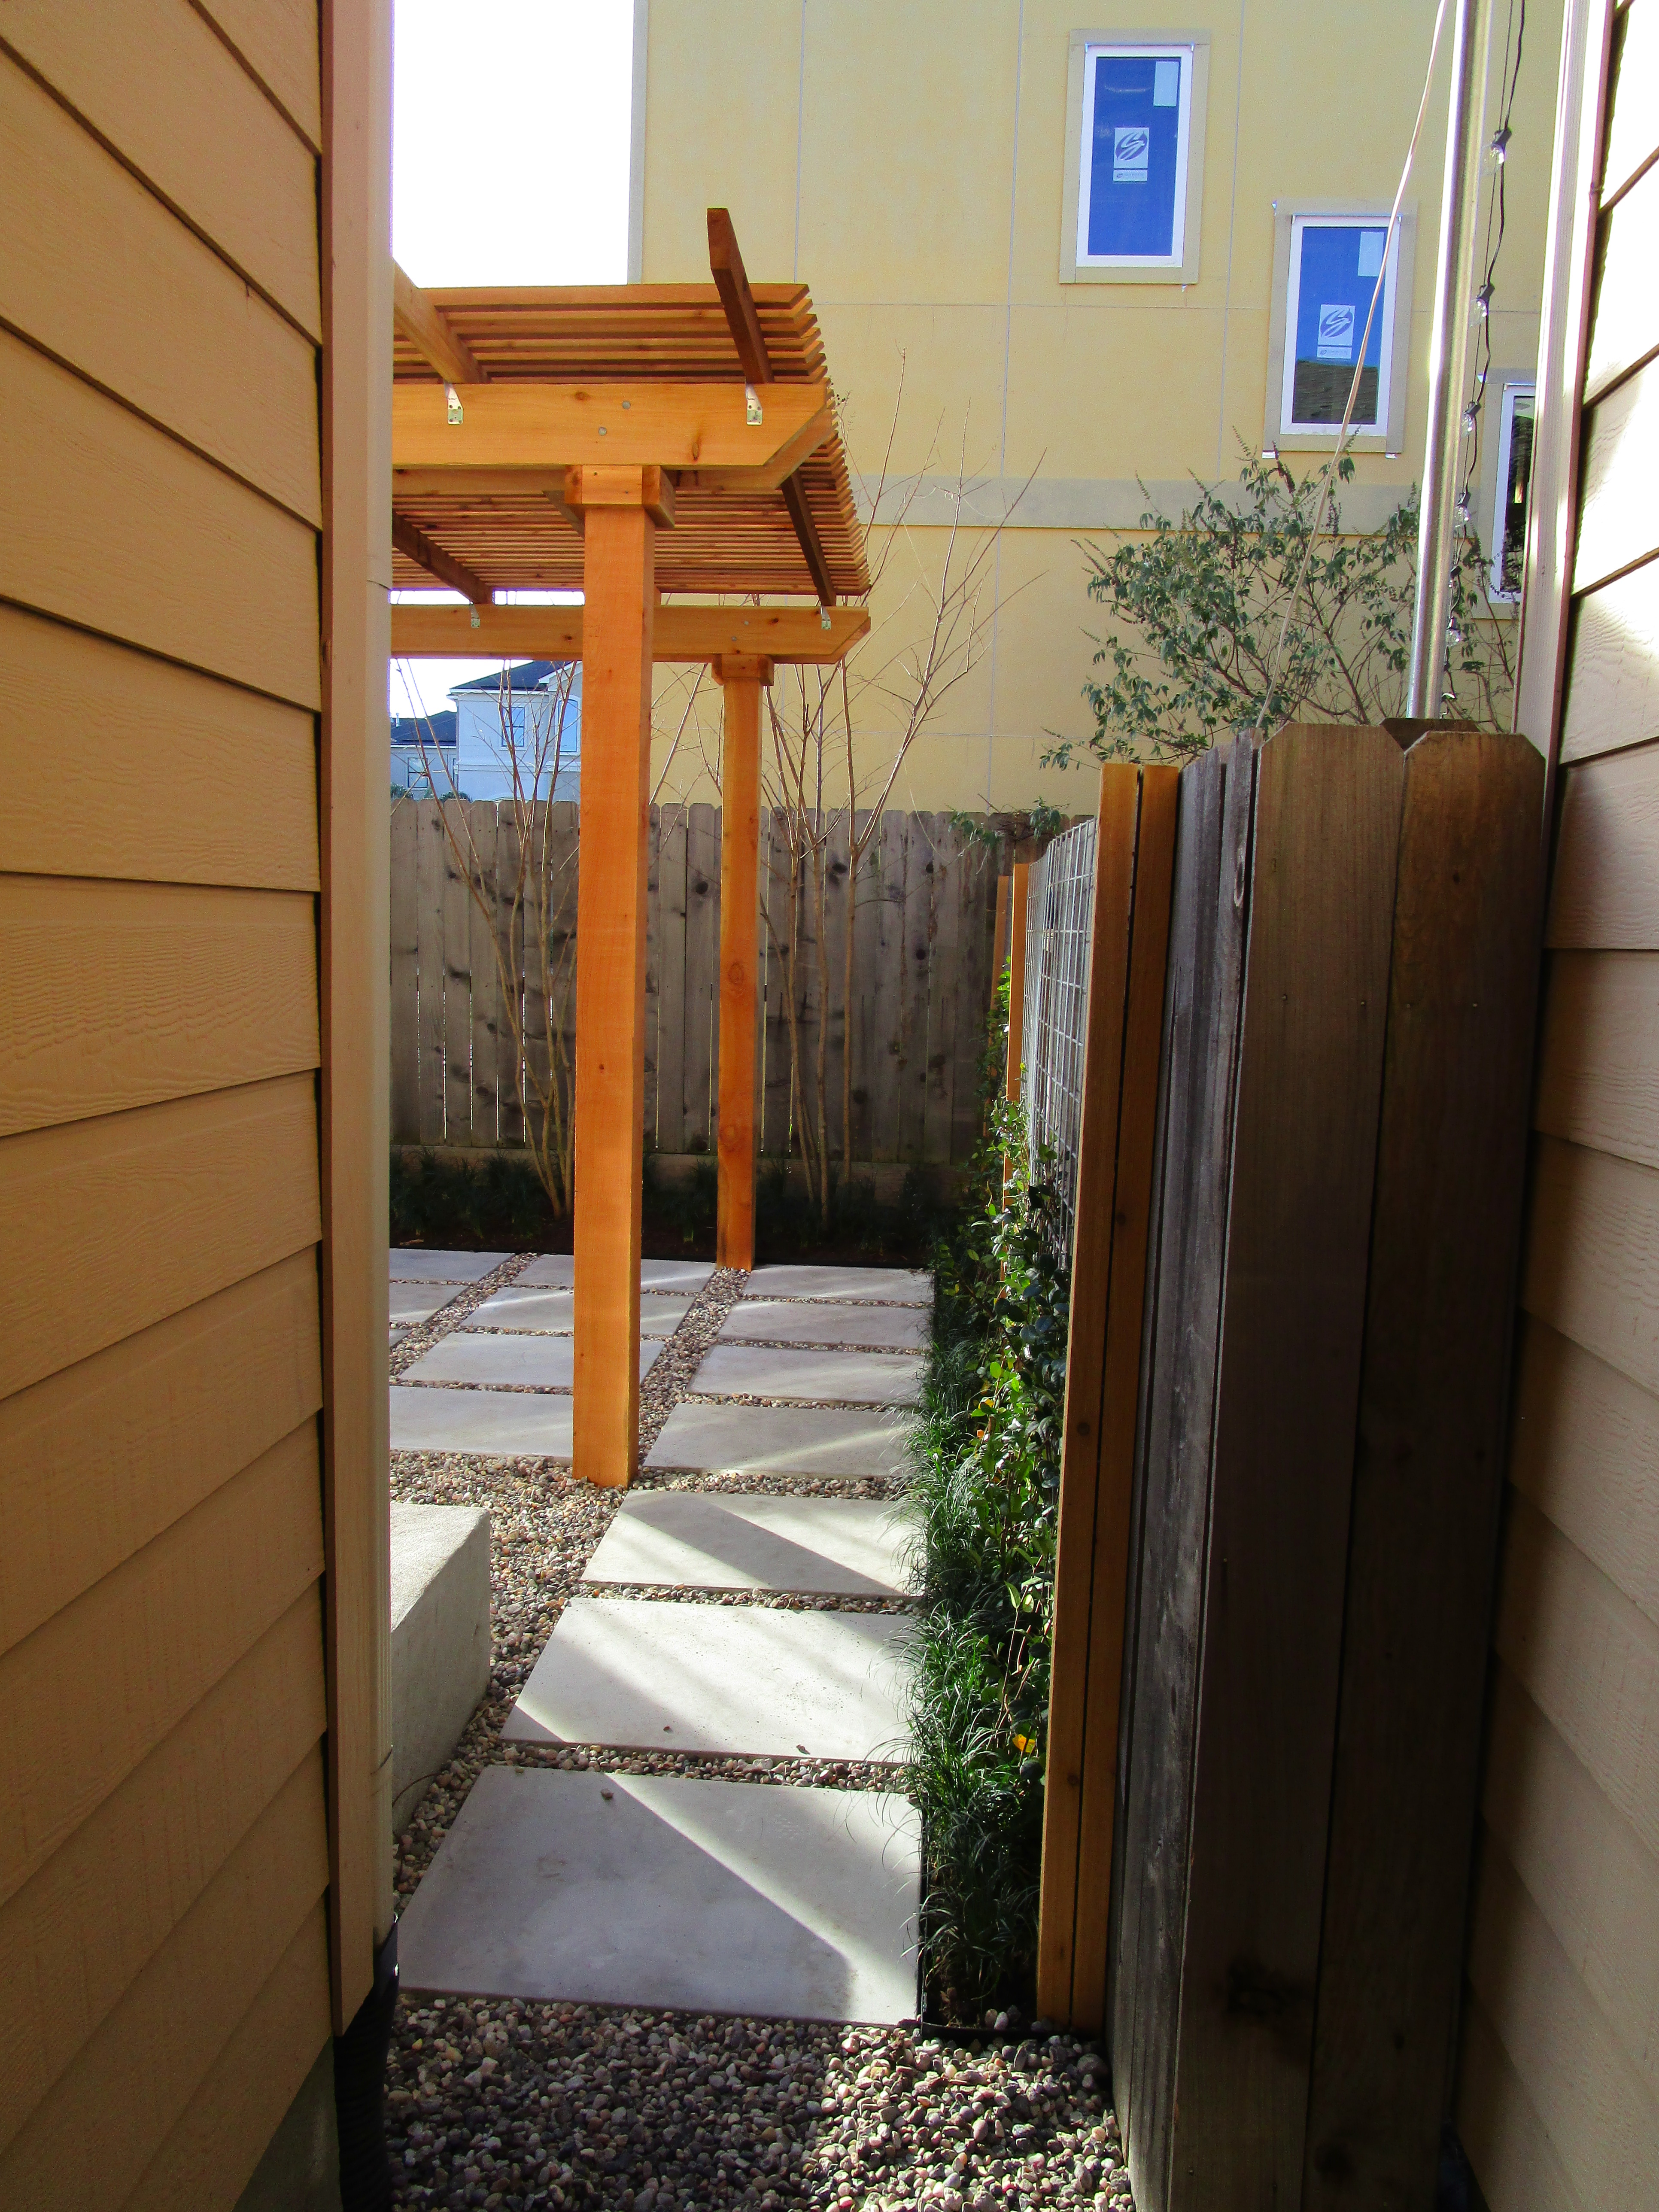
Peeking further into the back you can see the vines on the new welded wire we added to the fence and the rainbow gravel filled in between the pads. We used mondo grass at the base of the vines as a nice border and to help choke out weeds.

View of the beds with the patio. I will have to ask for pictures with furniture.

Here is a shot of the A/C surround and the lime and lemon trees with a field of mondo also to to help choke out weeds. The planting palate is minimal to keep a neat sleek modern look. You can see the nice structure of the crape myrtles. I prefer multi-trunk for this hedge style install.

View to the west.
Finally I would like to share the review we got from the very sweet homeowner. I can’t express in words the joy and satisfaction I feel knowing we created a space that will bring so much happiness!
“Shawn and Laurin did an amazing job, and that’s an understatement! I’m a pretty hard person to impress so that is saying a lot.
I met with several different landscapers and designers before deciding on Ravenscourt. Some either stopped communicating with me (probably because my project was too little in terms of revenue for them) or totally missed the mark on my vision. When I first decided on a backyard project, I had originally budgeted for $5,000 and Shawn and Laurin still met with me.
Shawn’s crew was very respectful and always left the space clean at the end of the day. Shawn kept me informed every step along the way. There were a few minor hiccups but Shawn will go above and beyond to make the client happy and in love with their outdoor space.
Before this project, my backyard was a nightmare and very stressful to be in. They listened to me but still offered opinions and ideas. Laurin is an amazing designer. She hit the mark with the very first plan she showed me. The final result was better than what I imagined. I’ll be sad whenever I have to leave this house but I already told them to expect a call for my next project!”
Happy Gardening!

Happy New Year! I can see why they are so happy. =)
LikeLiked by 1 person
Thank you Debra!
LikeLike
You are indeed amazing! congratulations on yet another job very well done! Will you come and fix my giant mistake of a garden in the pacific northwest?
LikeLiked by 1 person
Peter I would love to visit your garden! It is probably a lot like mine. I pretend and do explain it to customers as a test garden. In truth I am a plant geek and always finding something new and then looking for a place to stick it in dirt. I dream about being able to landscape my back garden but that is where we store our trailer, left over hardscape material and plants waiting to go to their new home.
LikeLike
Nice! She must have felt like an animal in a cage before you helped her add some privacy… Portland is full of tall buildings looking down on their tiny neighbors, and more are added daily.
LikeLiked by 1 person
I do think that is why she never really went out there. Now she can enjoy it year round.
LikeLike
This made me so happy to read…well done!
LikeLiked by 1 person
I am so happy to hear that Loree!
LikeLike
The finished product looks beautiful, and what a great review. Congrats!
LikeLiked by 1 person
Thank you, I am fortunate to have talented people working with me that take my ideas and make them a reality.
LikeLike
So nice to read, and the new garden really is a welcoming place! All the best for the new year 🙂
LikeLike
Beautiful finished project. I can see why the homeowner is a satisfied customer. 🙂
LikeLiked by 1 person
Thank you Judy : )
LikeLiked by 1 person