
Tags
cedar pergola, cement pad patio, cooking outdoors, dining canopy, privacy wall, sweet olive bush
Our quest for finding creative solutions for folks with small outdoor spaces continues. This home has a very tiny back yard space but nice sized front and side yards. Below is the before picture of the side yard. 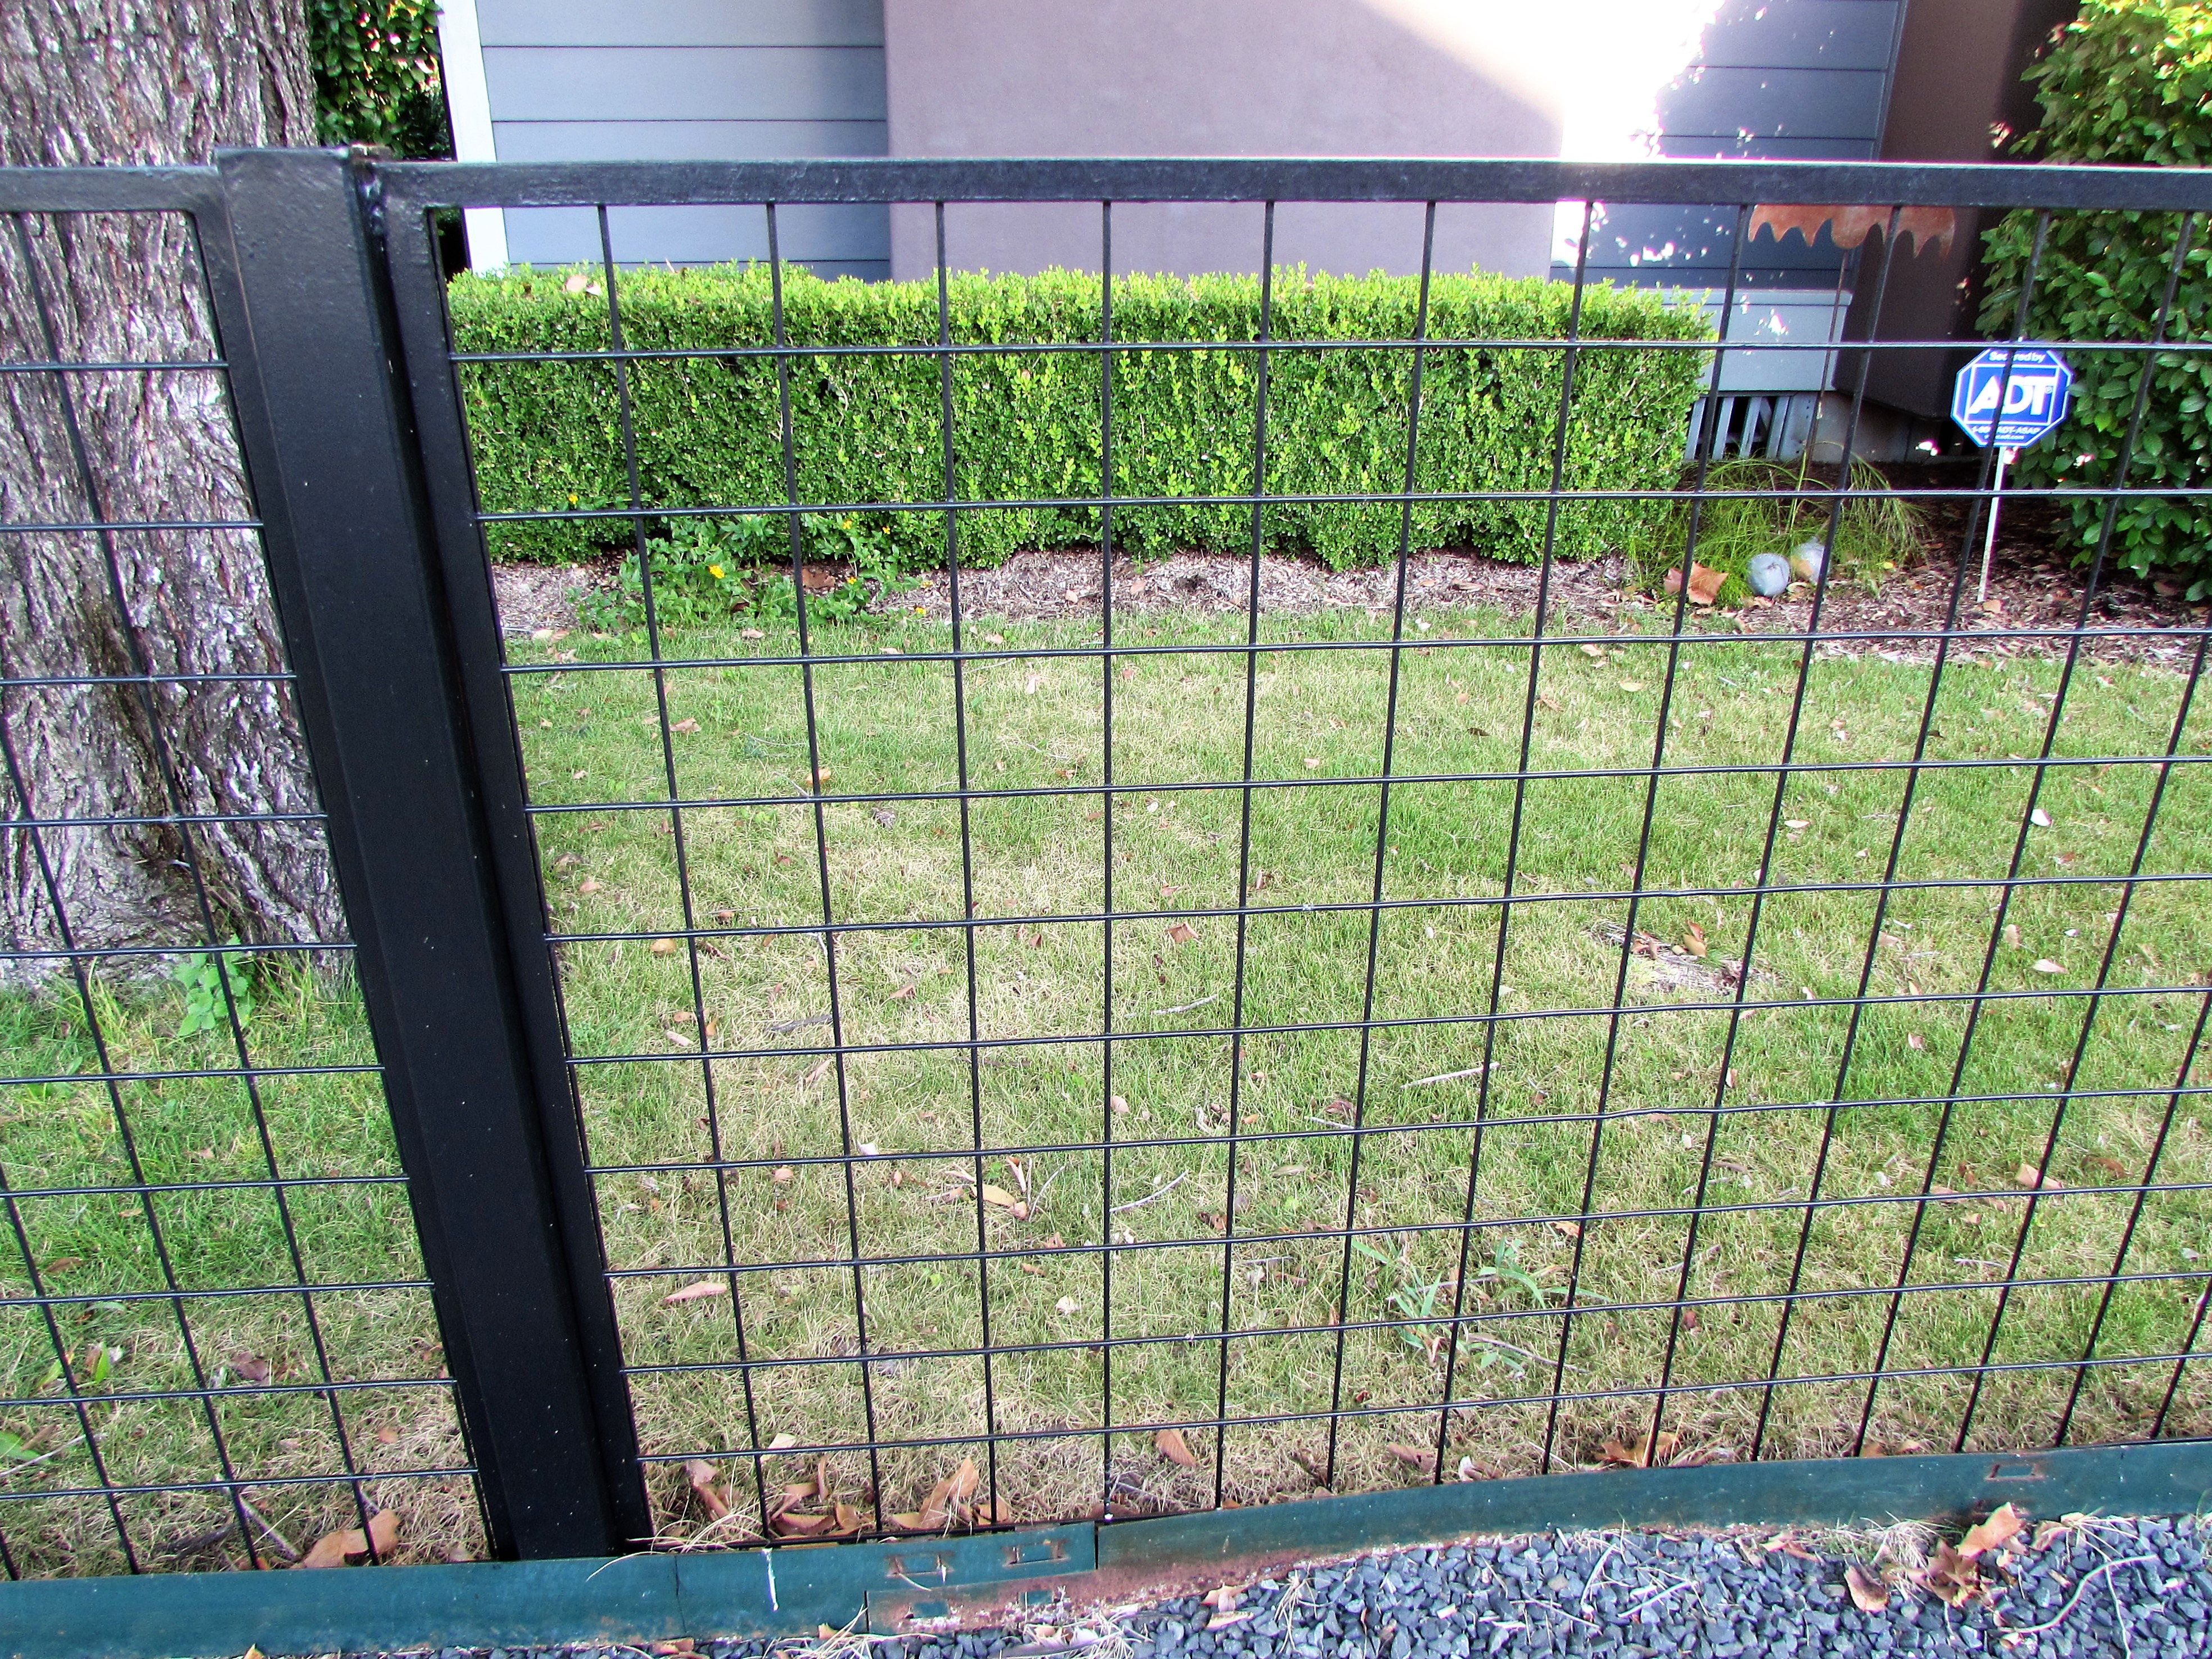 Wanting to enjoy some outdoor dining and connect the outdoors and indoors they added windows and doors leading outside on the west wall of their dining/kitchen area. New steps were added that match the front steps of the home and bring you to ground level. We used cement pads and matched the gravel they had already to create a path and patio.
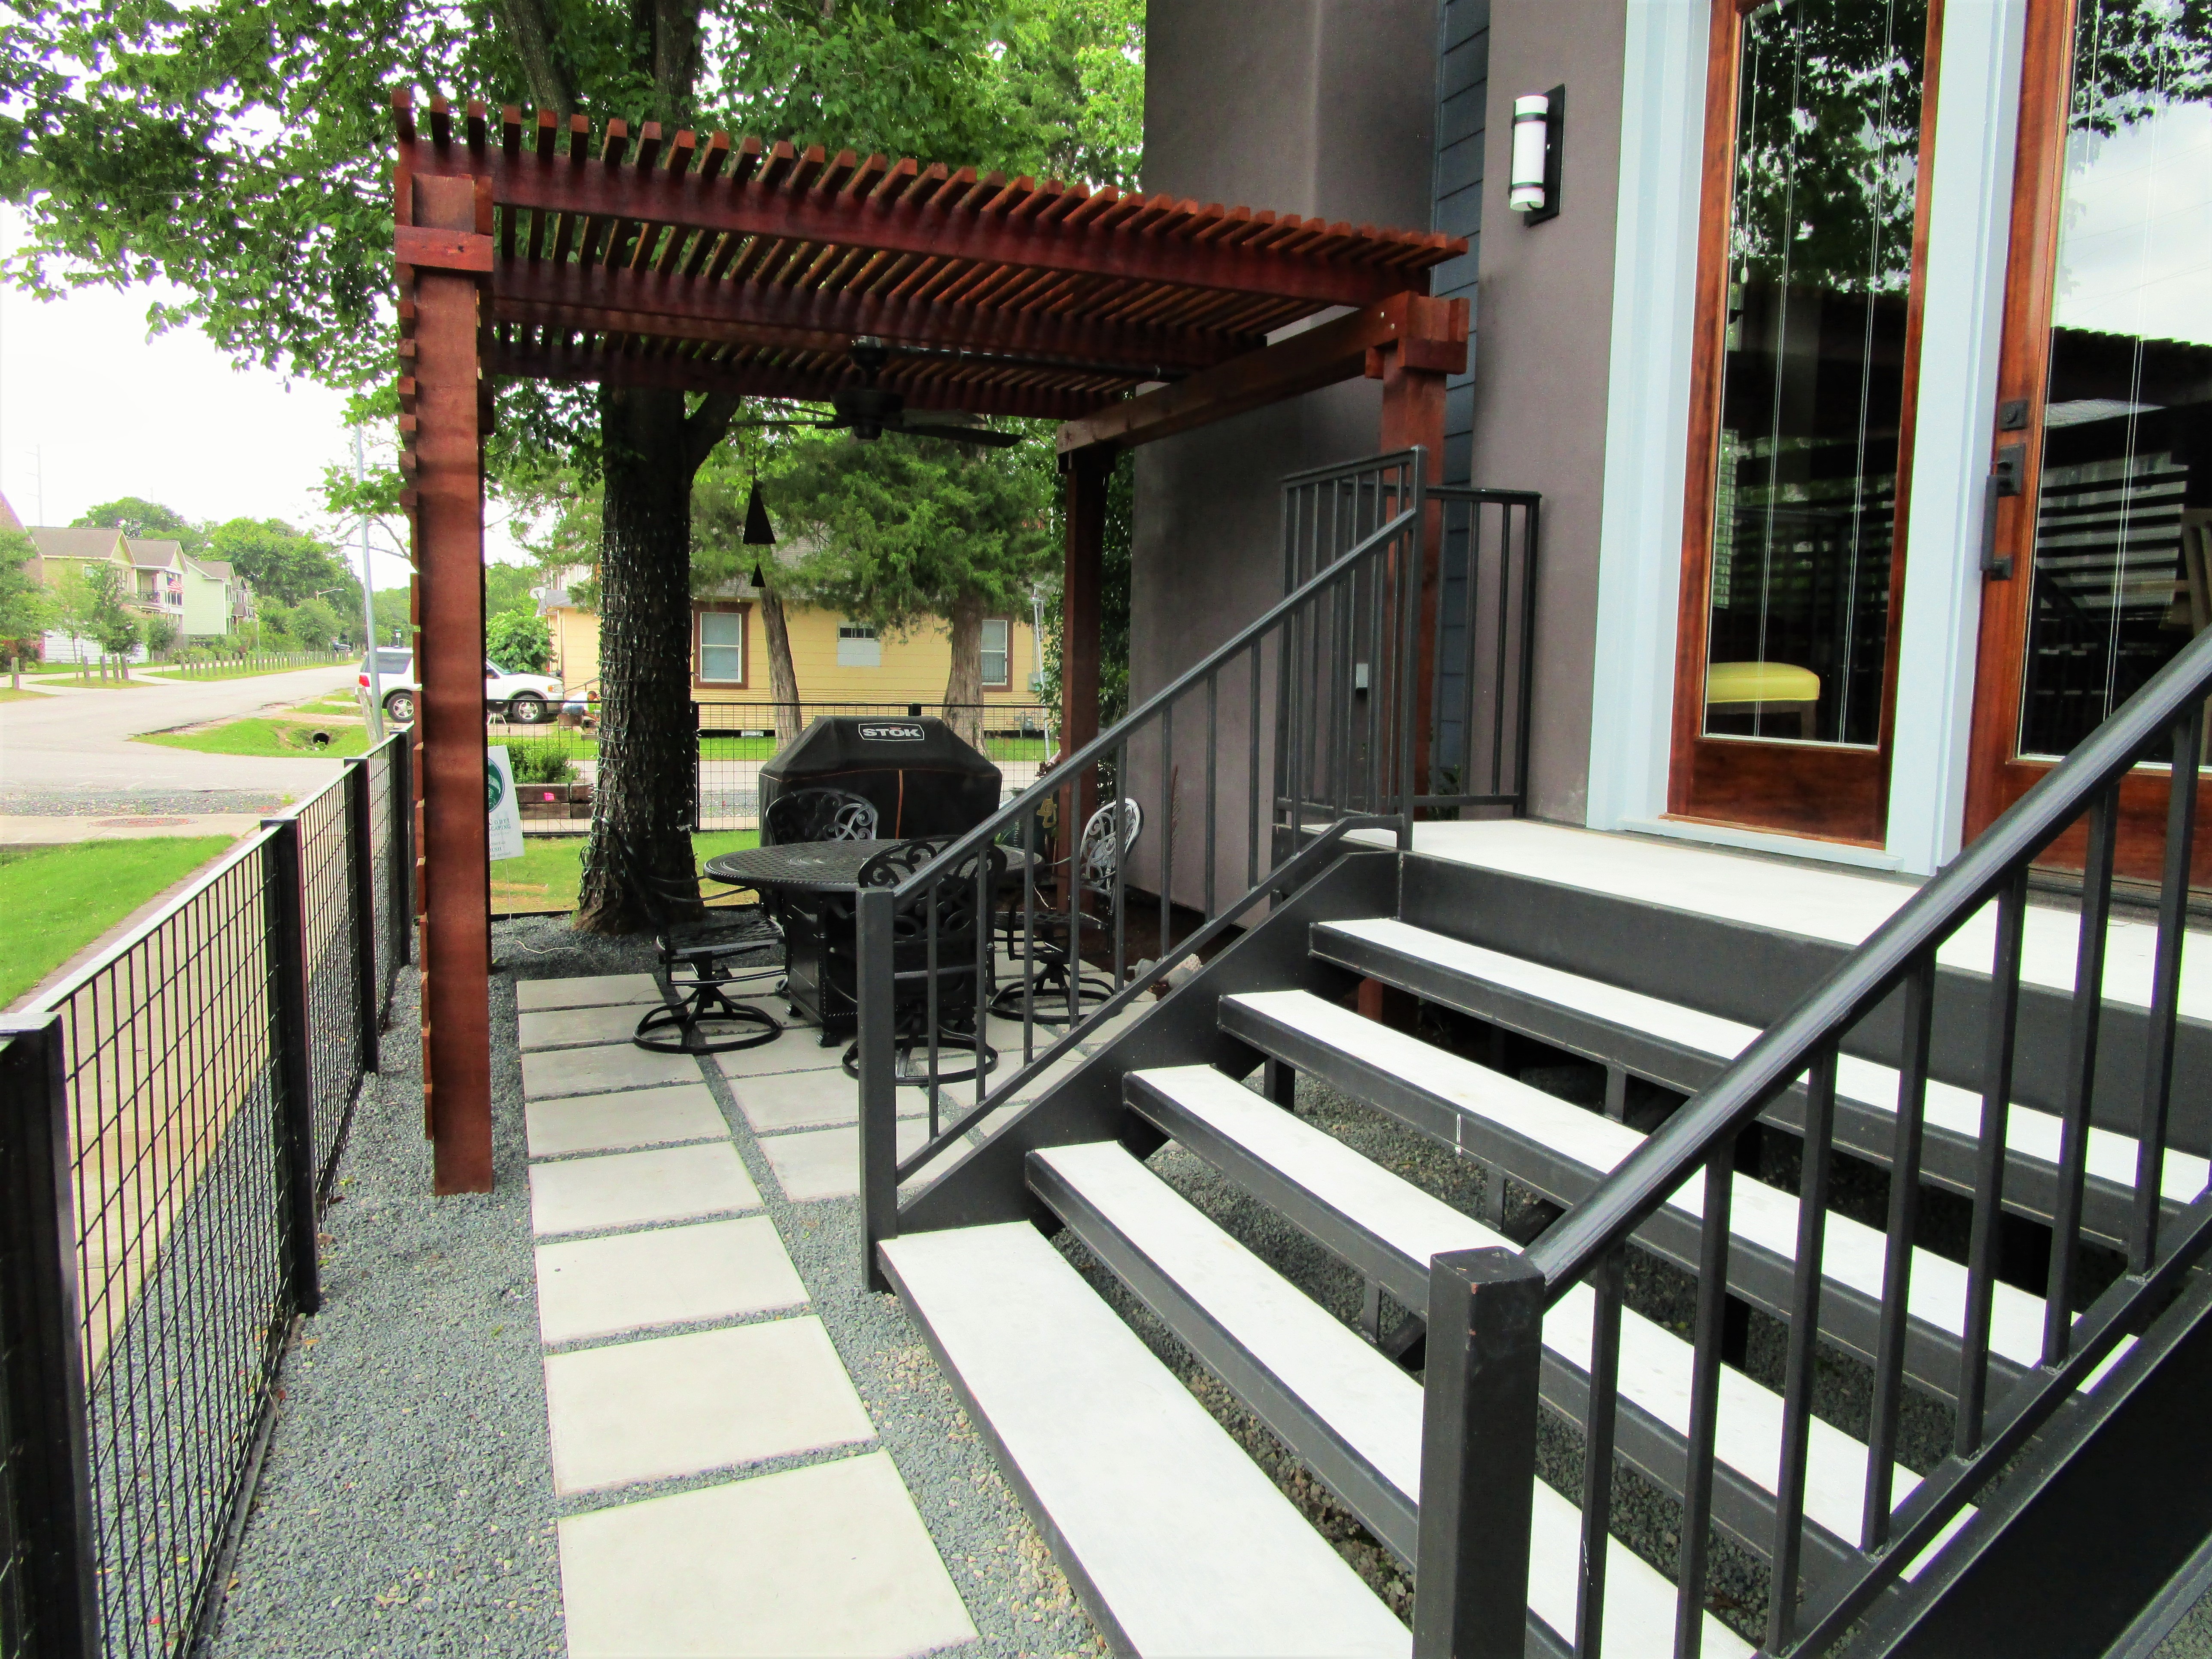 This is a tight space with several obstacles to work around. There is a large pecan tree to the north, the fireplace bump out on the east, the steps on the south and the fence on the west. I had to figure out the size of pads that would work with the spacing of the posts and be able to fit in a patio and structure that are large enough to be functional. Shawn and the crew did a excellent job of making my ideas and lines on paper a reality.
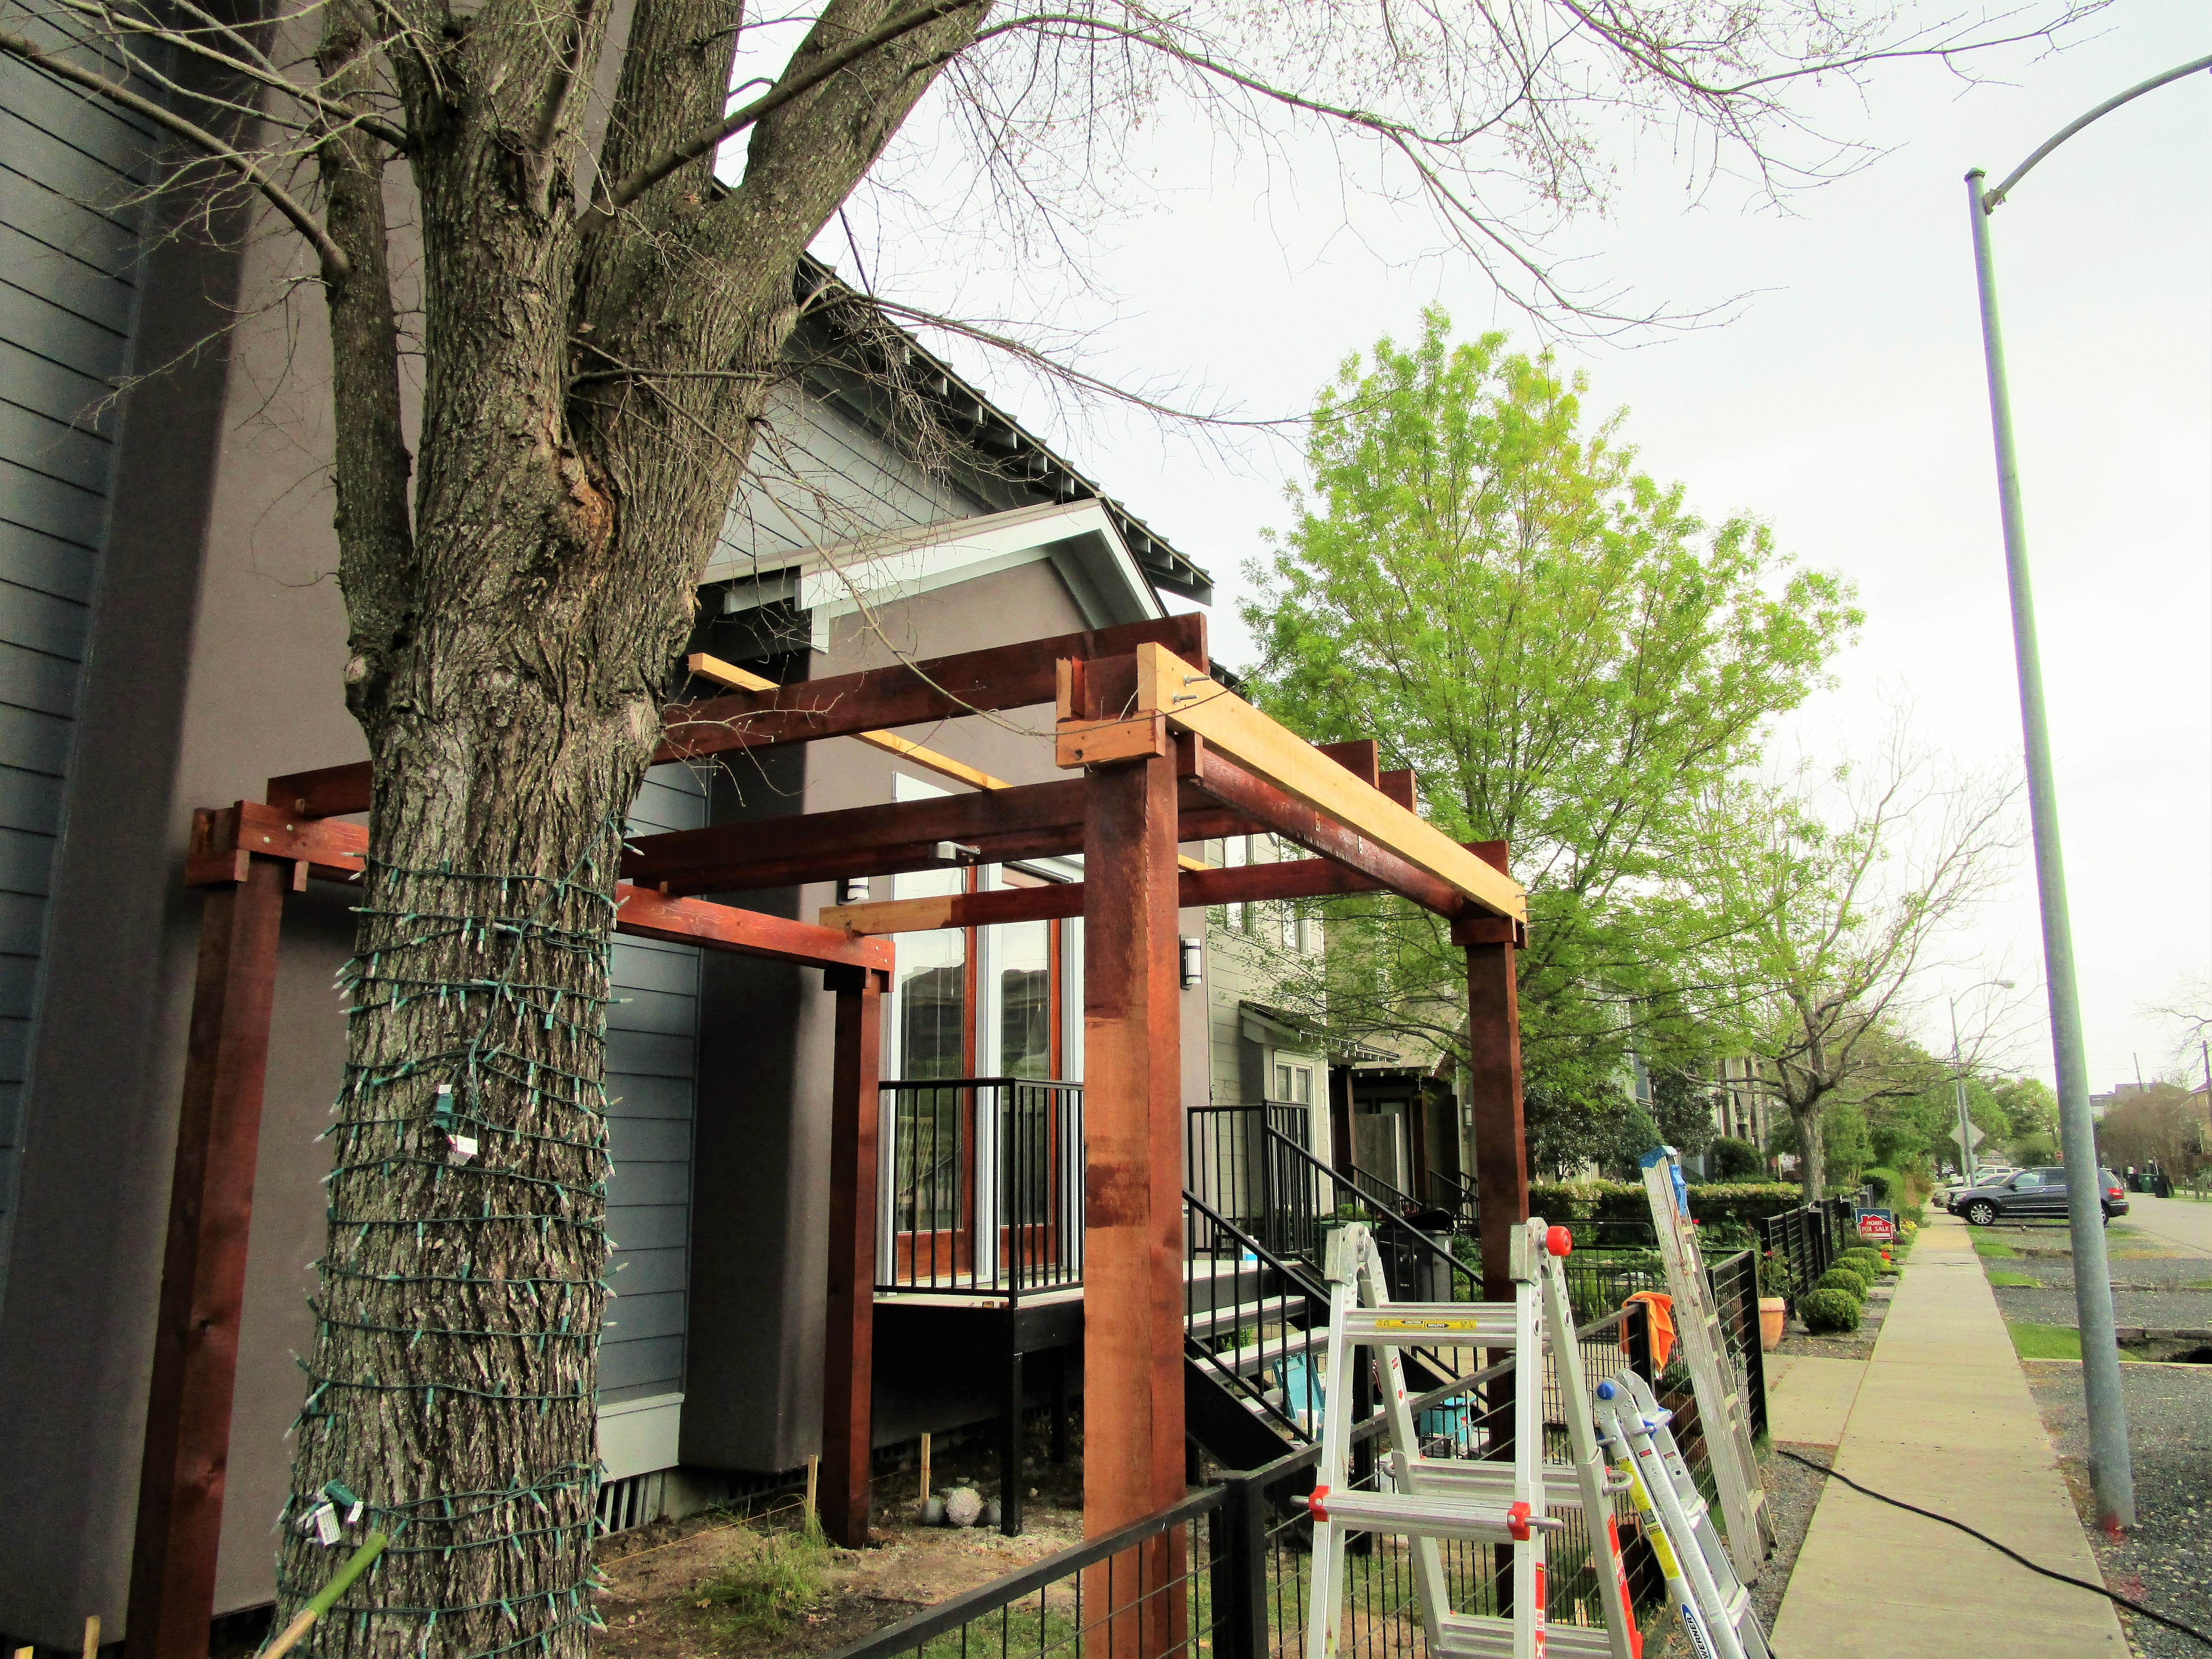 We start with the framing of the pergola. We square off the posts (you can still see a few stakes in the ground) with either the house or the fence. In a few instances the fence and the house align! As soon as the concrete on the posts cured we began building the supporting structures.
 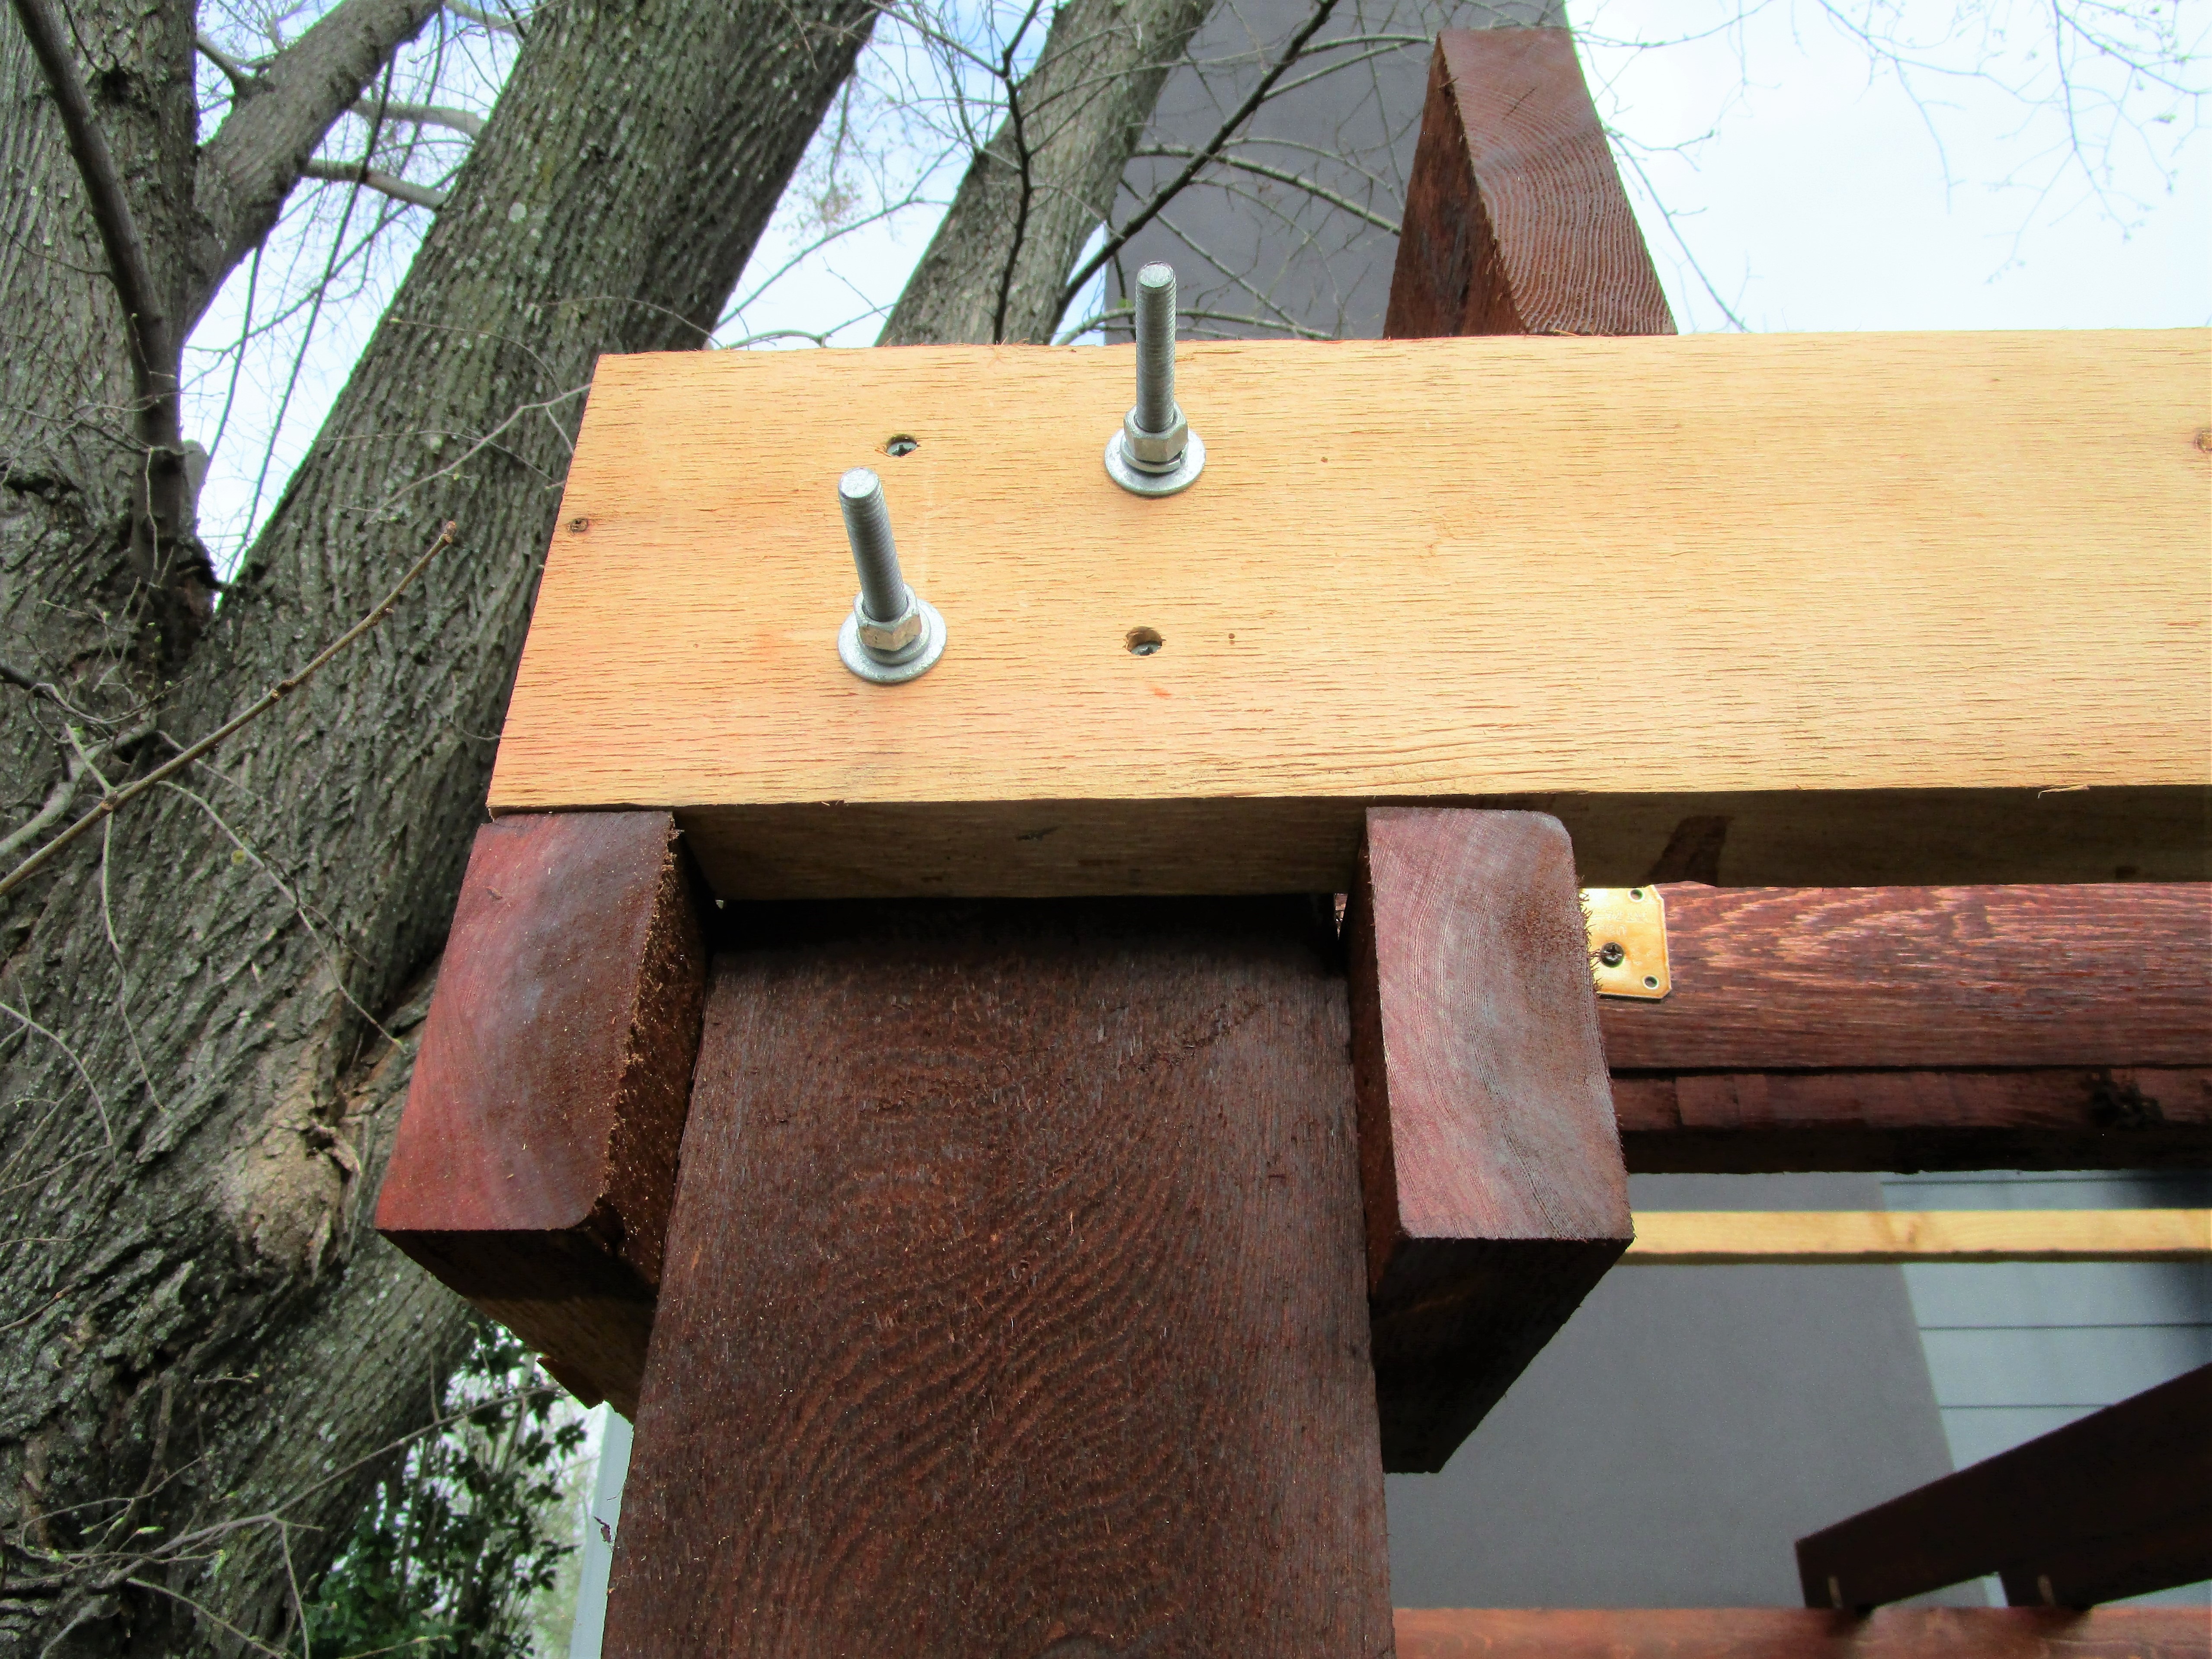 We fasten the pergola together using 3/8″ lag bolts. Often we have to buy longer bolts than we need; we then grind off the excess. We use screws to hold the tie beams on until we bolt them in. Also using a cleat helps disperse the weight as well as providing architectural interest.
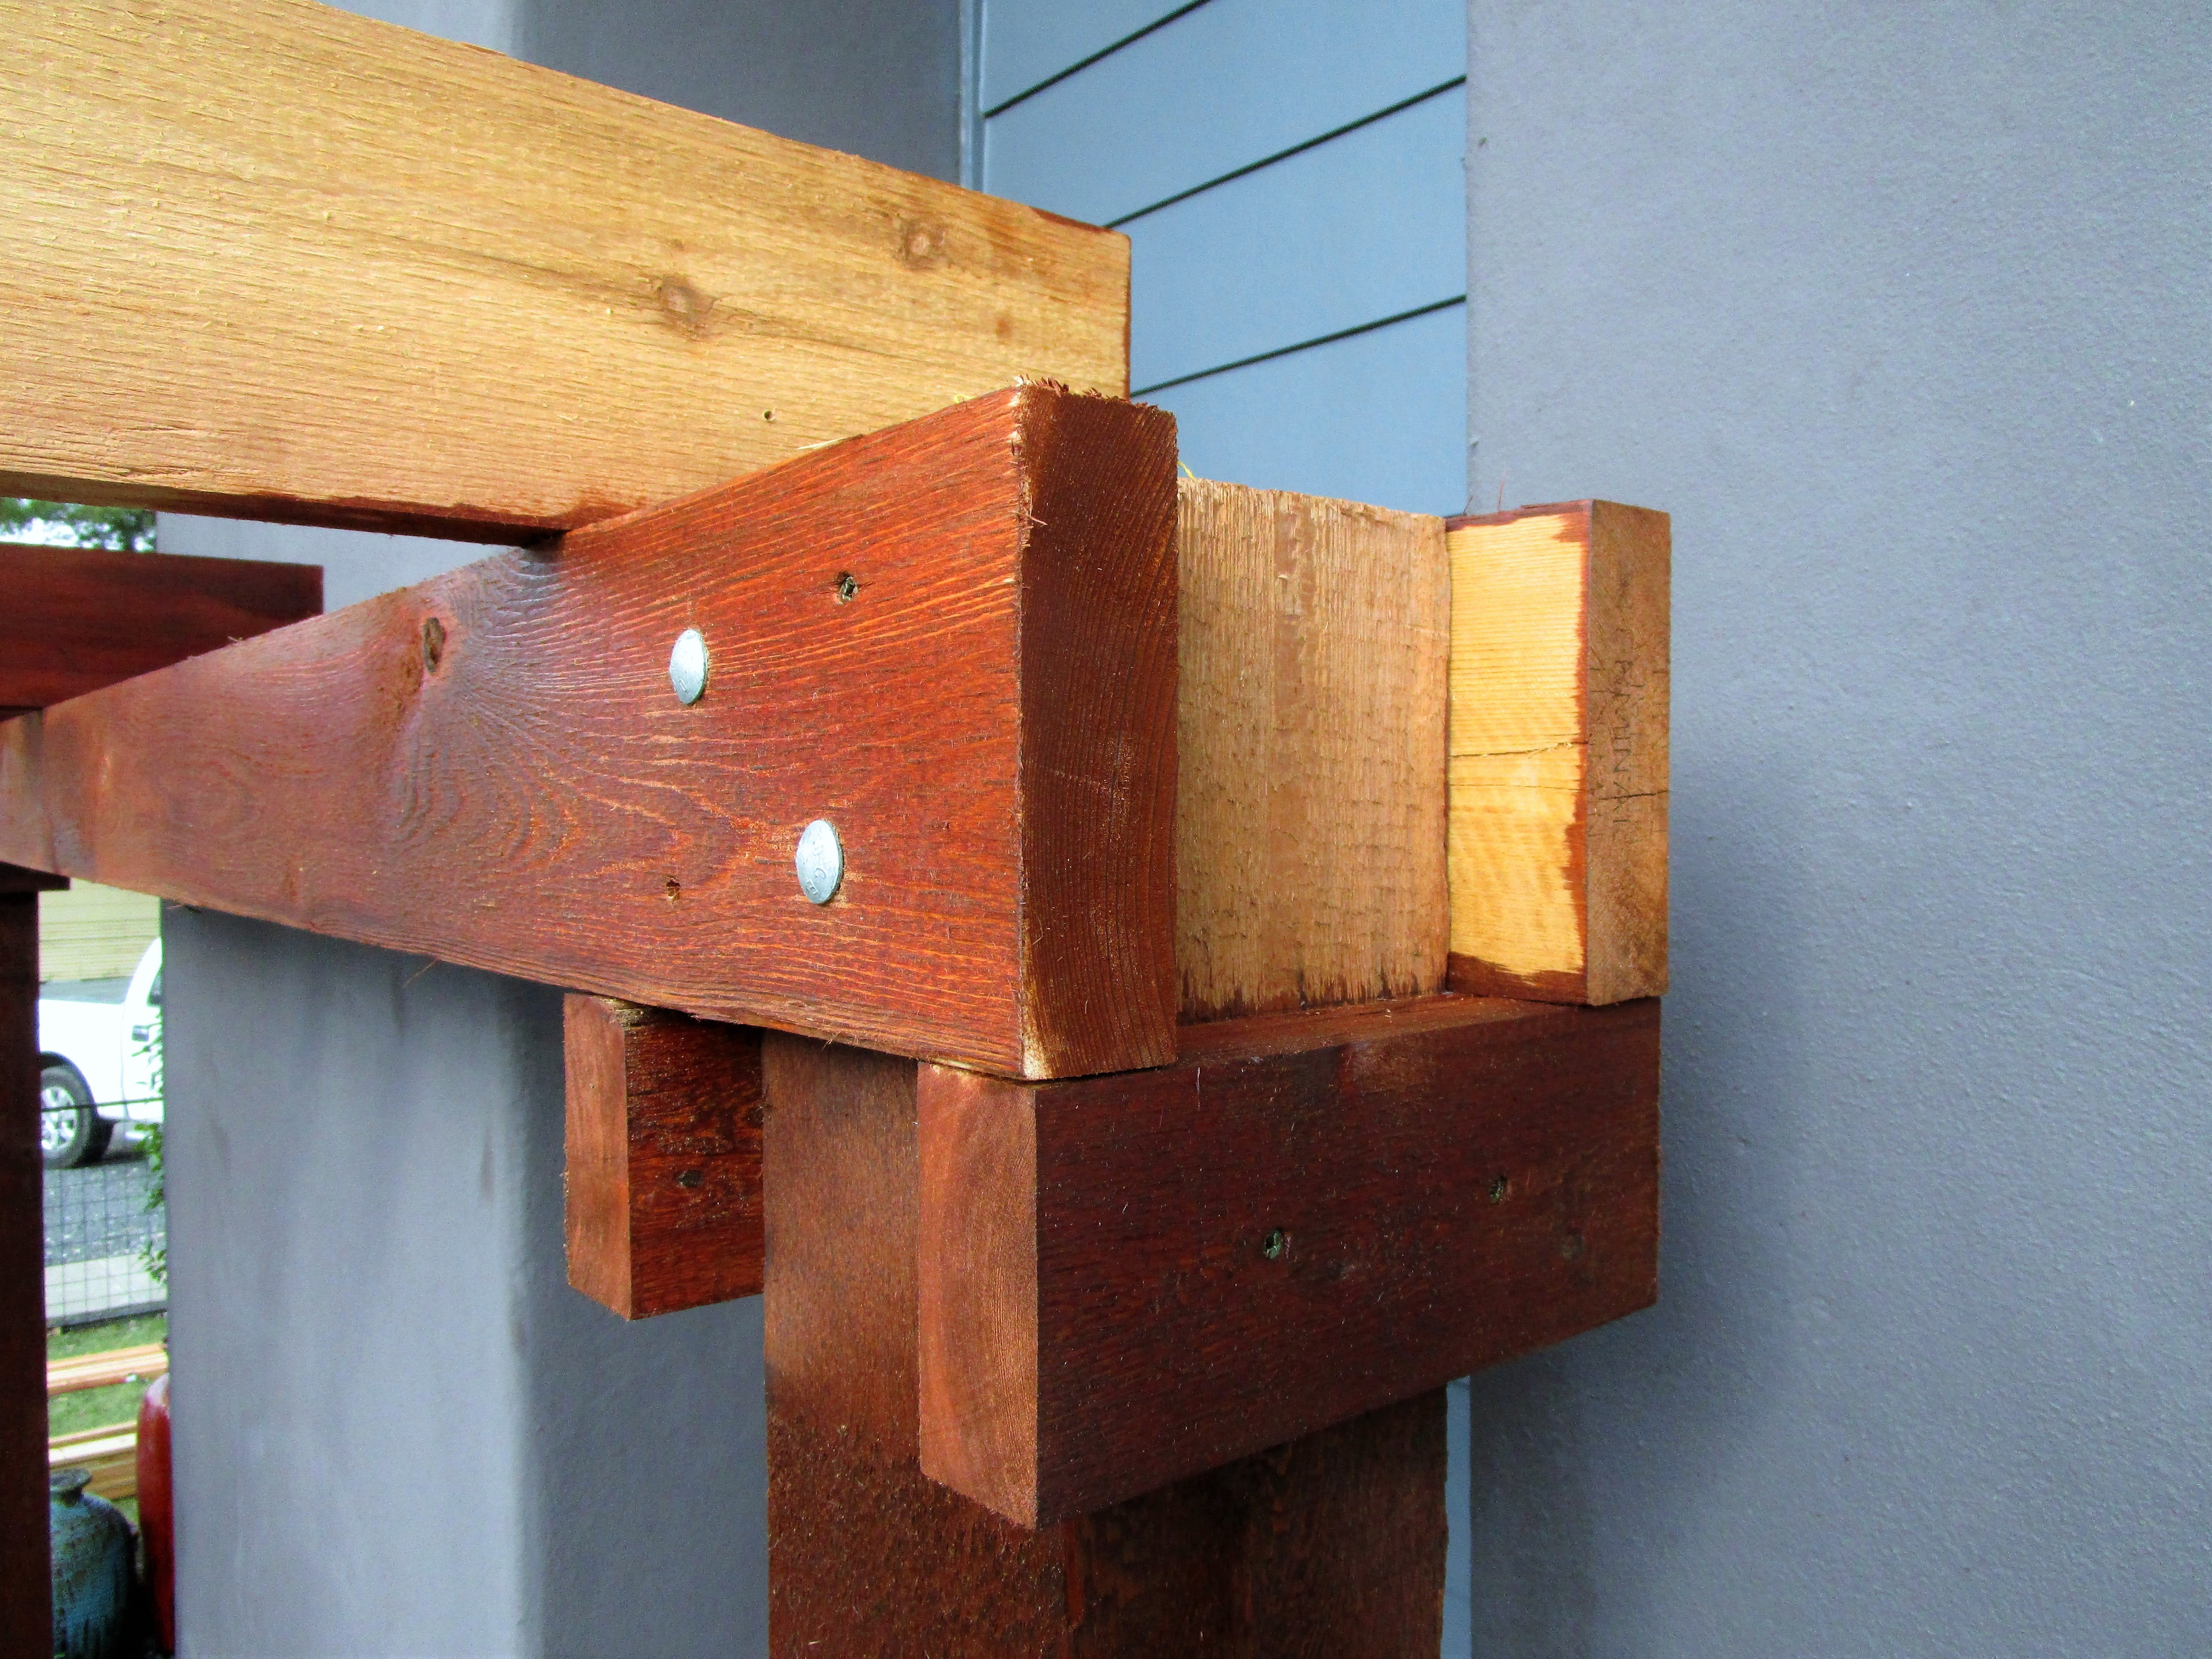 The pergola is stained a dark reddish brown to match the new doors. Cedar takes staining well. If you want to keep the reddish hue of fresh cut cedar you need to stain it every few years. If you leave it alone it ages naturally to a nice gray brown.
 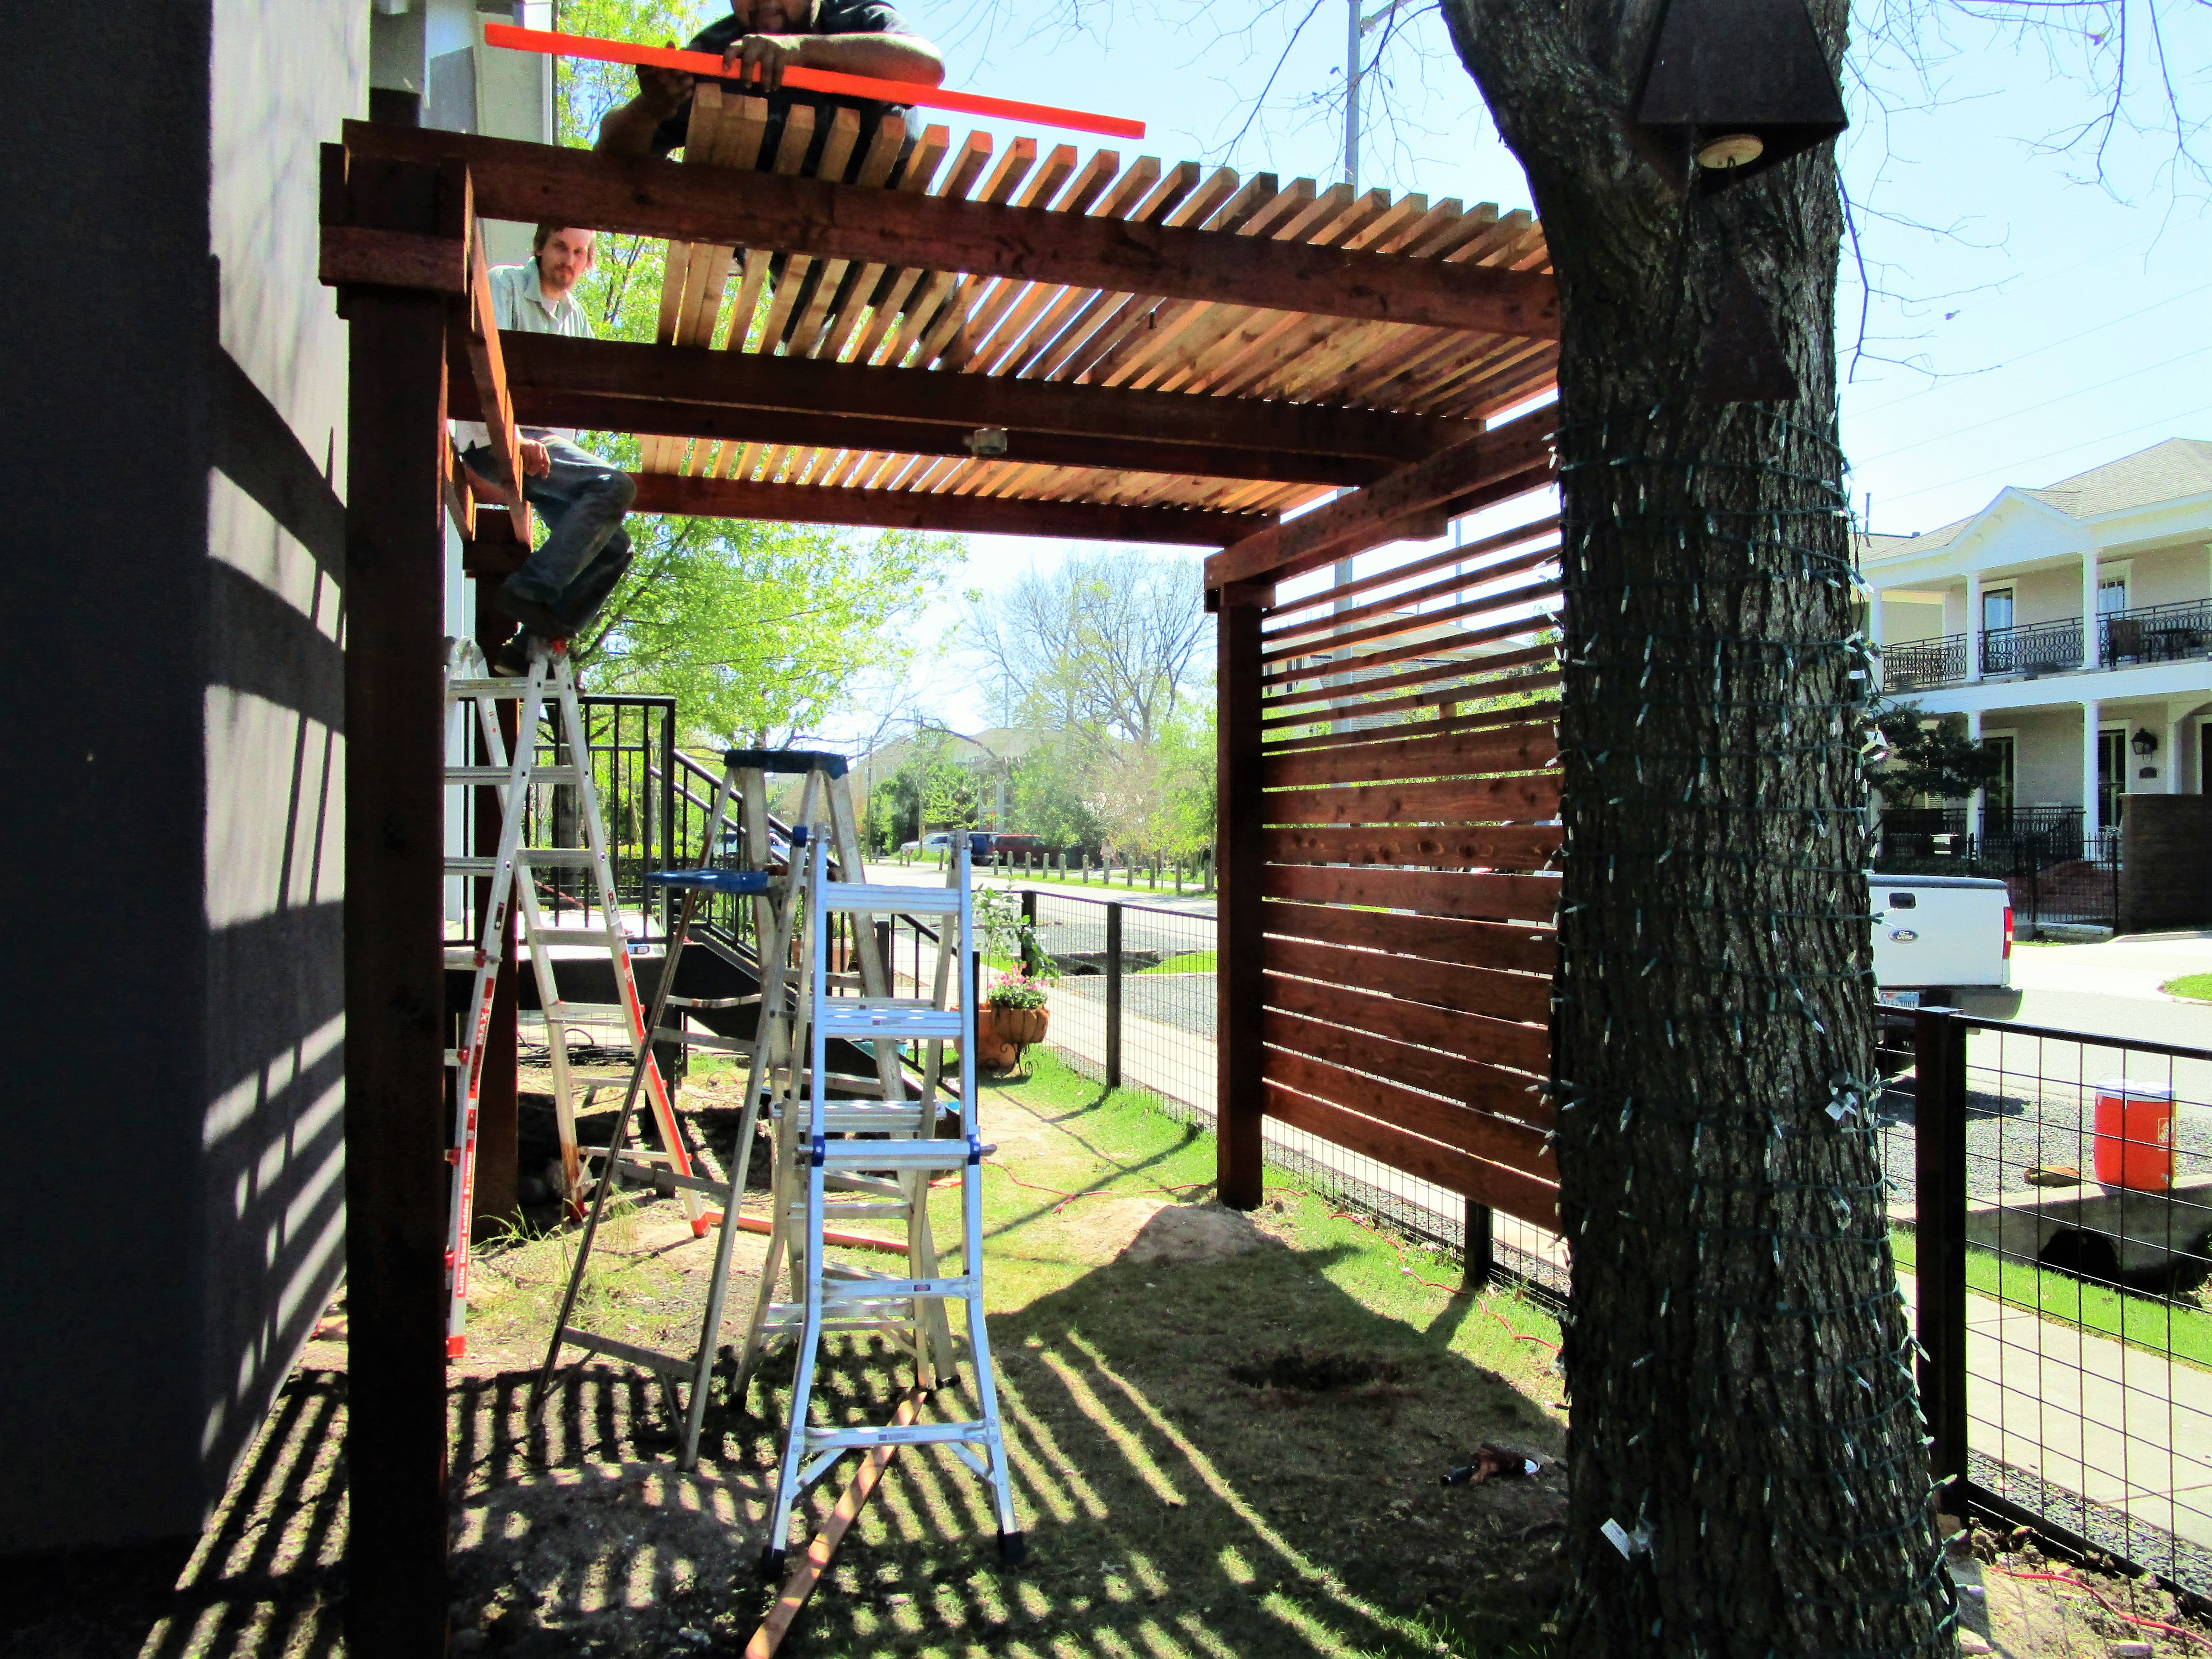 Beside shade another goal of the homeowners was gaining some privacy from the street. Many options were discussed. The space outside the fence is very narrow and not big enough for tall bushes. We talked about outdoor curtains or a trellis with vines. I suggested using wood planks. I wanted it to feel like the roof wraps around and down the side. To create this feel we used the same size boards as we used on the top for the top few feet then switched to 1 x 6 planks with a on inch gap. In this view you can see we created supports for a future ceiling fan. This is a nice feature to help with muggy evenings and mosquitoes.
 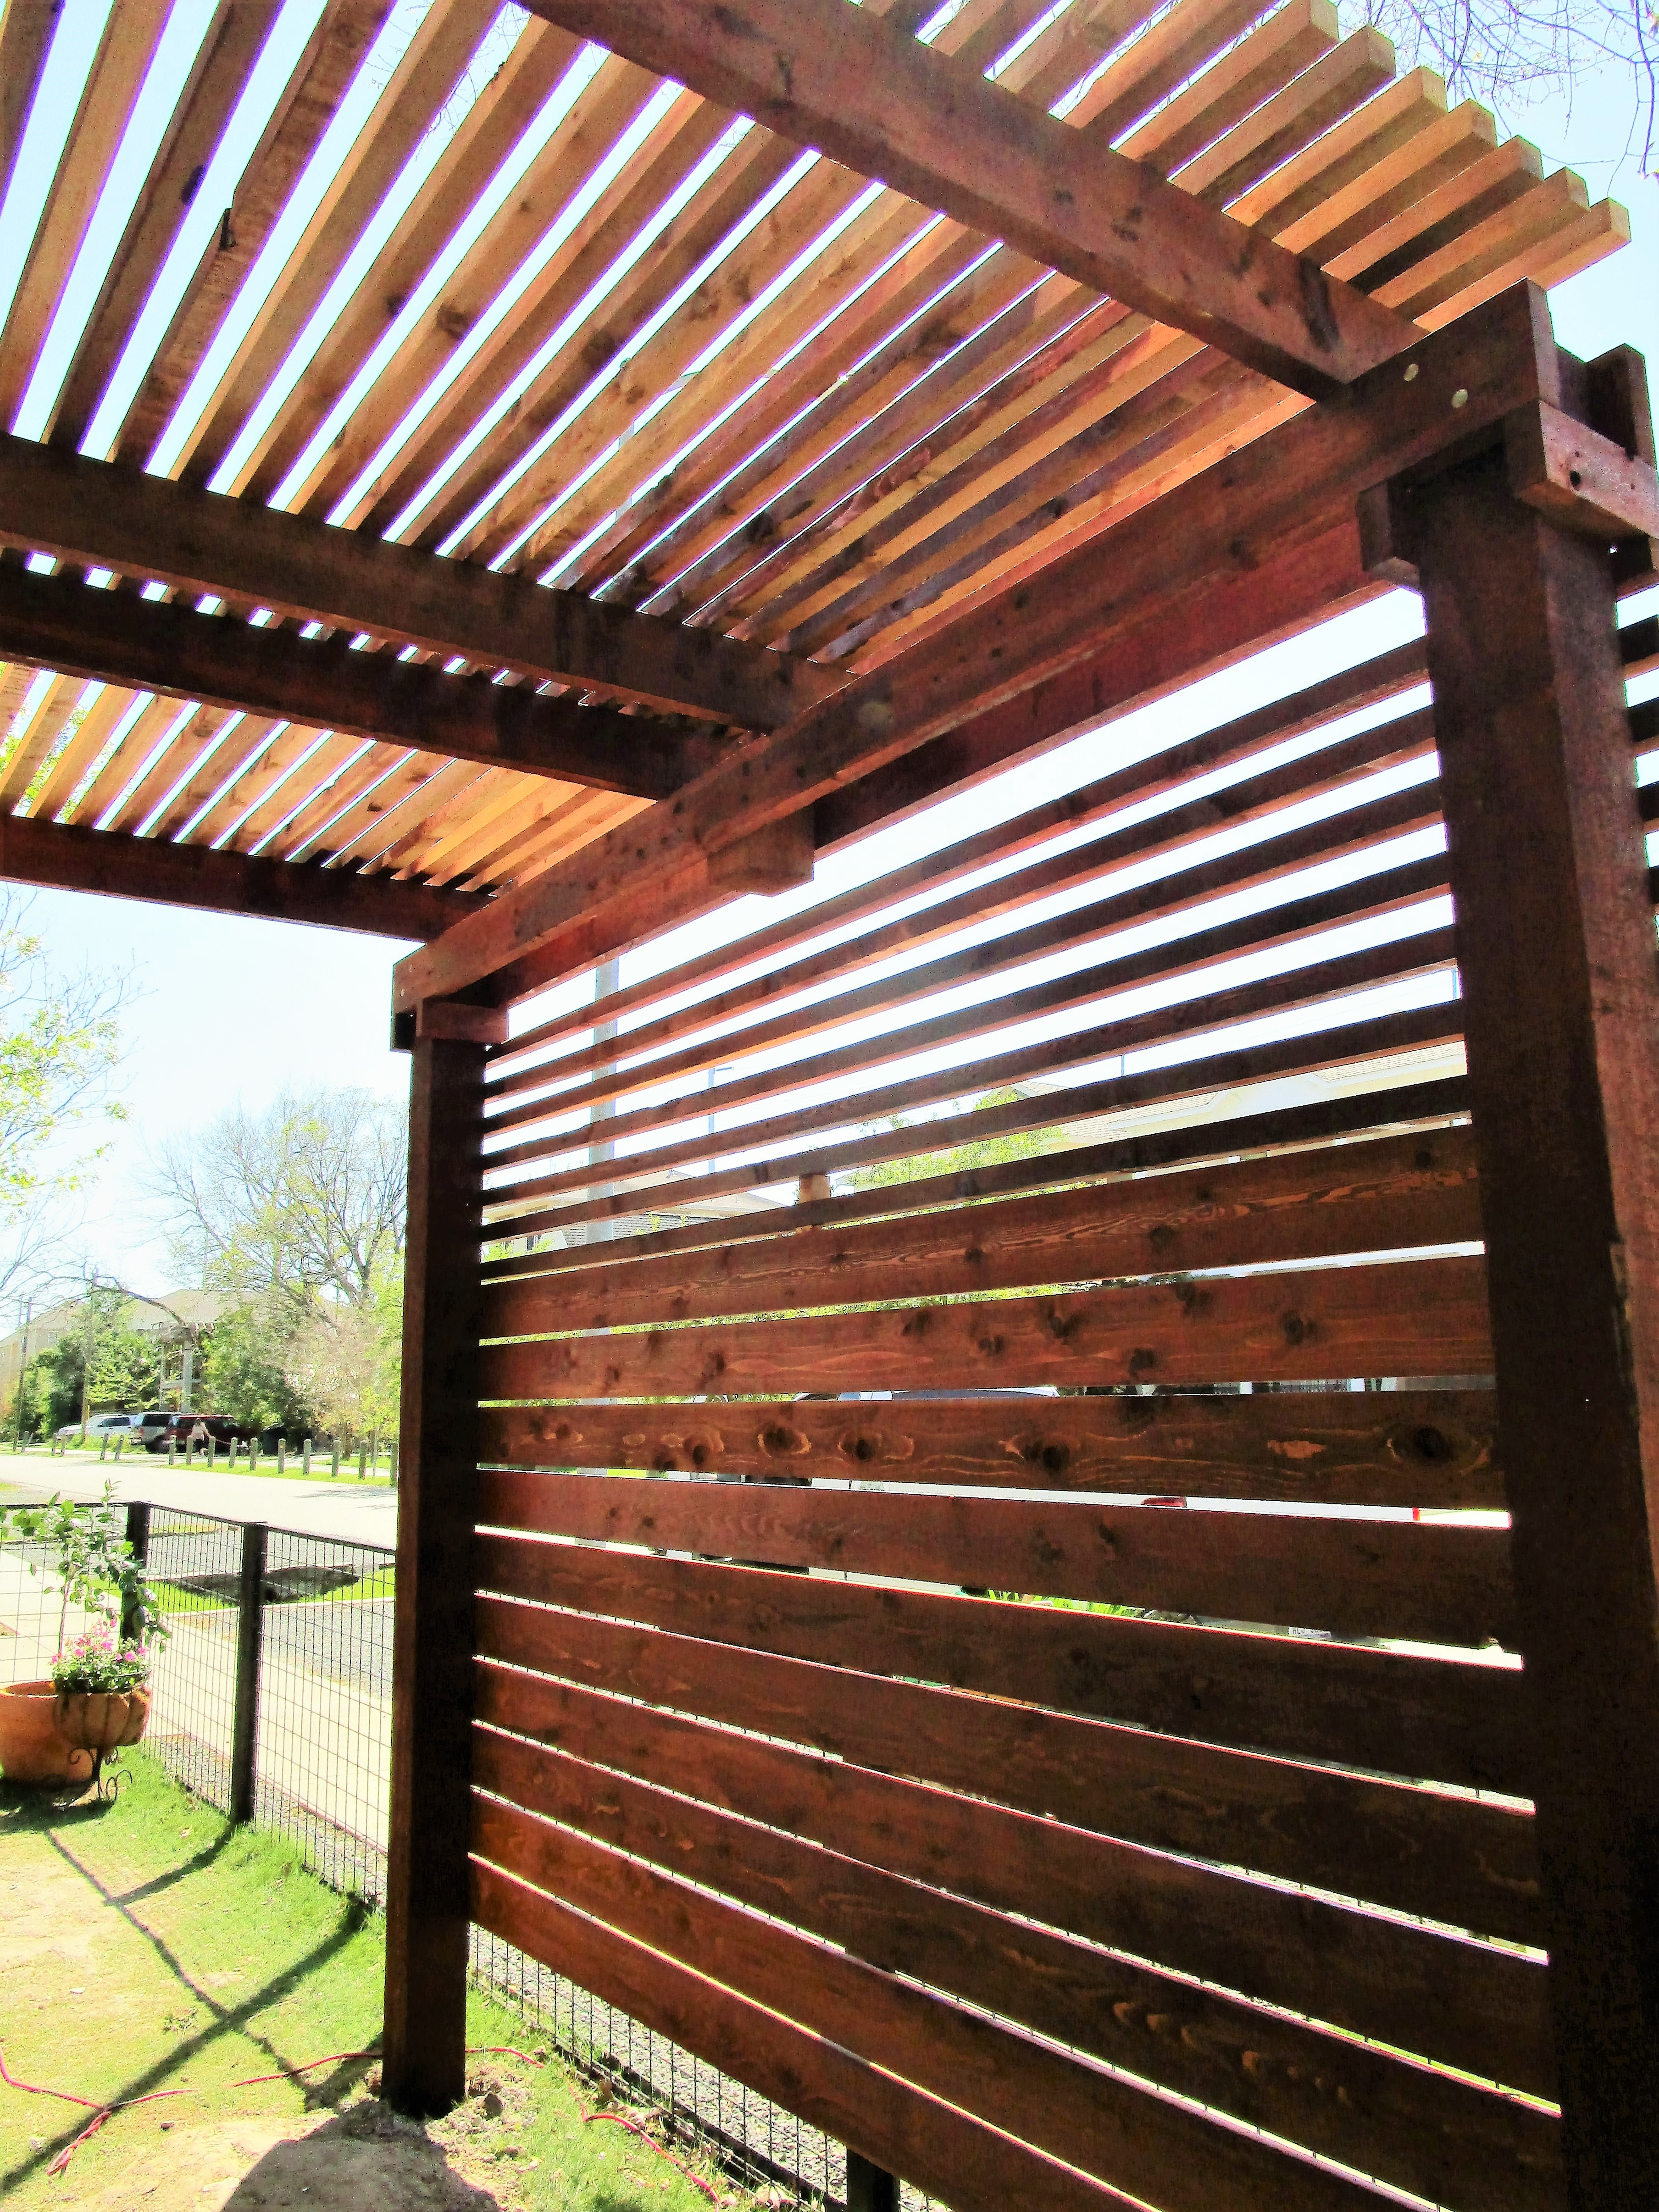 The shade the wall creates is perfect to shield you from the late afternoon western sun. Here is the view from the street. Next we will put in a patio using cement pads with gravel in between.
  The lines of this pergola are very contemporary and meant to complement the house. Tucked on each side of the fireplace bump out we planted a Sweet Olive, Osmanthus fragrans bush. They will fill the space nicely, are low maintenance and as their name indicates have a lovely fragrance when in bloom.
 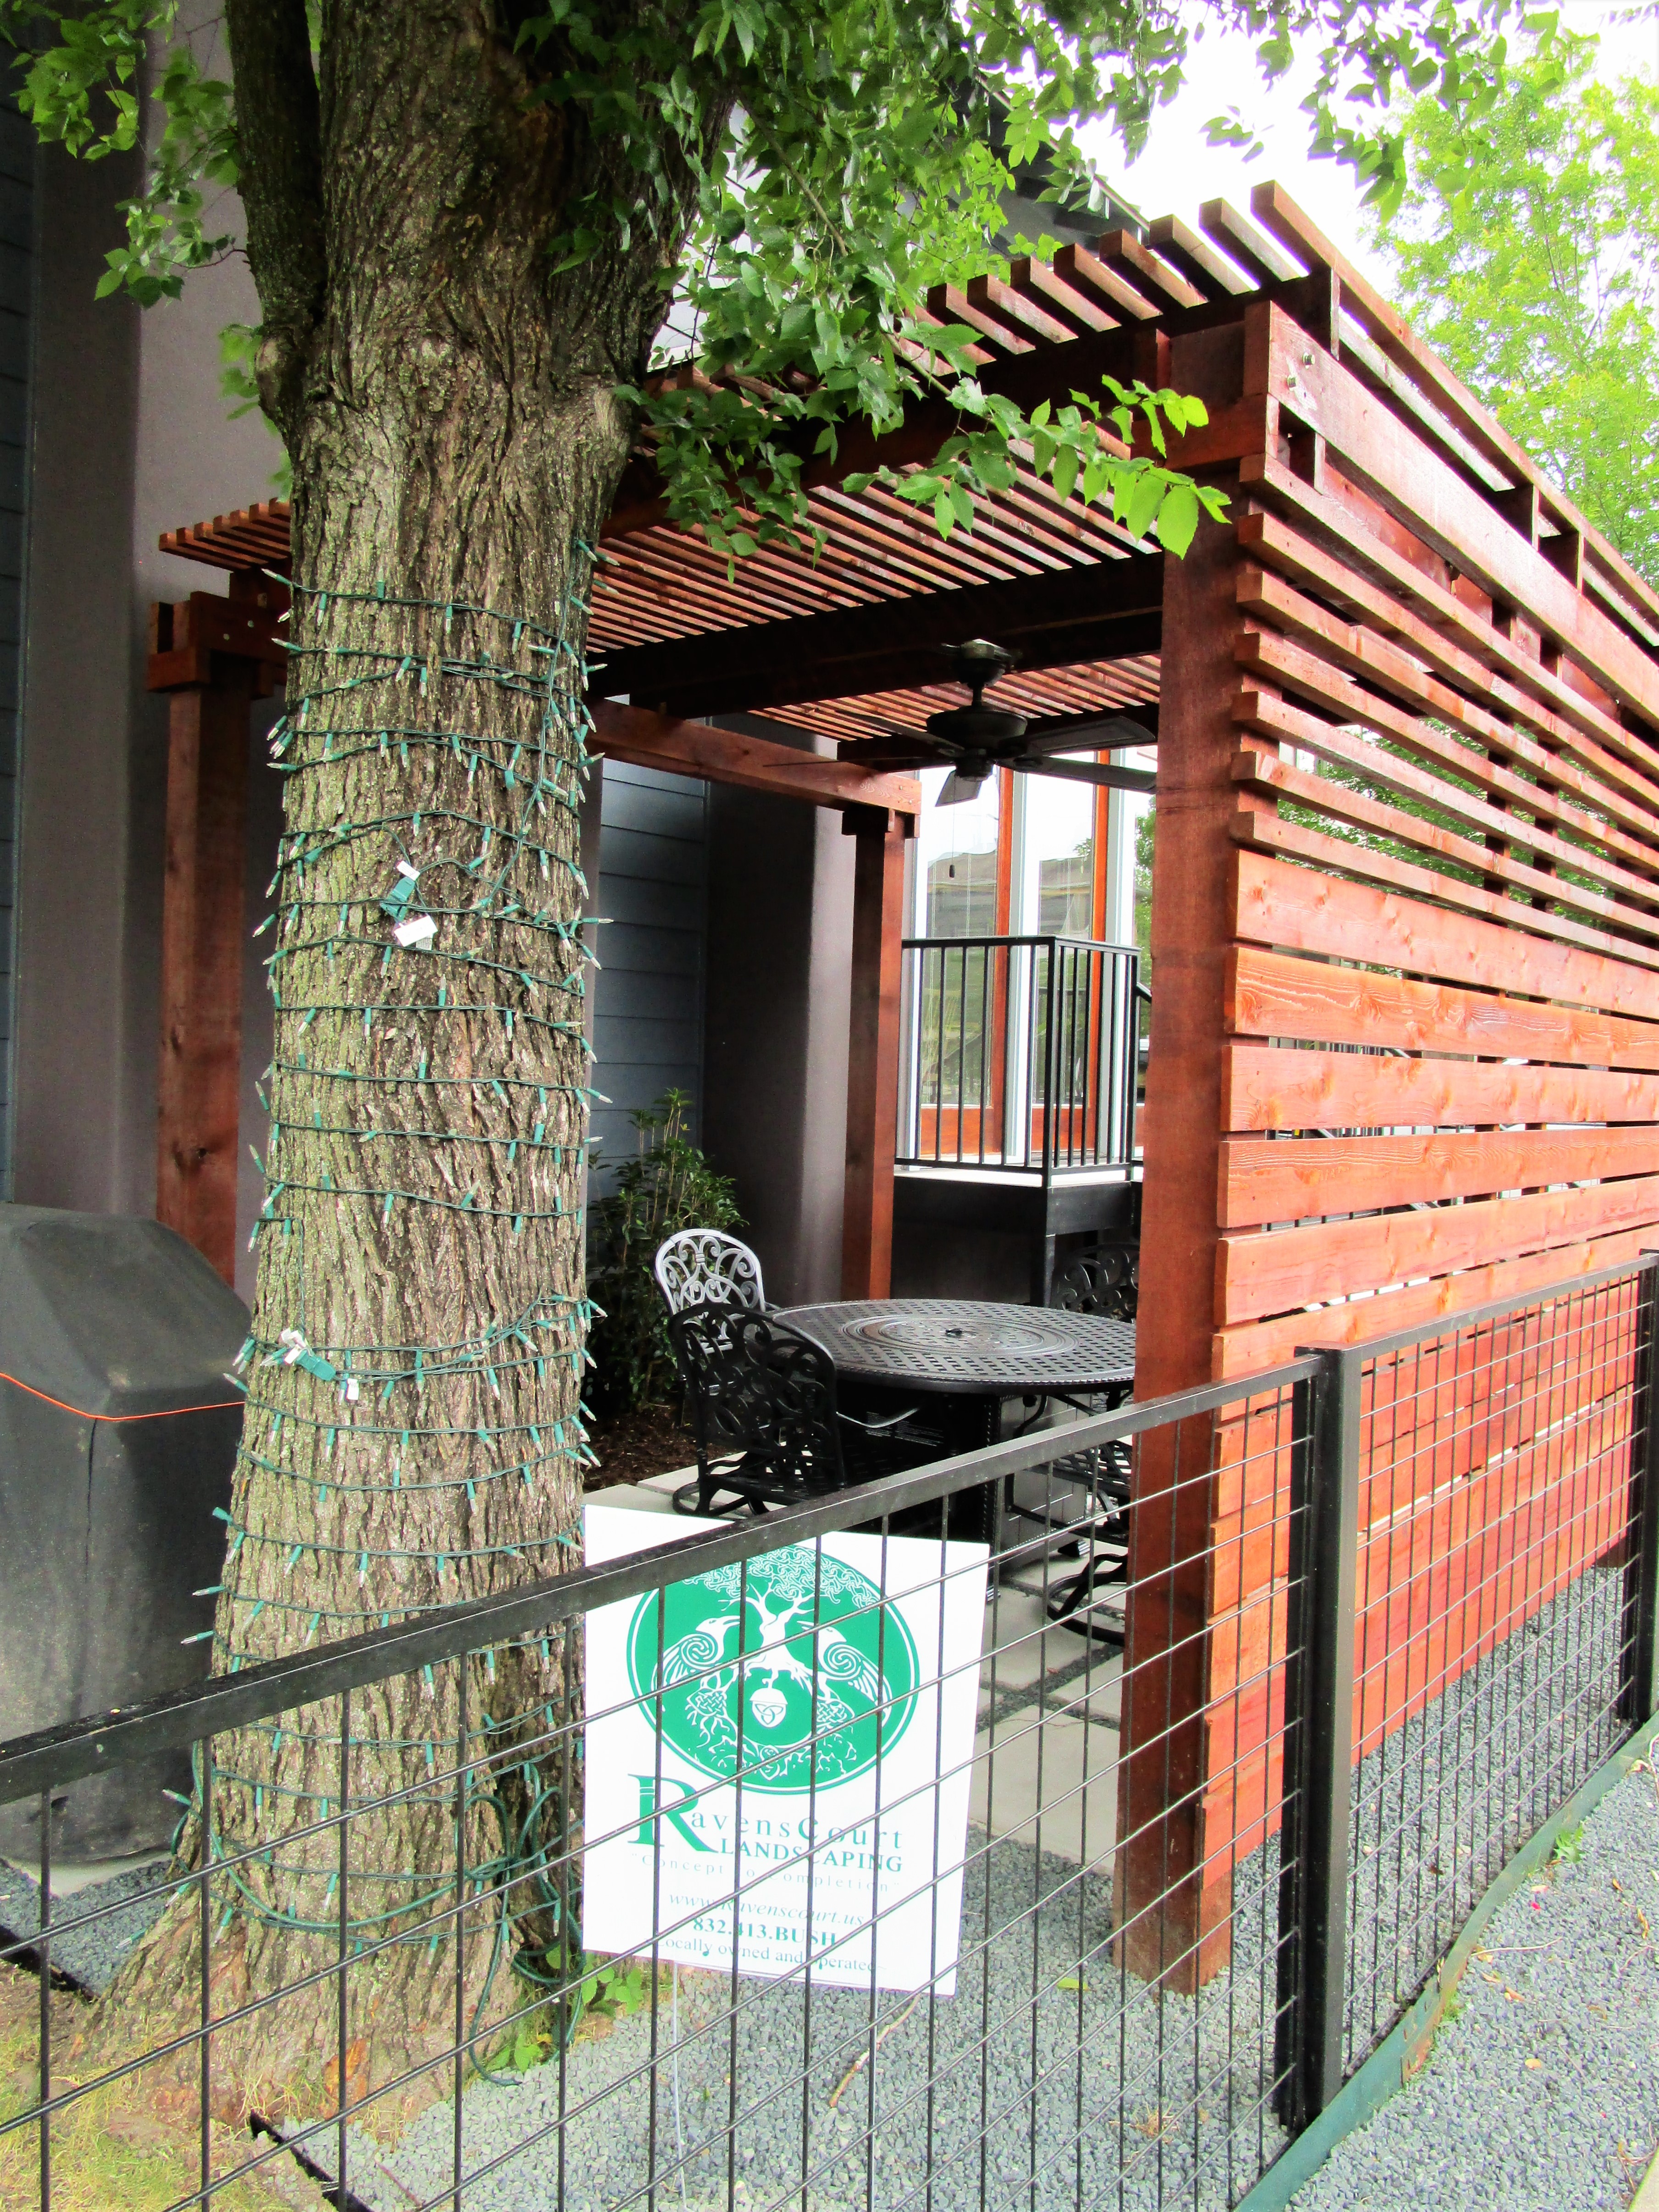 Everything flowed together well when we were finished. We had issues with tree roots but managed to get everything in as planned. There is a planting plan but they are planing to do that in the next phase!
  Happy Gardening!

I could use that shade here. WNY weather is in the 90° range. Yipes its hot and dry.
LikeLiked by 1 person
Most excellent! I love it! 🙂
LikeLiked by 1 person
Thank you 😊
LikeLike
Very creative and the end result is good looking. I’m sure they are enjoying it. 🙂
LikeLike